Creating and Editing Memberships
Before creating a membership, make sure you understand the what Memberships and Rule Sets are, and the relationship between them: read here.
Creating a New Membership
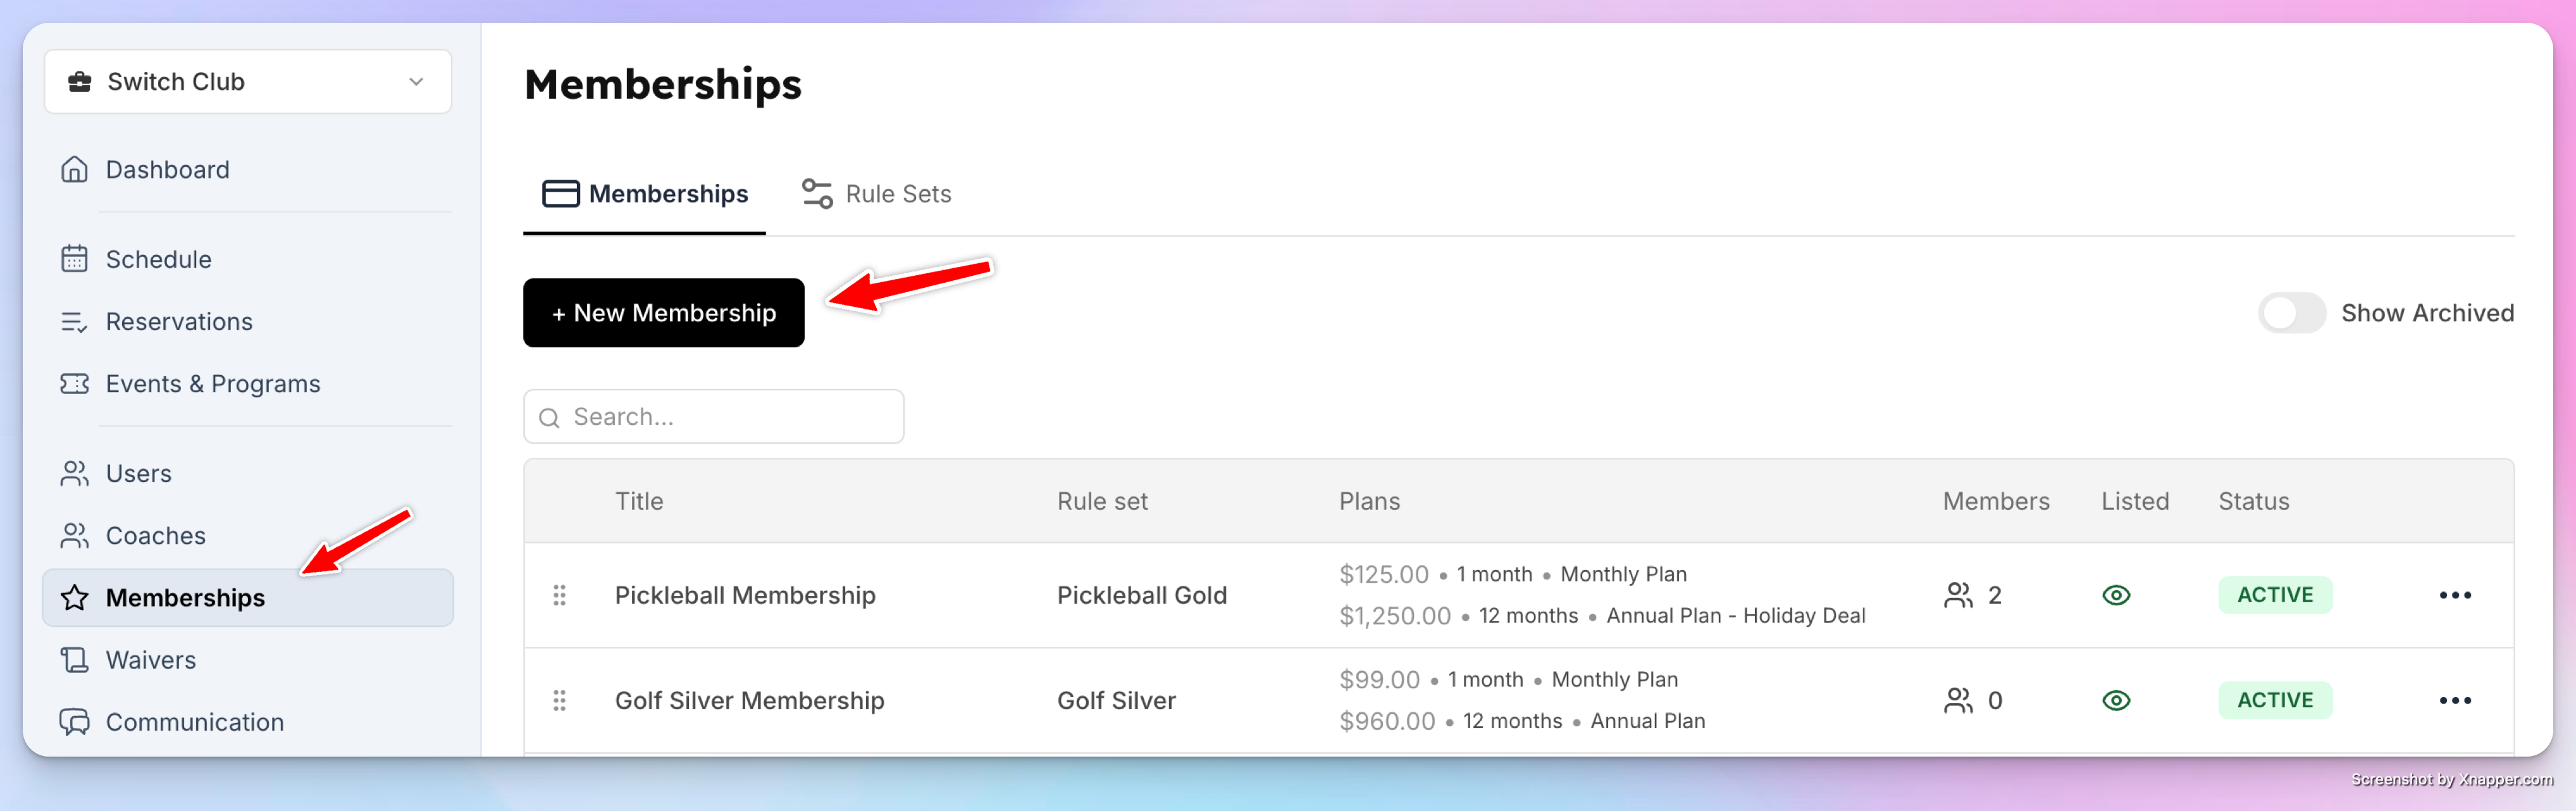
Go to Admin → Memberships.
Click New Membership.
Enter the Membership Name.
Once created, you’ll be taken to the membership settings page where you can configure everything below.
Membership Name & Description
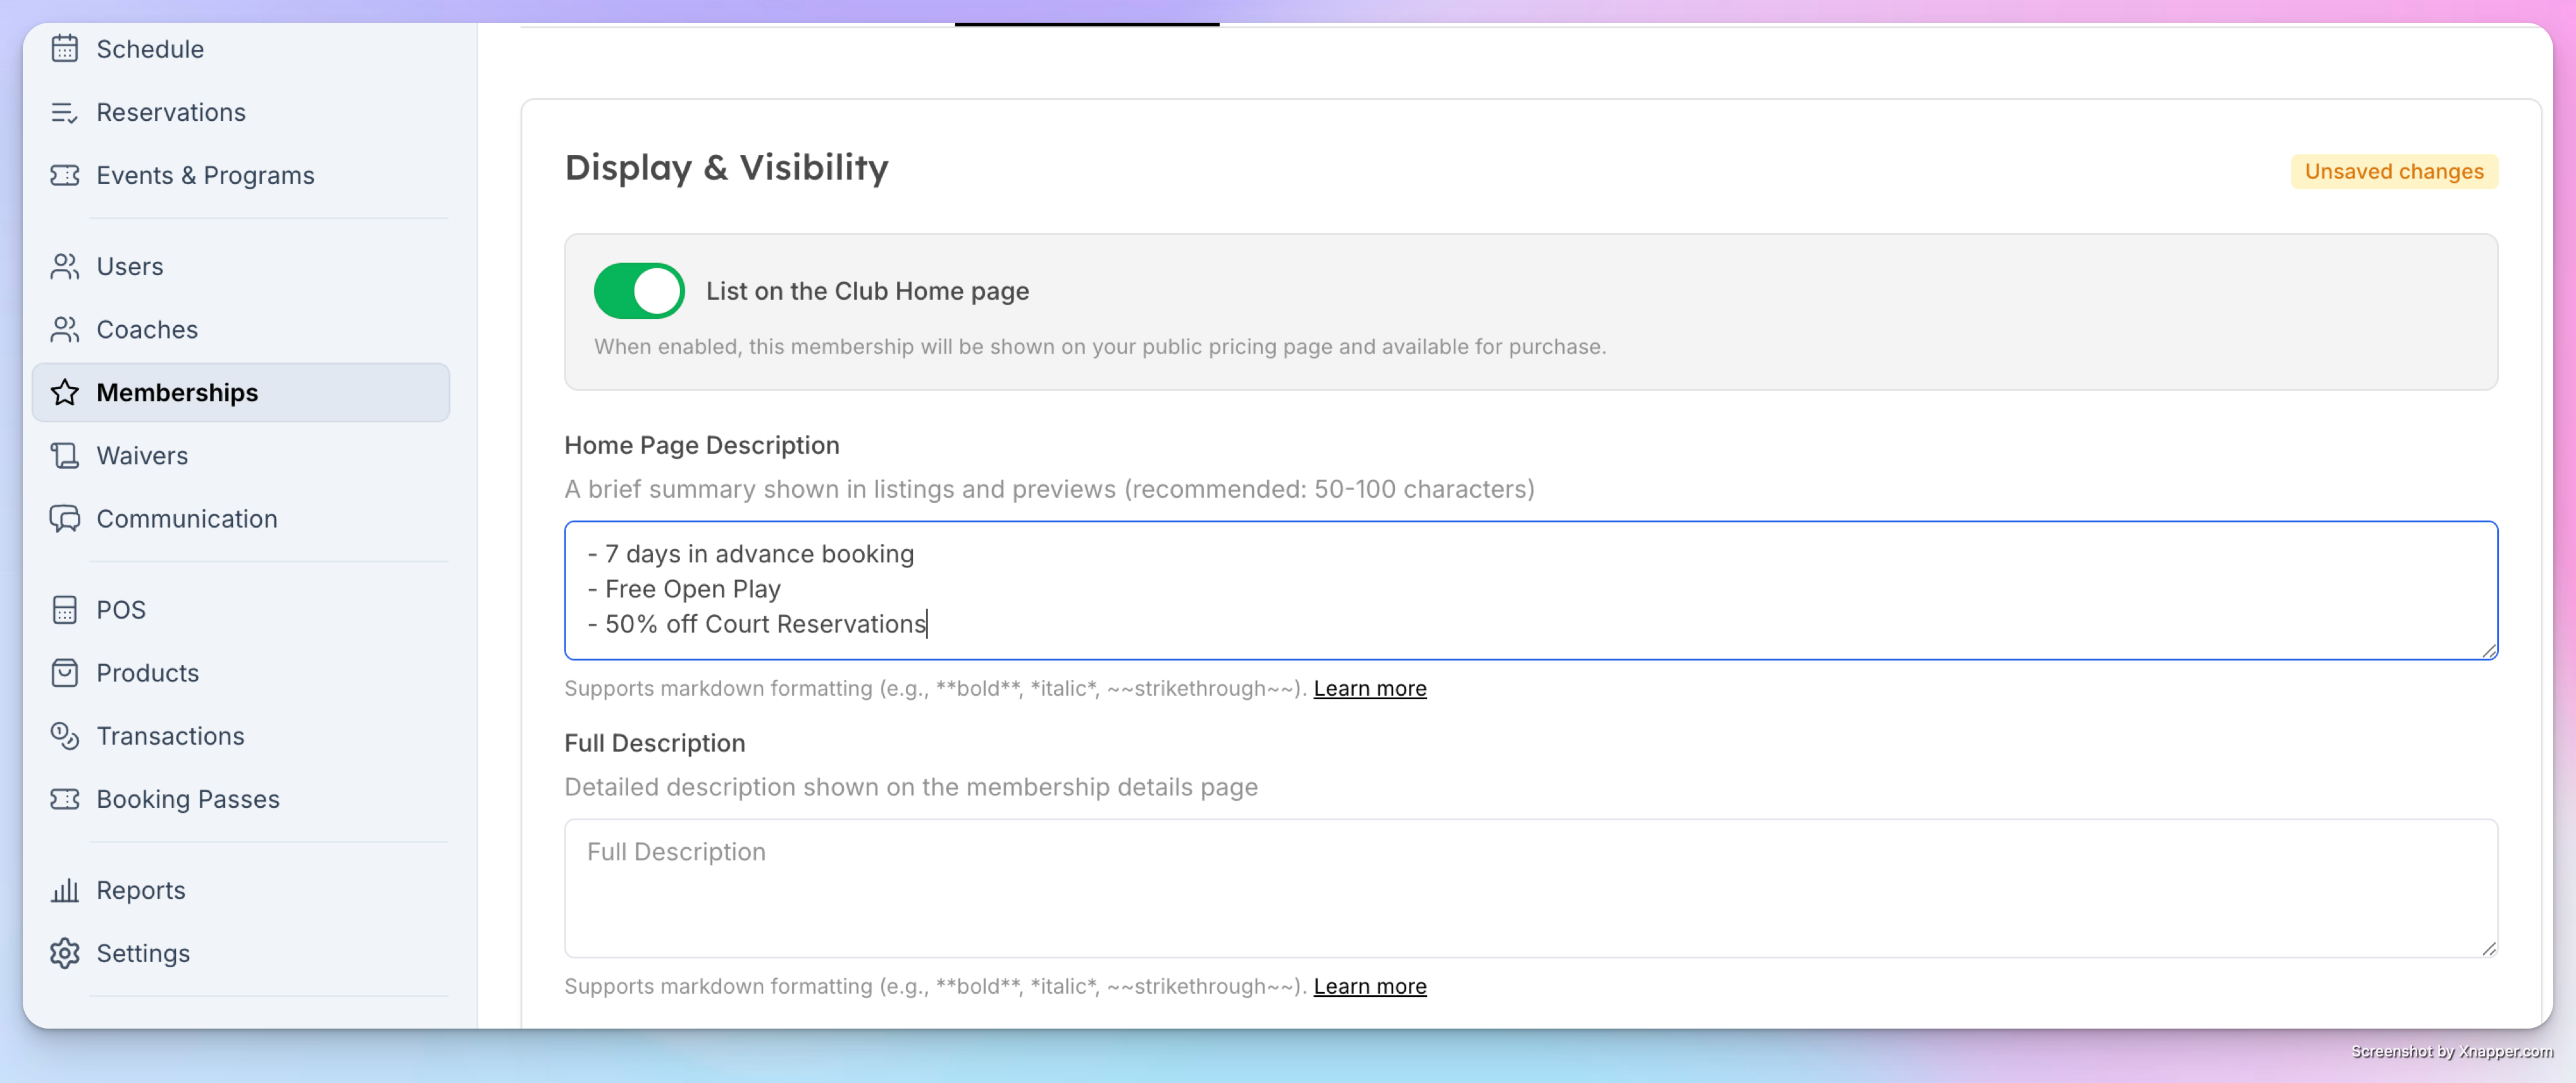
Name — displayed to customers on the memberships page and at checkout
Description — supports Markdown formatting. Use it to list benefits, included perks, or anything that helps customers understand the value. Start each line with a hyphen (
-) for bullet points
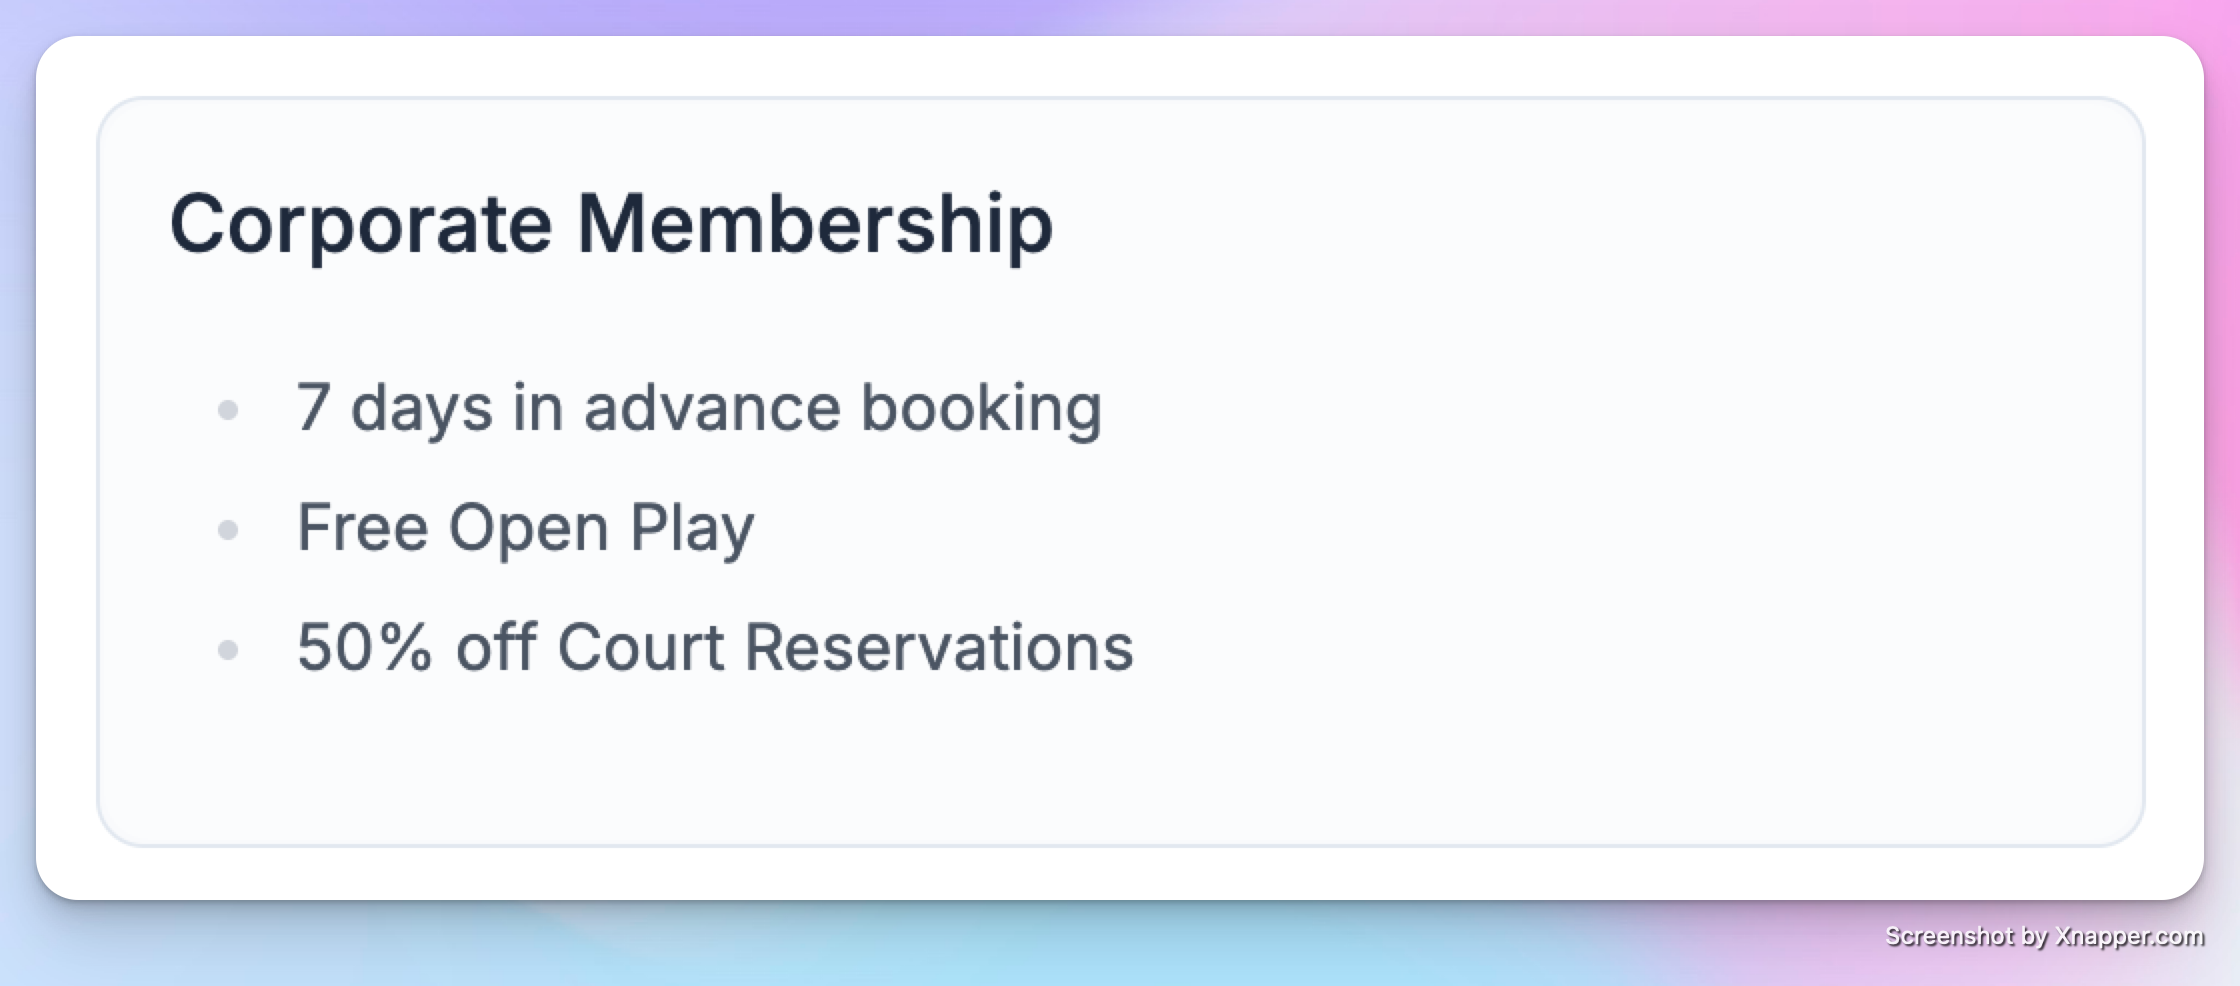
Your future members will see it like this:
Assigning a Rule Set
Every membership must be linked to exactly one Rule Set, which controls court booking rates, advance booking windows, schedule visibility, and refund policy. Select a rule set from the dropdown under Membership Rule Set.
If your club doesn’t have any rule sets yet, one will be created automatically with default settings. You can edit it later from Admin → Membership Rule Sets.
→ See [Creating and Managing Rule Sets] for details on configuring rule sets.
Display membership publicly or keep them Admin-only
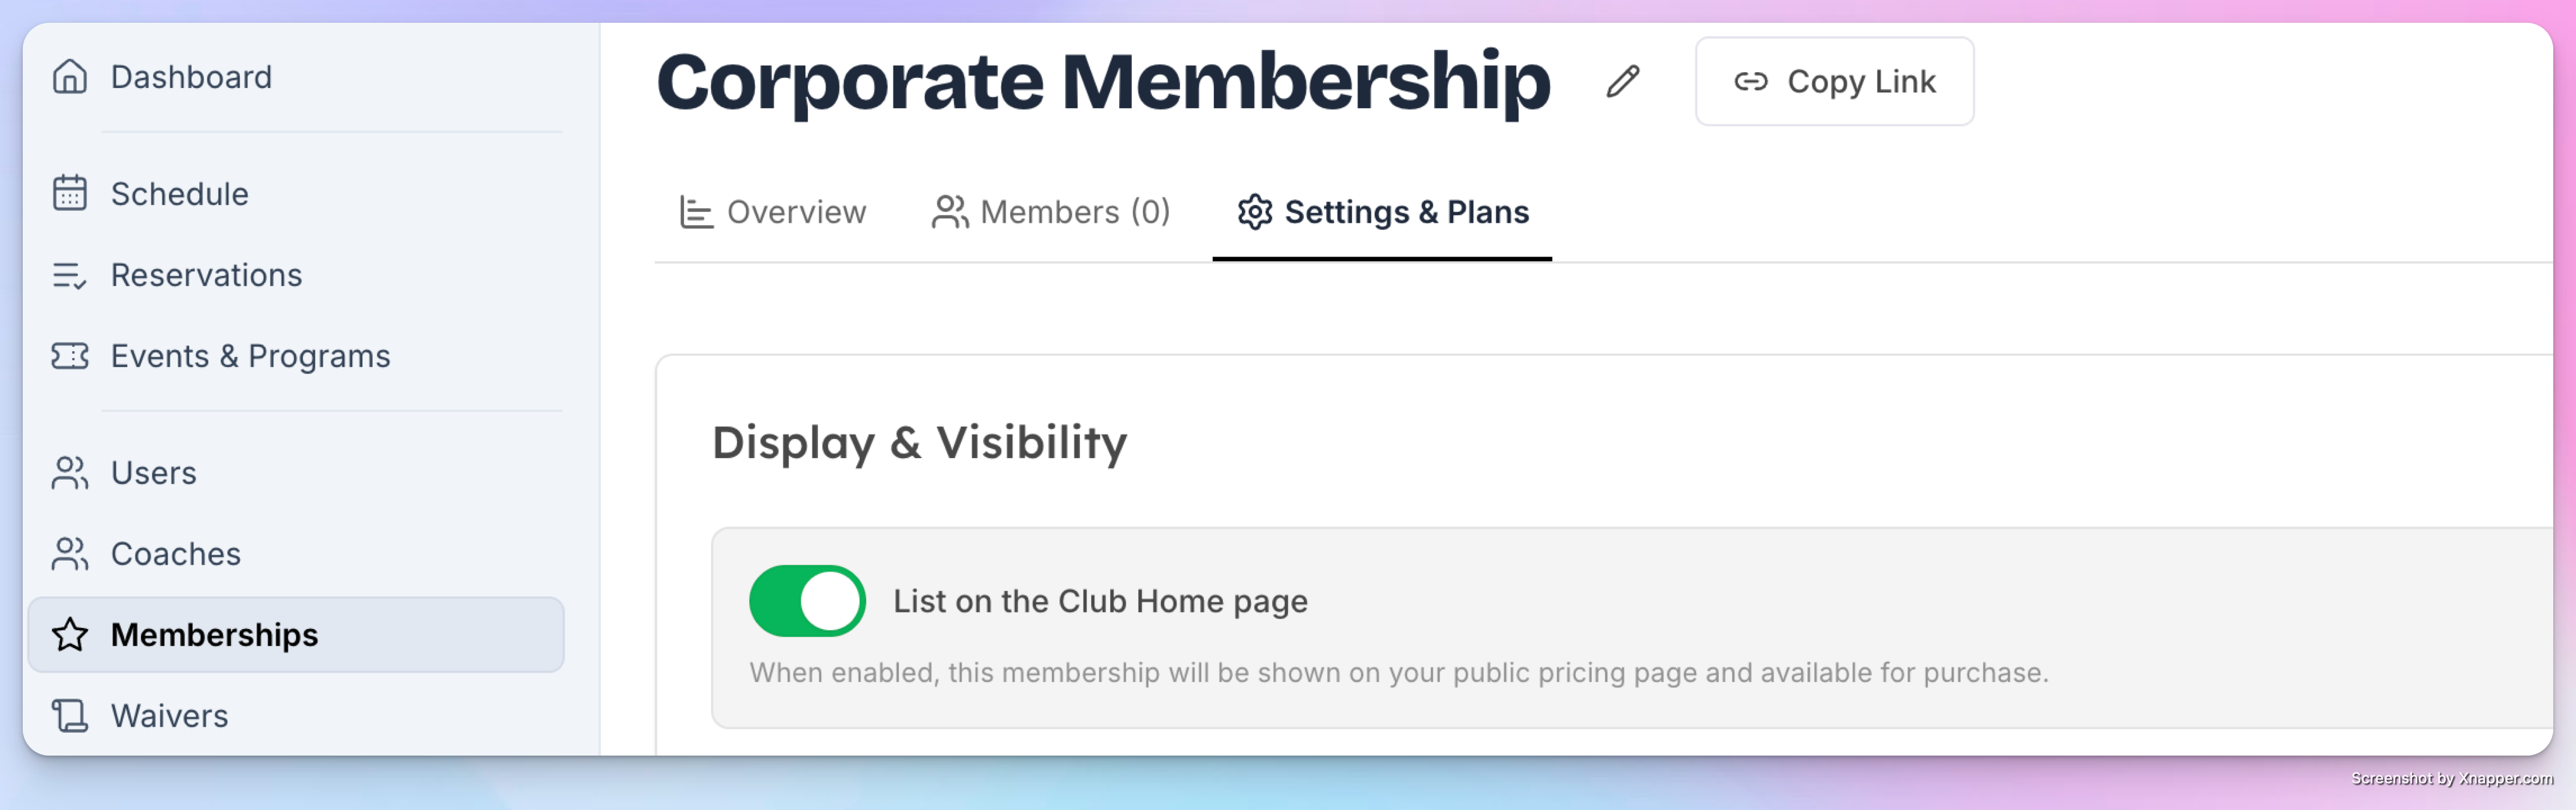
Click Settings & Plans tab.
Toggle List on Home Page ON to make the membership visible and purchasable by users from the Home Page → Memberships page (app.getopencourt.com or app).
Toggle it OFF to make the membership admin-only (users won’t see it on the website or app).
Admin-only memberships are useful for:
Corporate or business agreements
Special pricing for specific users
Private offers or promotions
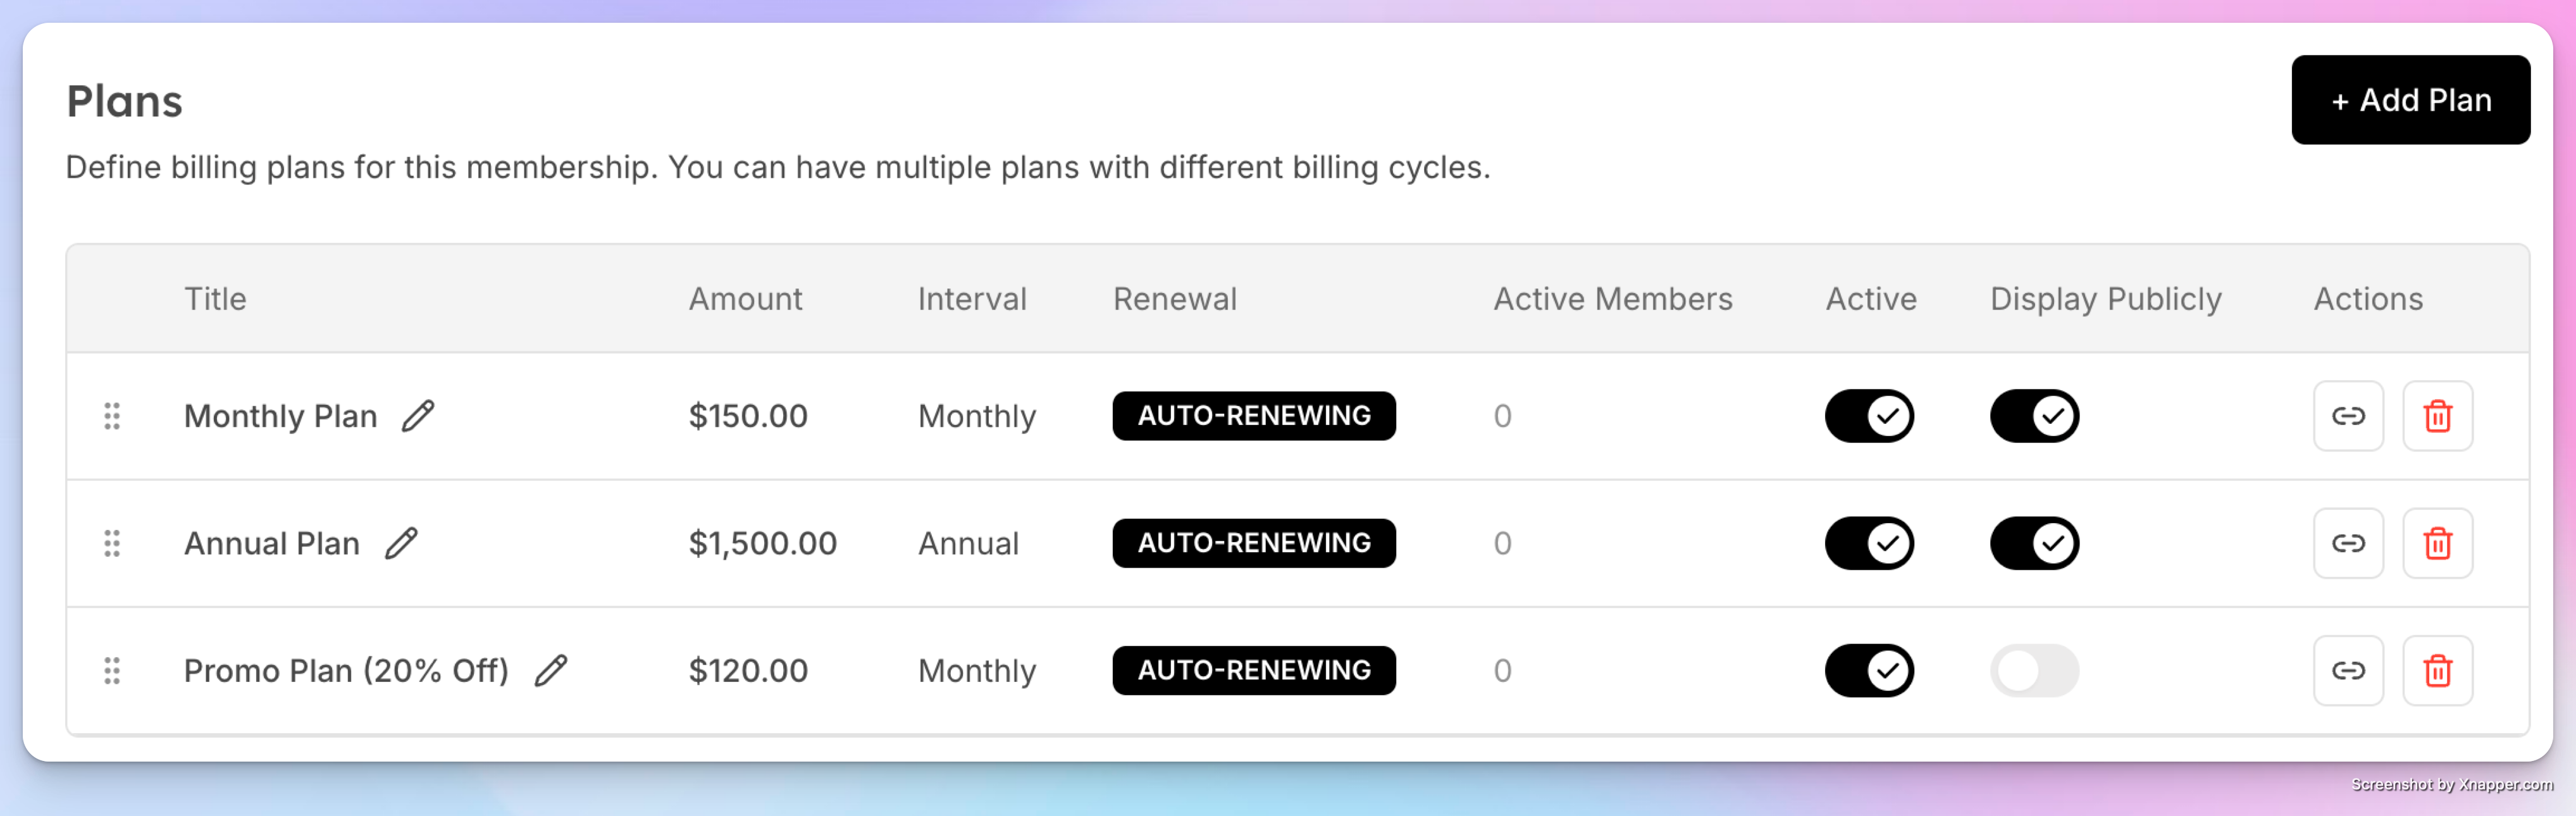
Displaying Pricing Publicly
You can choose to display on the Memberships Page:
All pricing plans
Only selected plans
If a plan is active but not displayed publicly:
Users cannot purchase it themselves
Admins can still assign it manually.
Example:
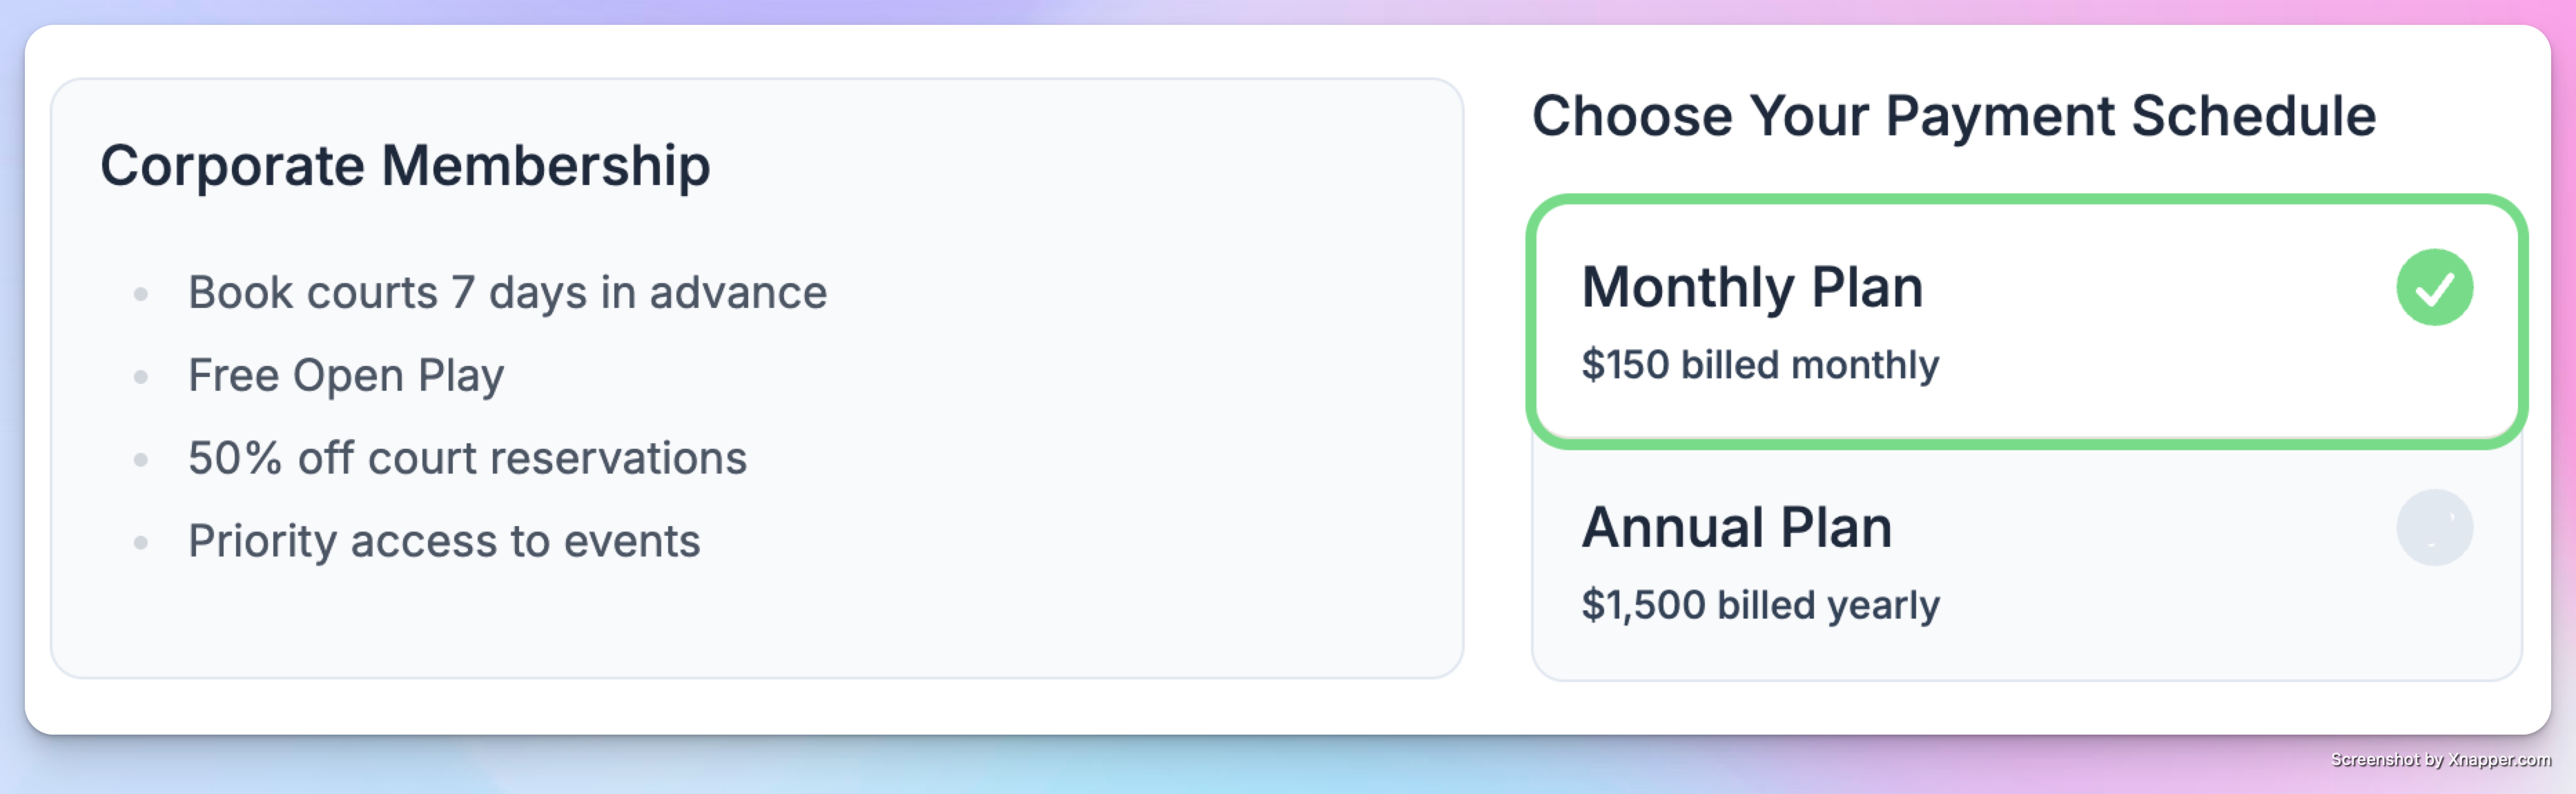
Promo Plan with 20% discount is not displayed publicly, so your future members can’t purchase it on the website or in the app.
Your customer’s view:
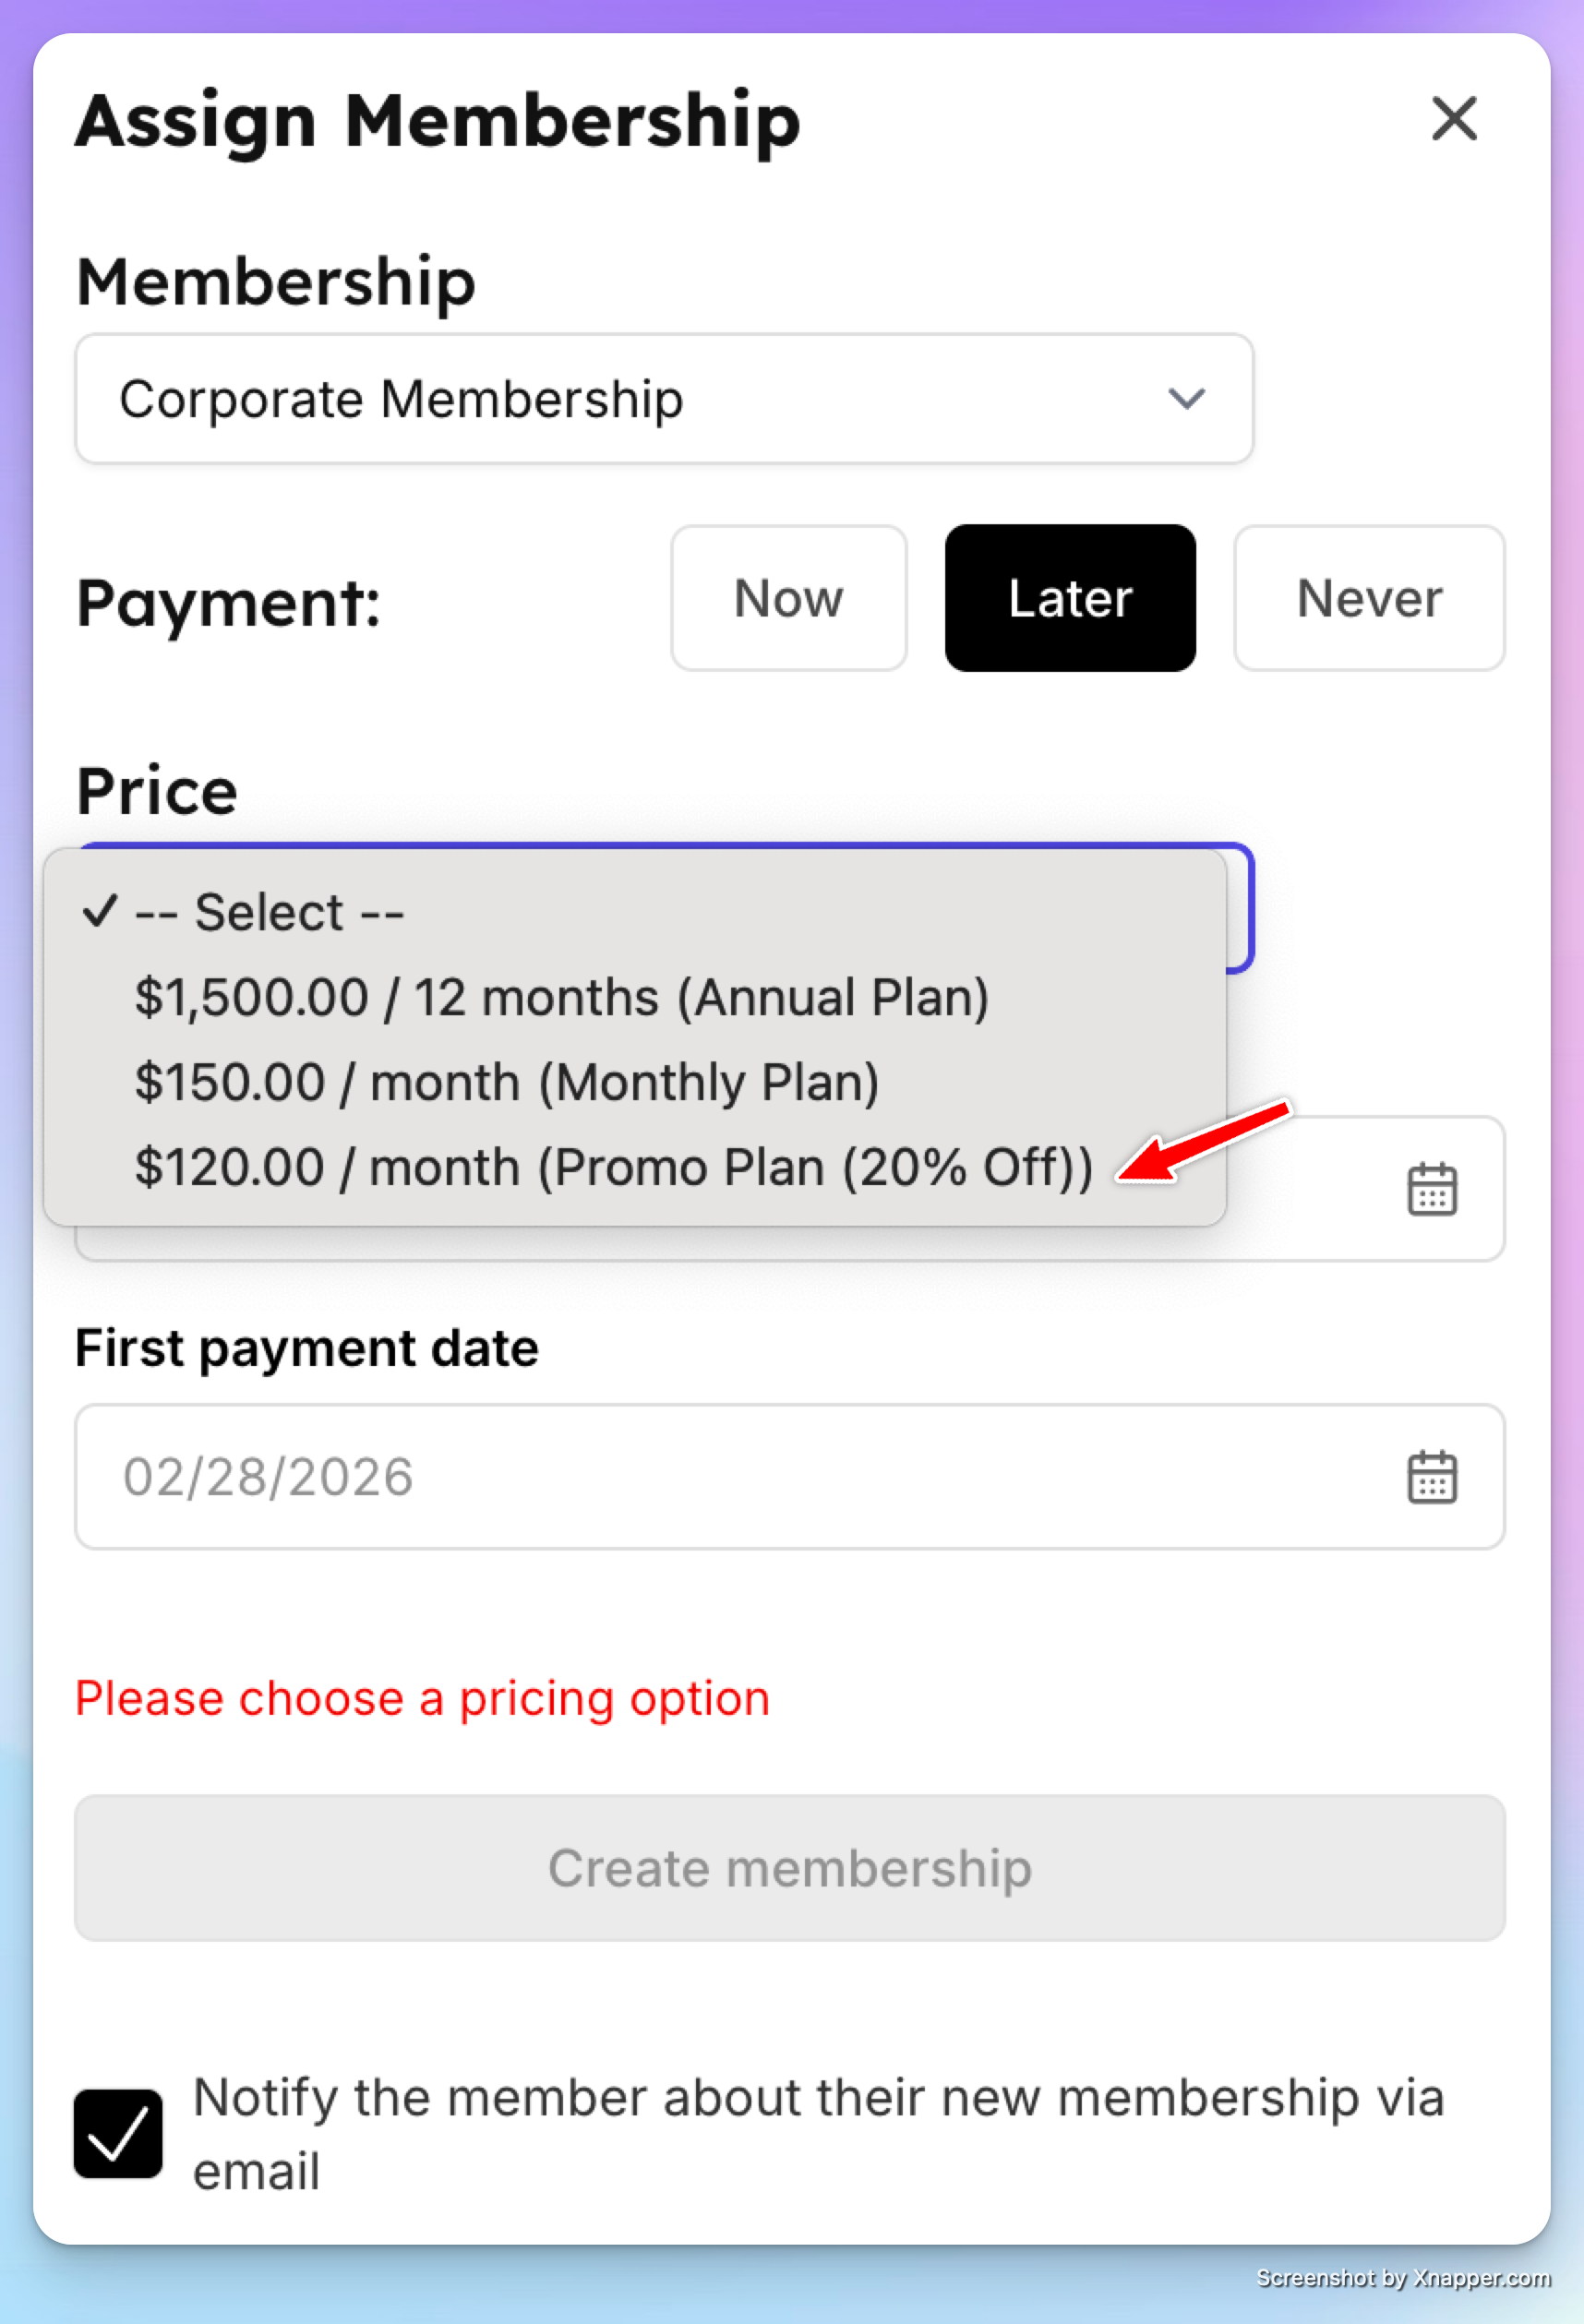
But admins can sell it via the admin portal:
If a plan is inactive:
It cannot be sold or assigned anymore
Existing members on that plan remain and continue renewing
This is useful for:
Early-bird pricing (example: you have a special price before club opening, then these members keep the discounted plan, but no one else can buy it anymore).
Limited-time offers
Legacy plans
Archiving a Membership
If a membership is no longer offered but has existing members, you can archive it.
Go to Admin → Memberships → [membership] → Settings
Scroll to the bottom and click Archive
Confirm by typing the membership name
Archived memberships are hidden from new sign-ups, but existing members keep their access and billing continues as normal. You can unarchive at any time to make it available again.
Deleting a Membership
A membership can only be deleted if it has never had any members (current or past). If it has, use Archive instead.
To delete: go to Settings, scroll to the bottom, and click Delete. Confirm by typing the membership name.
Reordering Memberships
Drag and drop memberships on the Admin → Memberships list to change the order they appear on the public memberships page.
What’s Next
[Setting Up Plans & Pricing →] Add billing plans — monthly, annual, one-time, or free
[Family & Dependent Memberships →] Enable group memberships with dependent members
[Selling a Membership to a Customer →] Enroll a customer from the admin panel