Creating groups / chats
The Community feature helps you keep your players engaged and connected. Create groups around skill levels, events, or interests, share important updates, and give your players an easy way to coordinate games, clinics, and conversations — all right inside your club’s app.
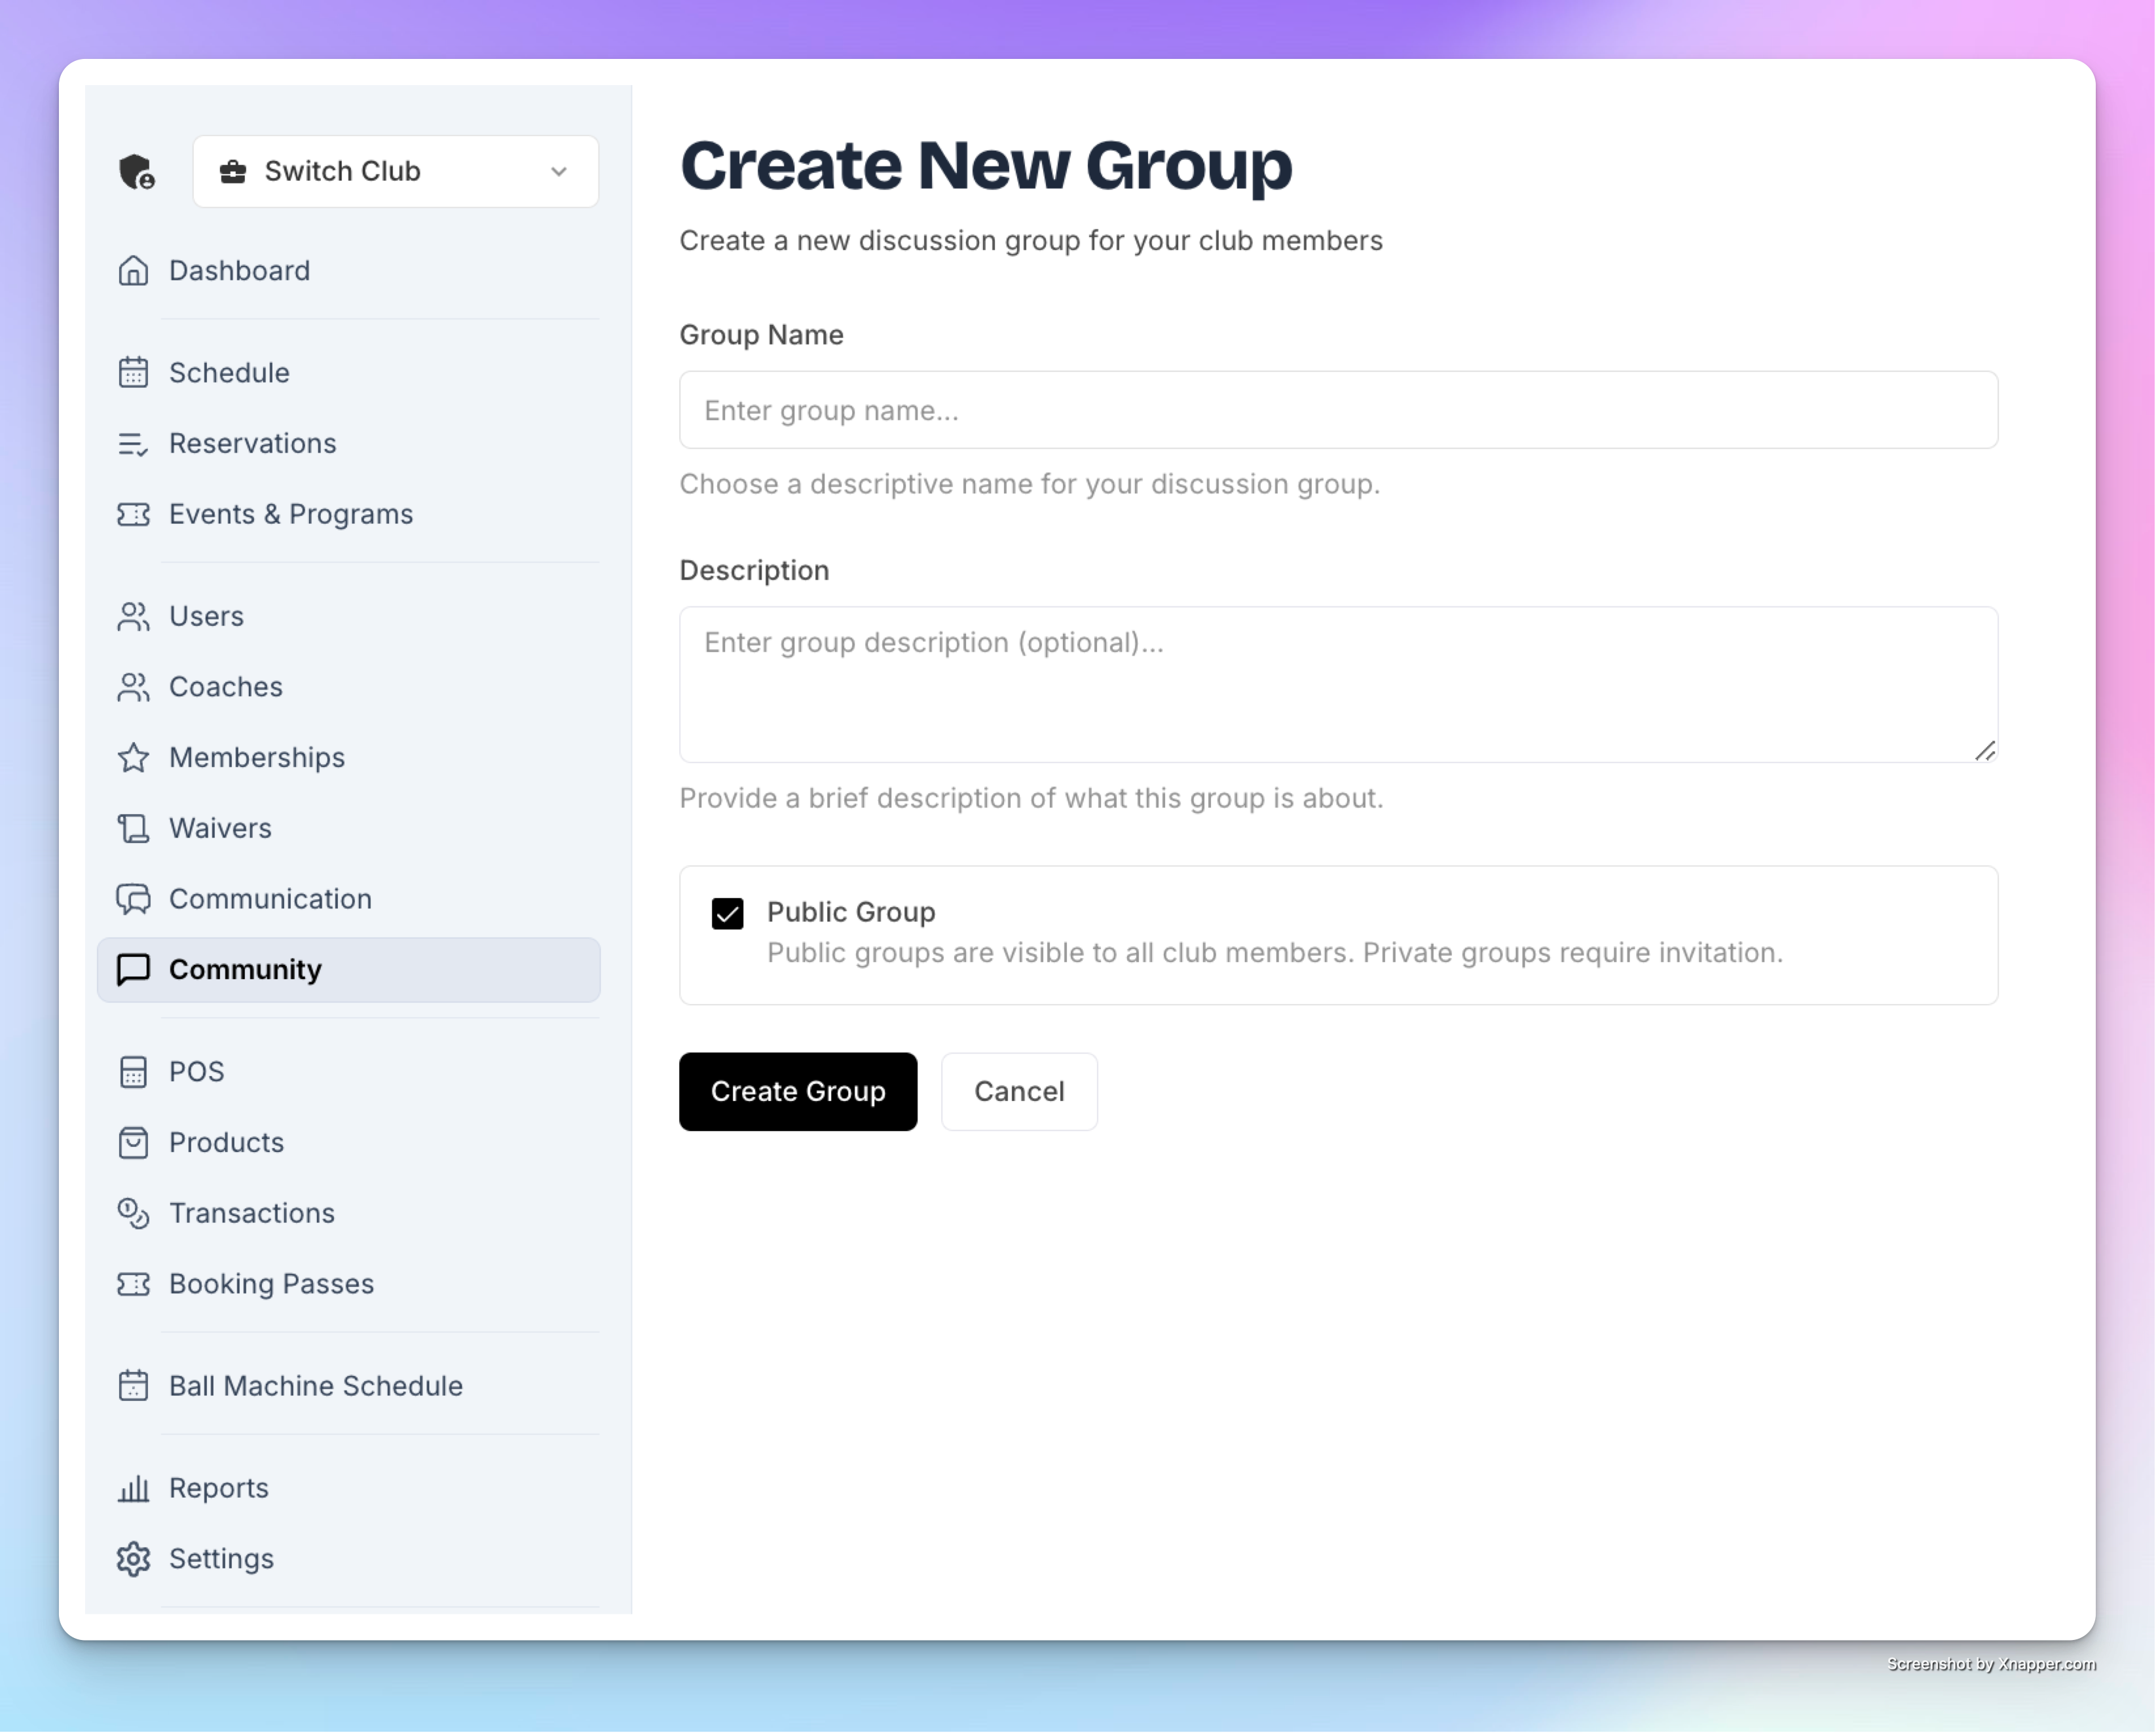
Creating a Group.
Go to the Community tab in the left-hand menu in the Admin panel.
Click Create Group.
Enter a Group Name (e.g., Beginners Chat or Early Birds).
Add a description.
Choose whether it’s Public (visible to everyone on the Home Page and at the Community tab) or Private (join only by invitation code).
Click Create.
Once created, you can:
See the group in your list.
Edit or delete it anytime.
Share the group code or invitation link with players.
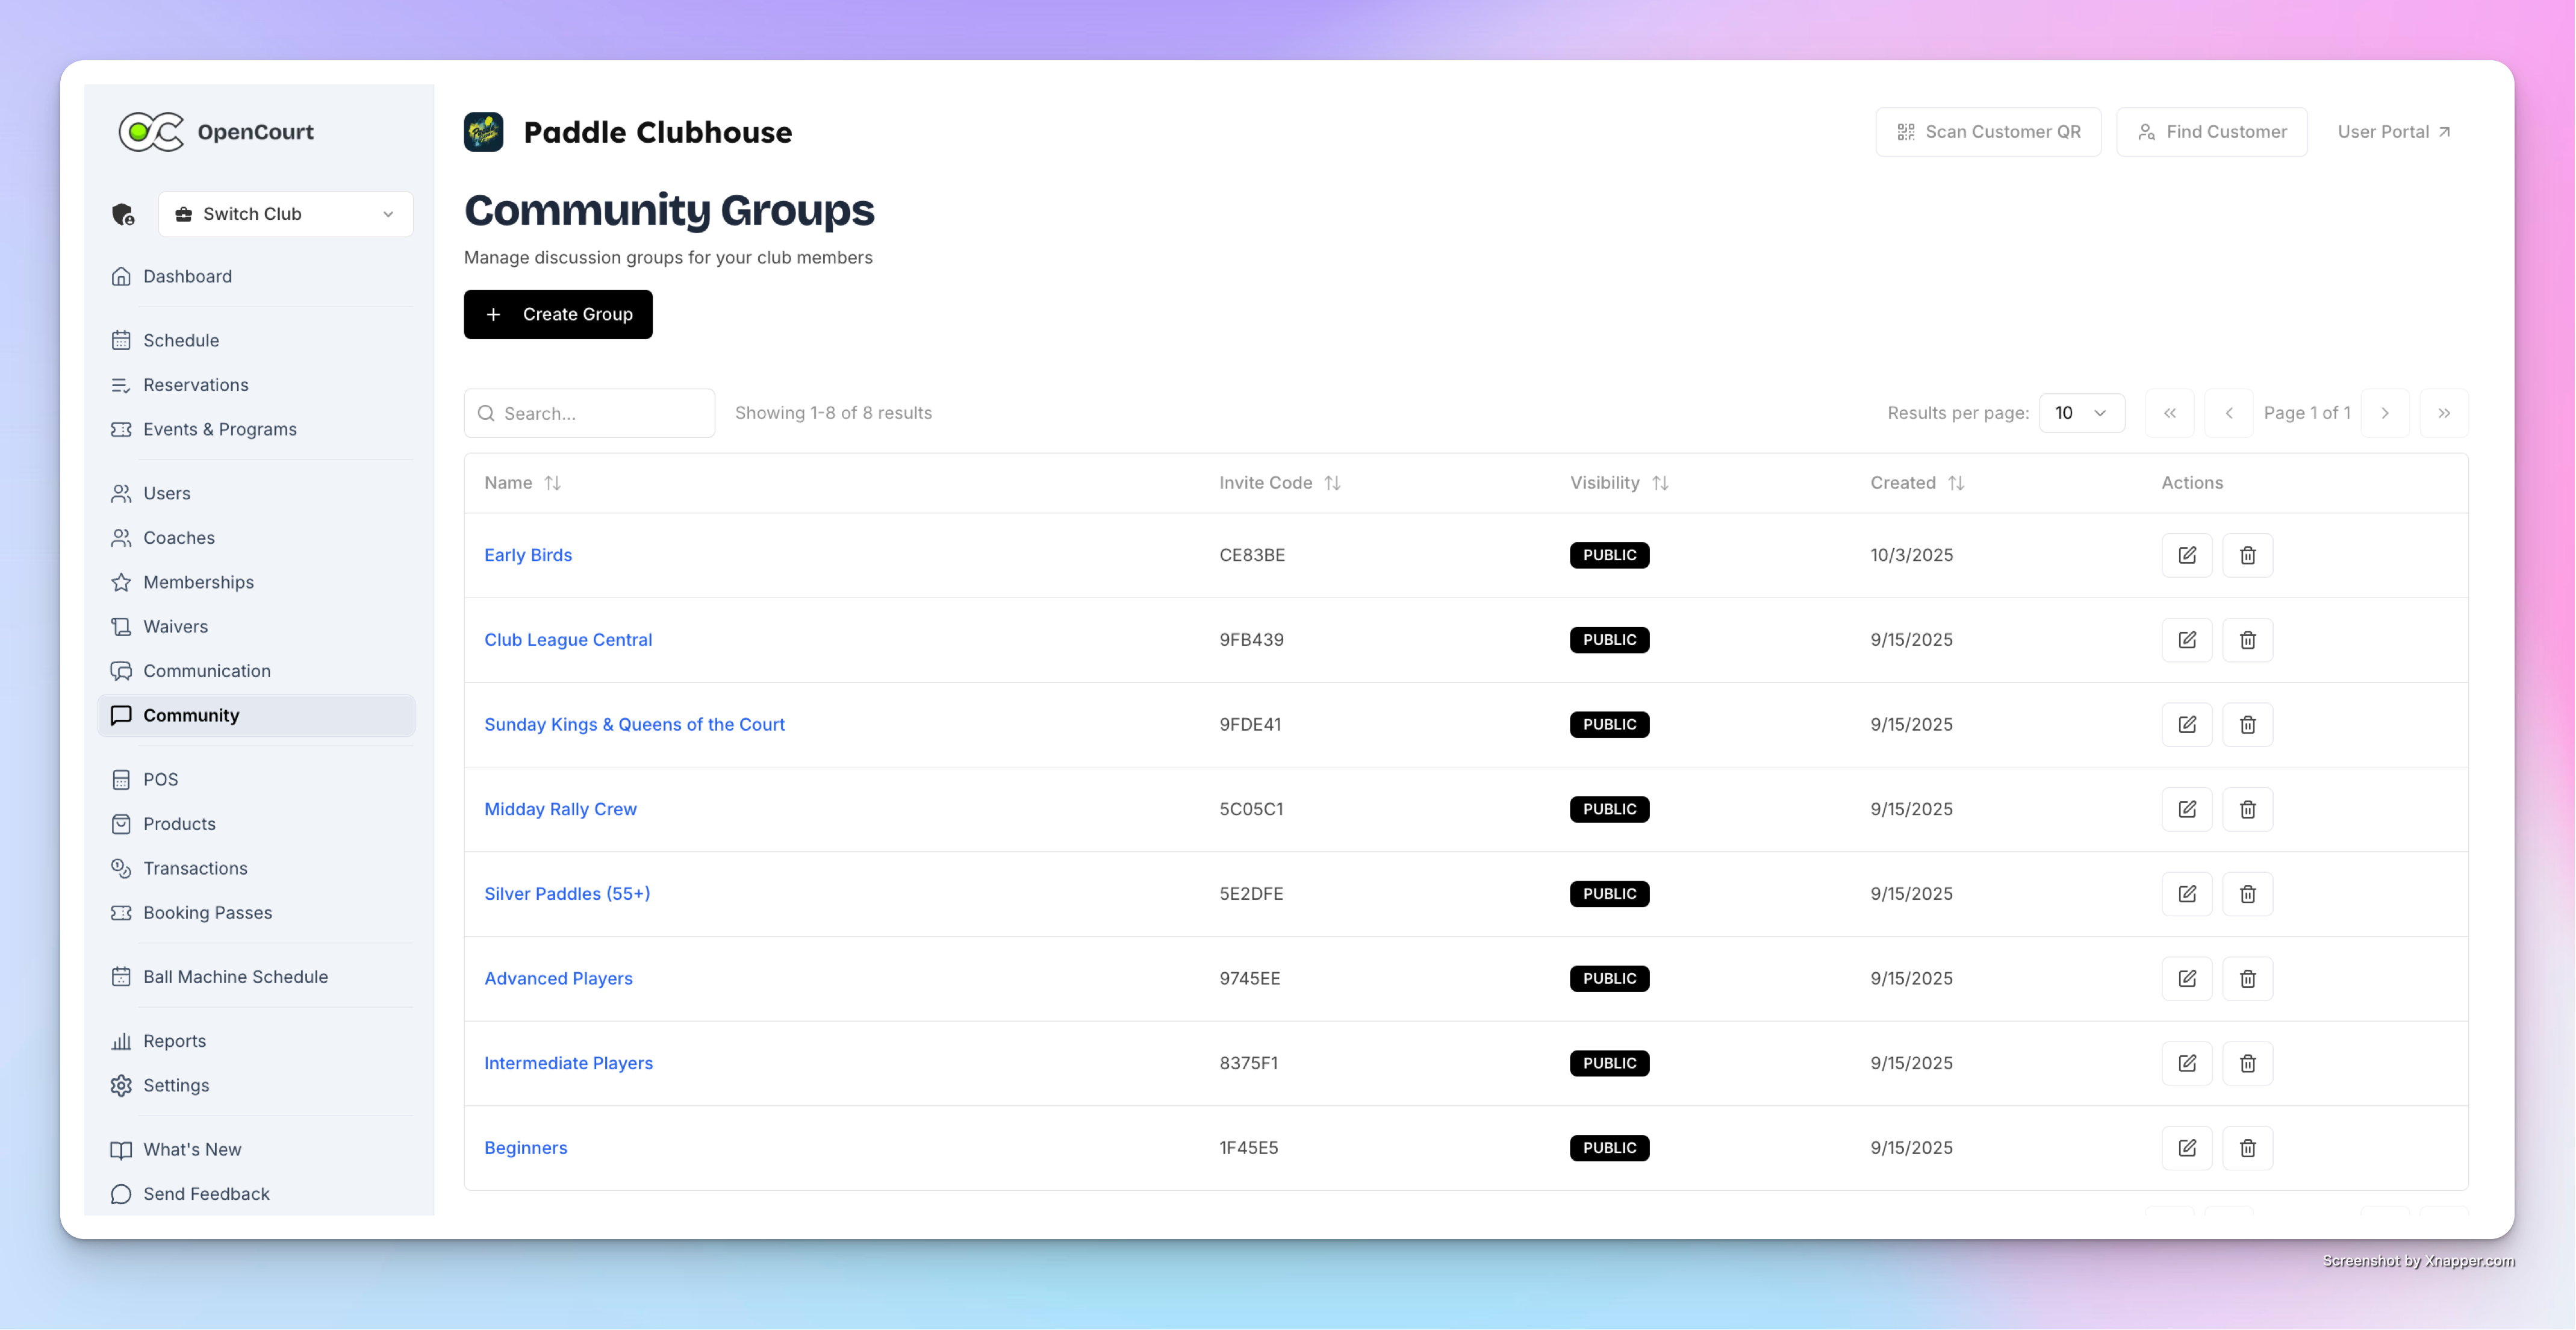
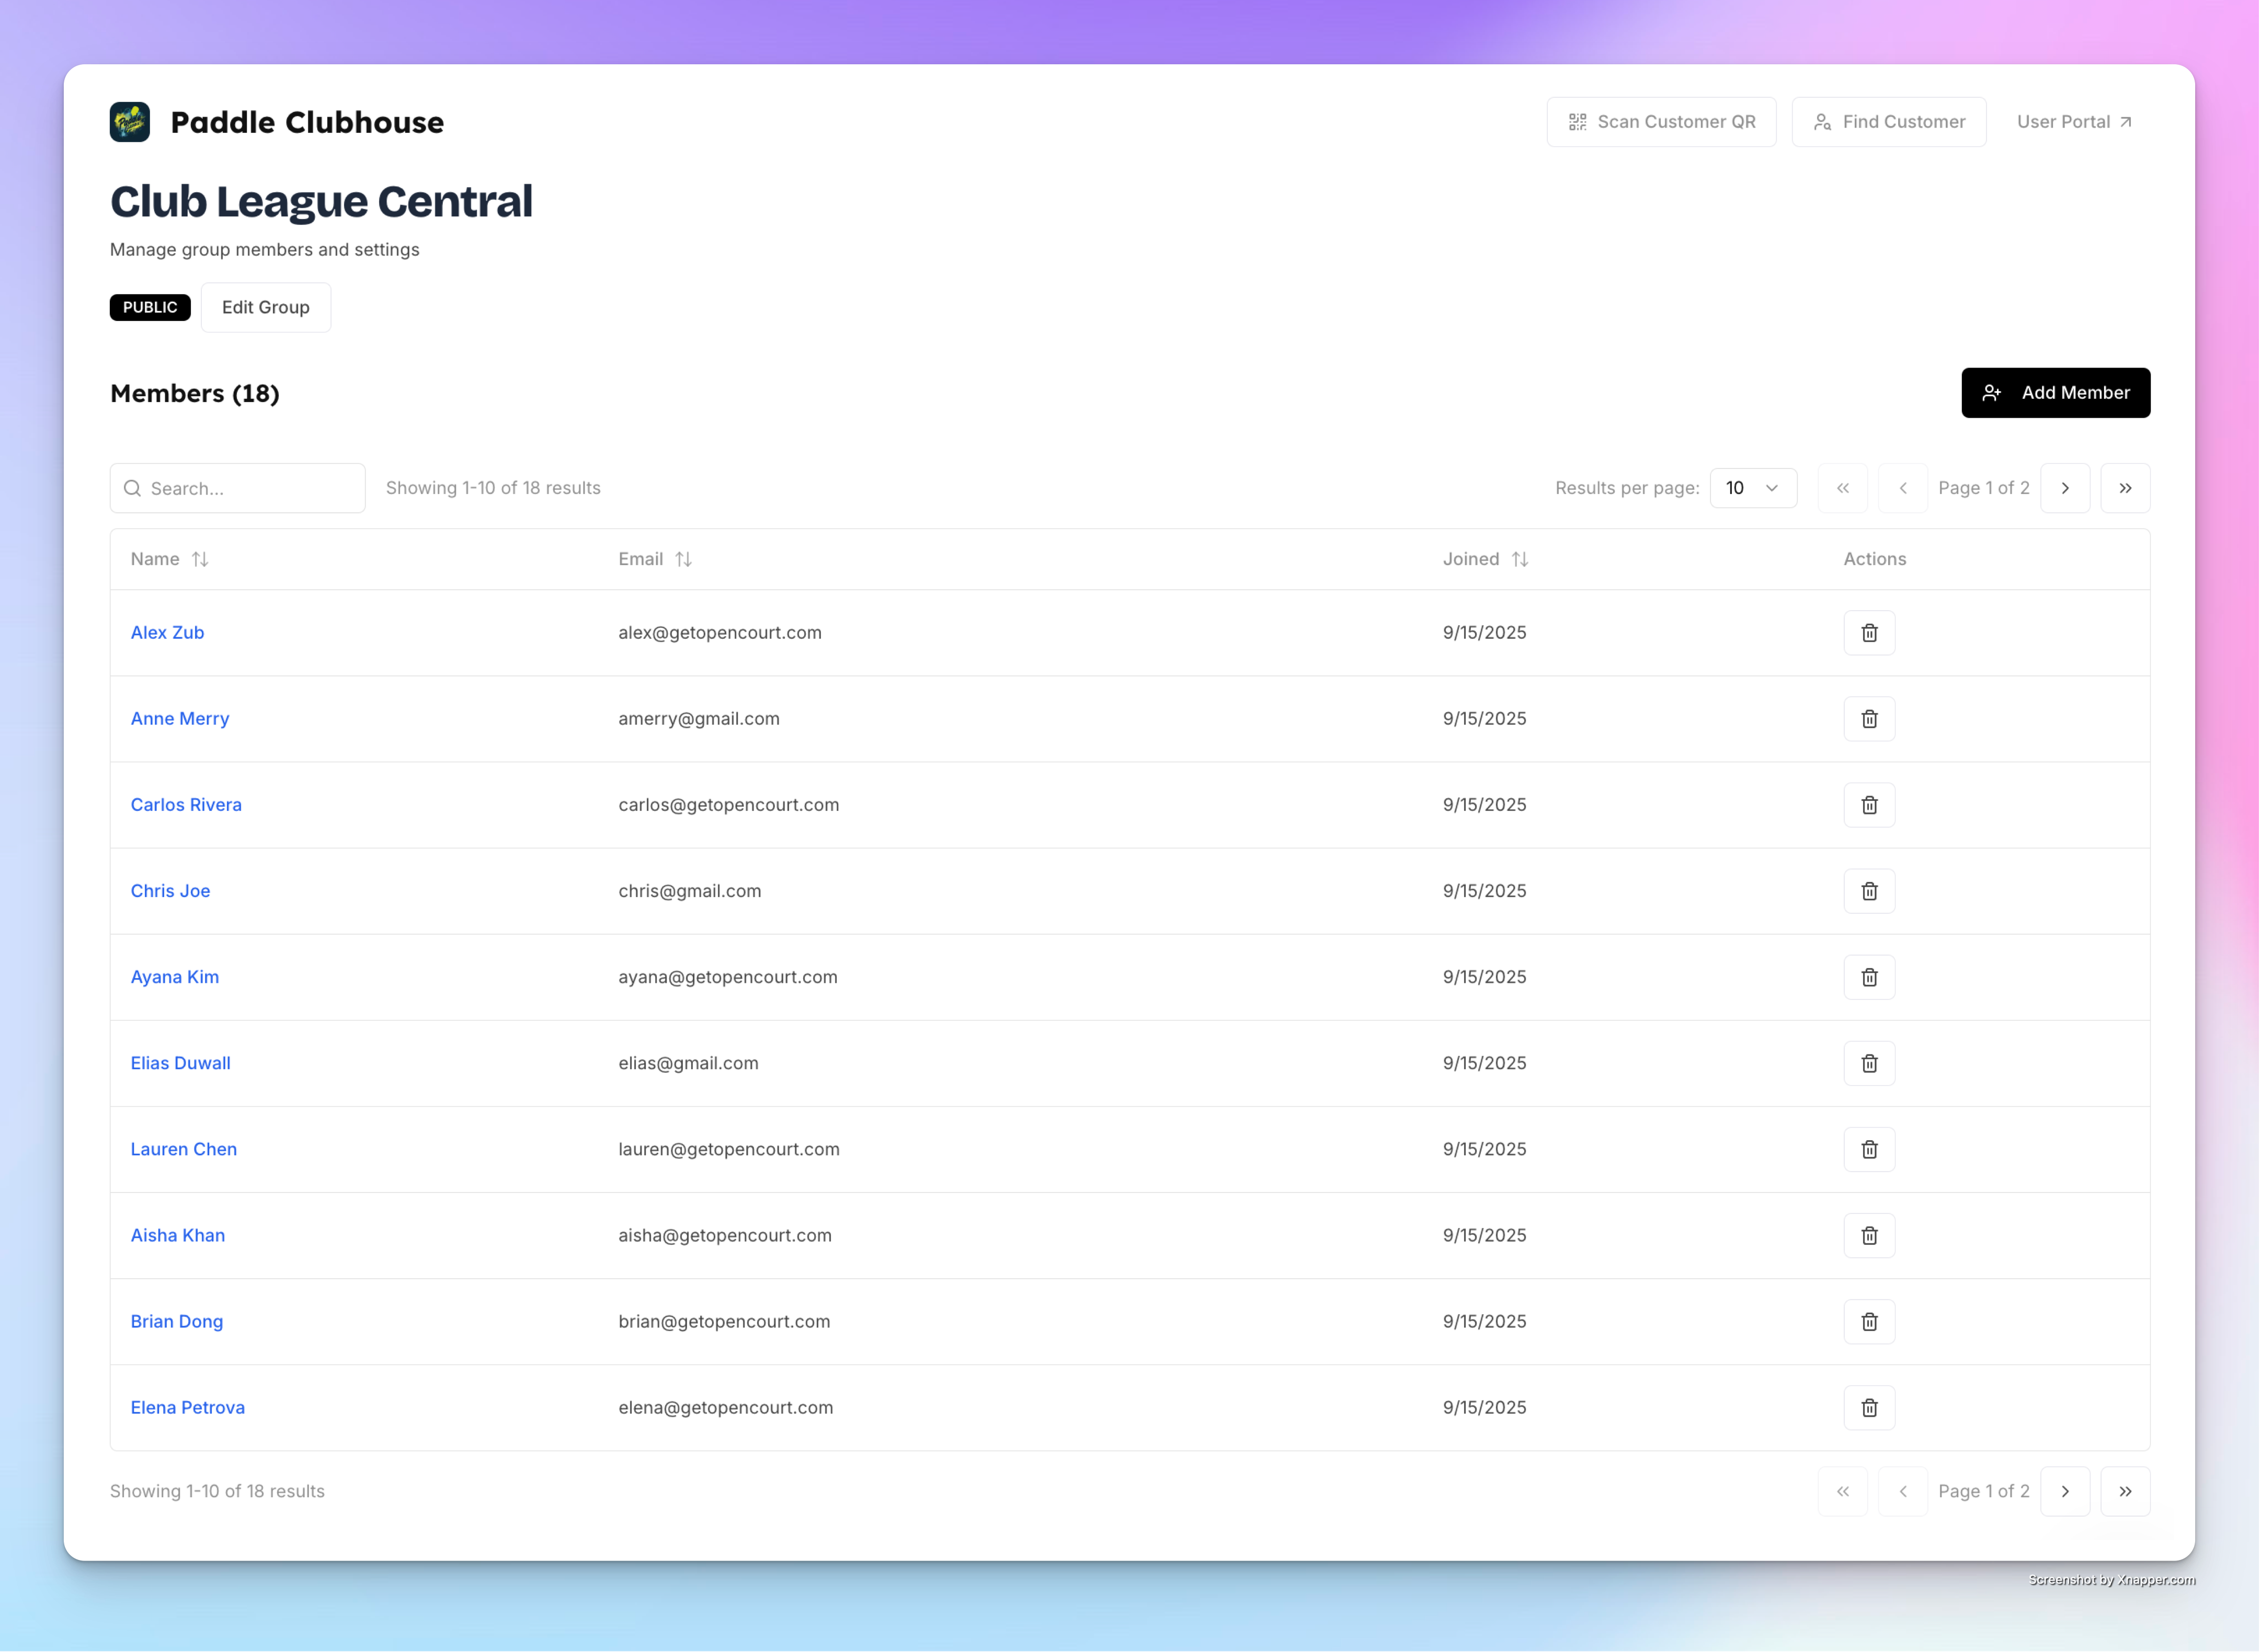
Add members manually from your club’s participant list.
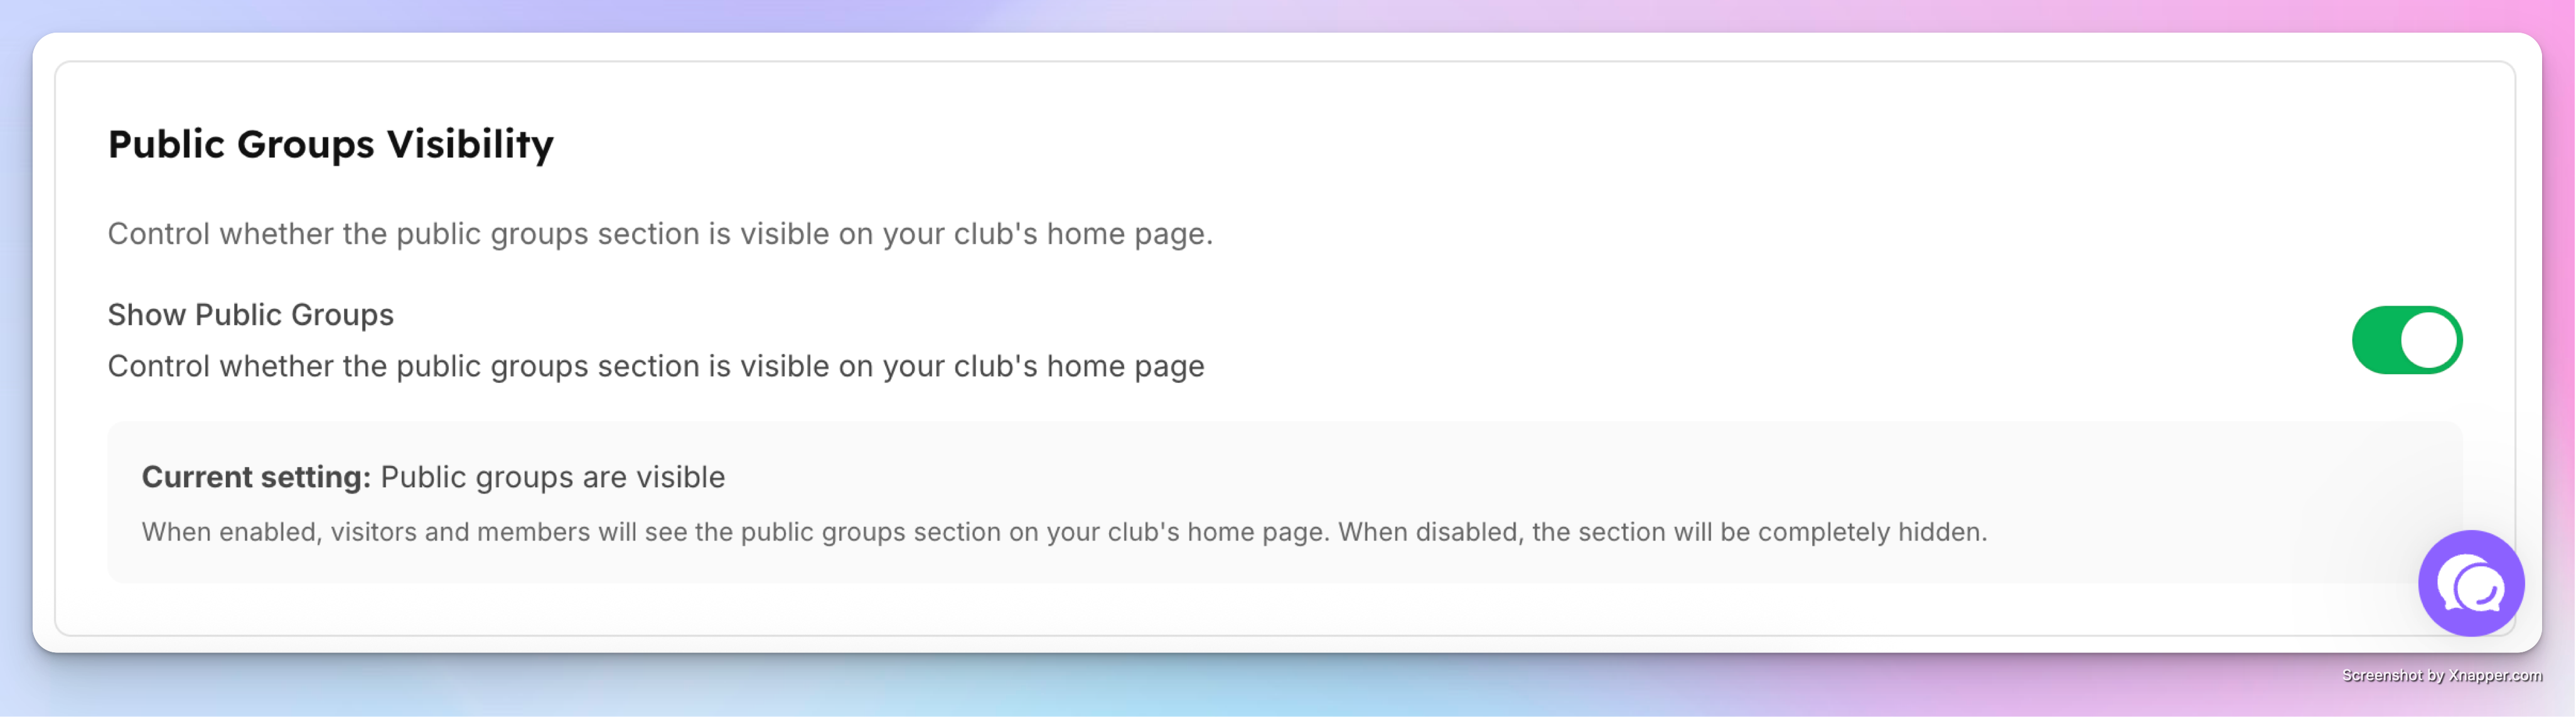
Featuring on the Home Page
You can feature groups on the Home Page so members can easily discover and join them. To enable this, go to Settings → Club Home Settings. At the bottom of the page, find Public Groups Visibility and toggle it on. This will display the groups block on your Home Page.
Check out what your players will see and how they can use the Community feature here.