Check a customer in with the QR scanner
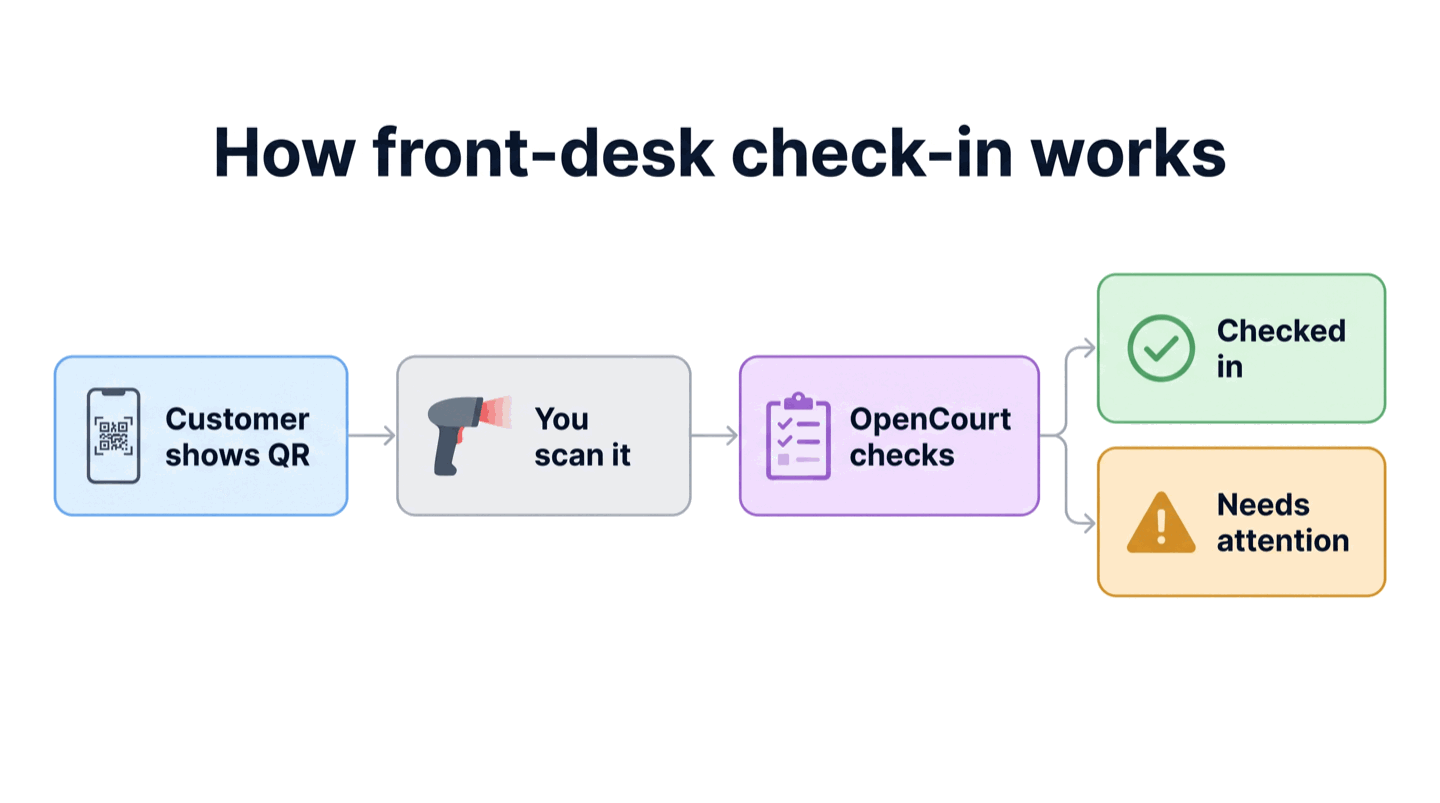
Check a customer in at the front desk by scanning the QR code from their OpenCourt app. (About 2 minutes to set up your scanner; each check-in takes about a second.)
Note
Works on any page of the admin panel. You need a USB QR/barcode scanner plugged into your front-desk computer (any model that reads QR codes works). No scanner? Use Find Customer and type their name, or open the schedule and open their reservation/event they signed up for. It’s easy to check them in just changing their status.
Before you begin
A USB QR scanner connected to the computer running the admin panel.
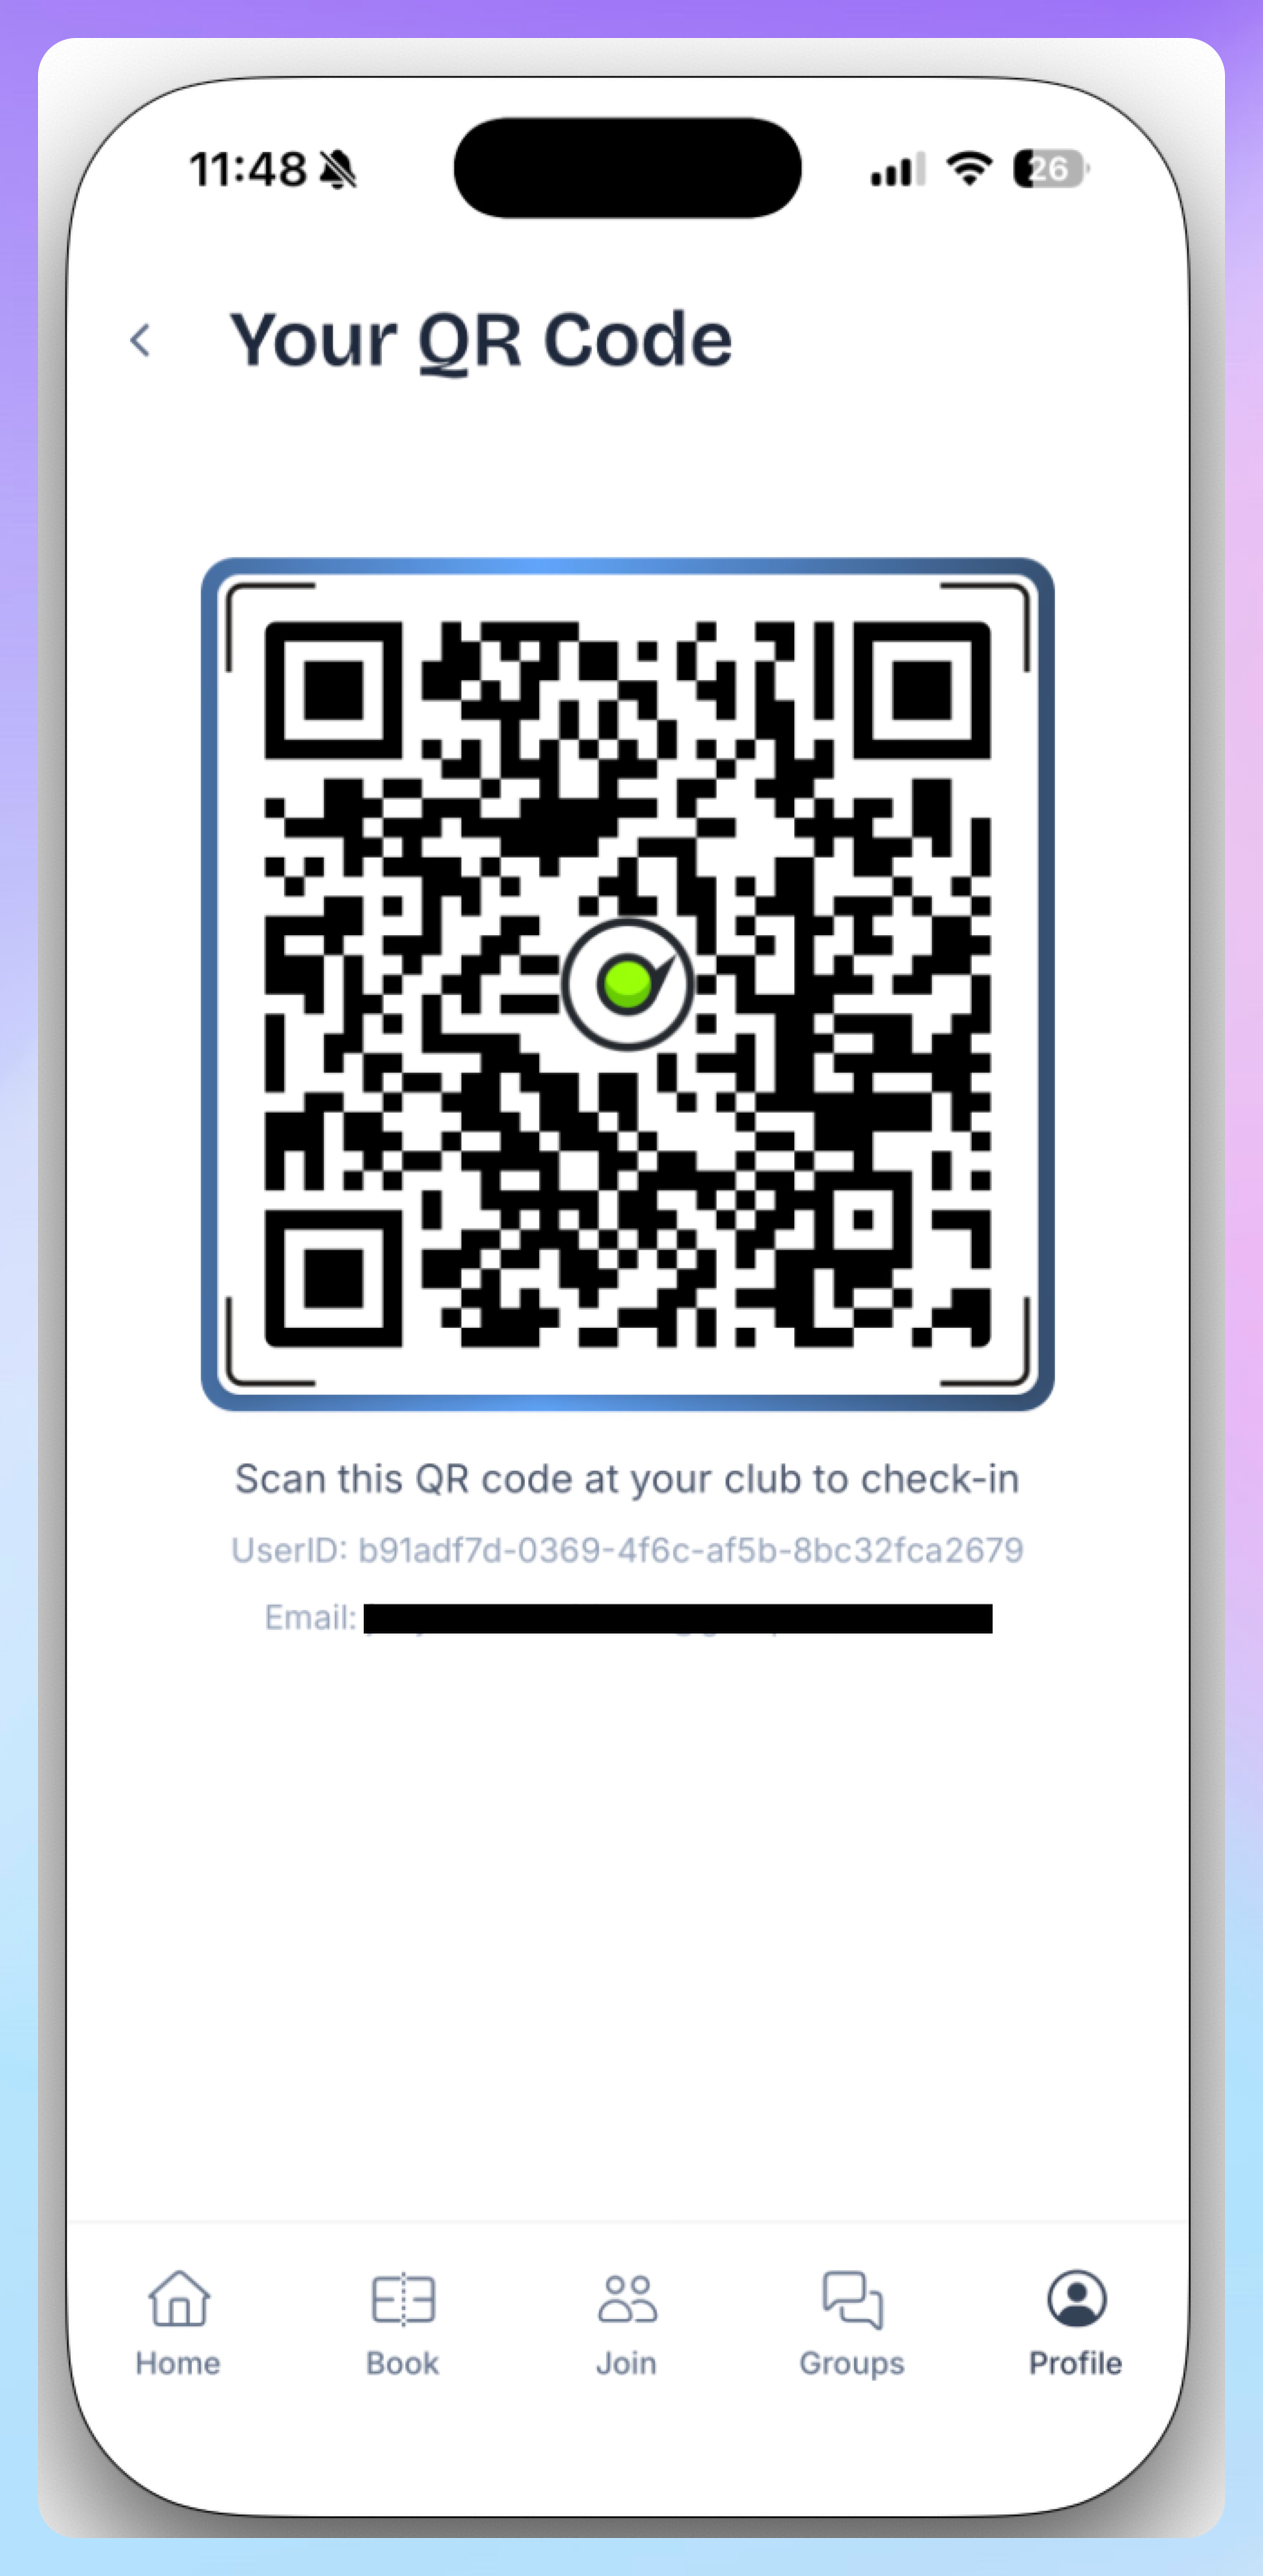
The customer has the OpenCourt app and can open their Check-In QR Code (in the app under My Profile).
Where the customer finds their QR code
The customer opens the OpenCourt app, goes to My Profile, and taps Check-In QR Code. They show that screen to your scanner.
Open the admin panel to any page — the Today page is a good home base.
Point the scanner at the customer's Check-In QR Code and scan. You do not need to open anything first.
Read the result:
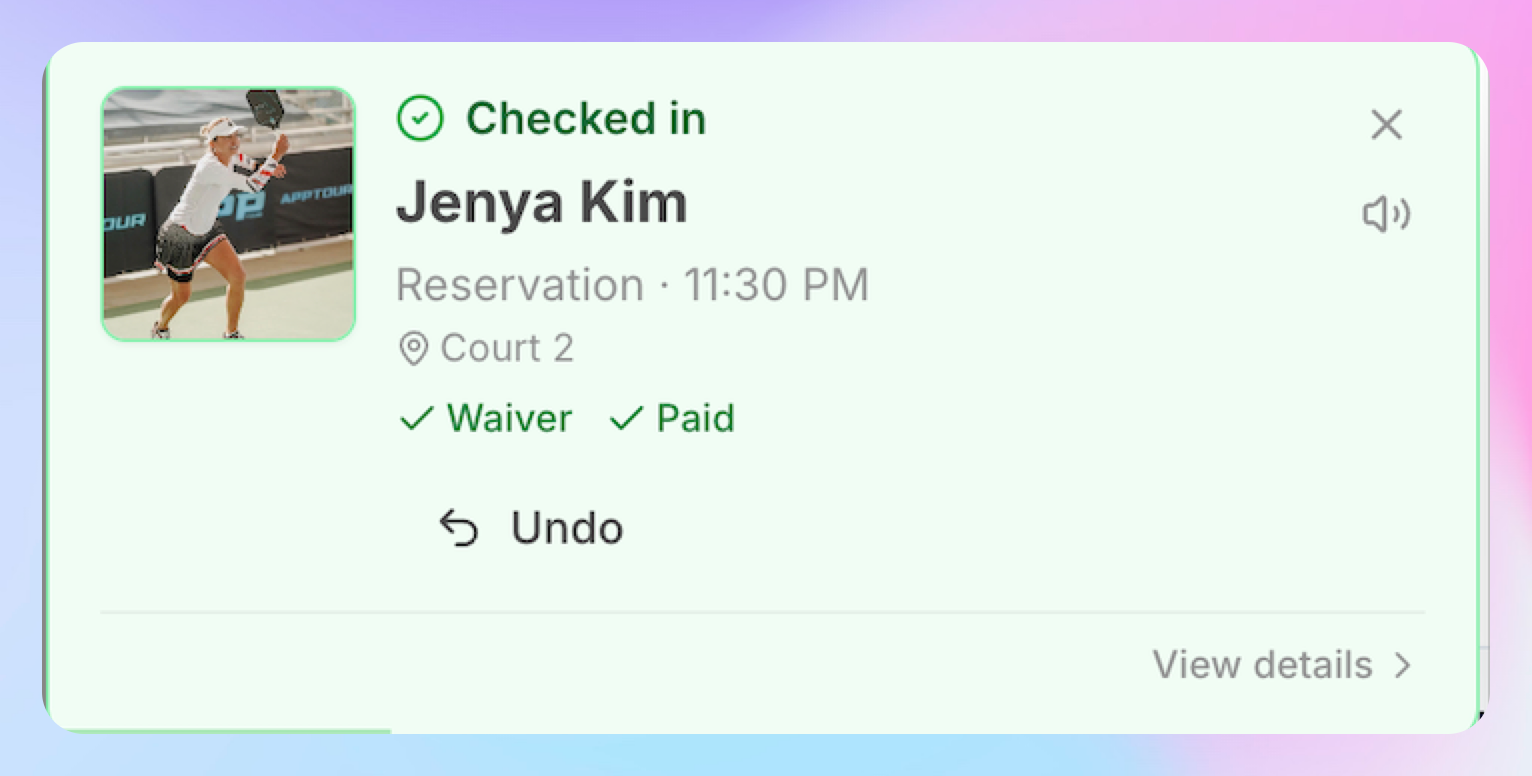
A green Checked in banner appears at the top of the screen with the customer's name and photo, then clears on its own. They are checked in — wave them through.
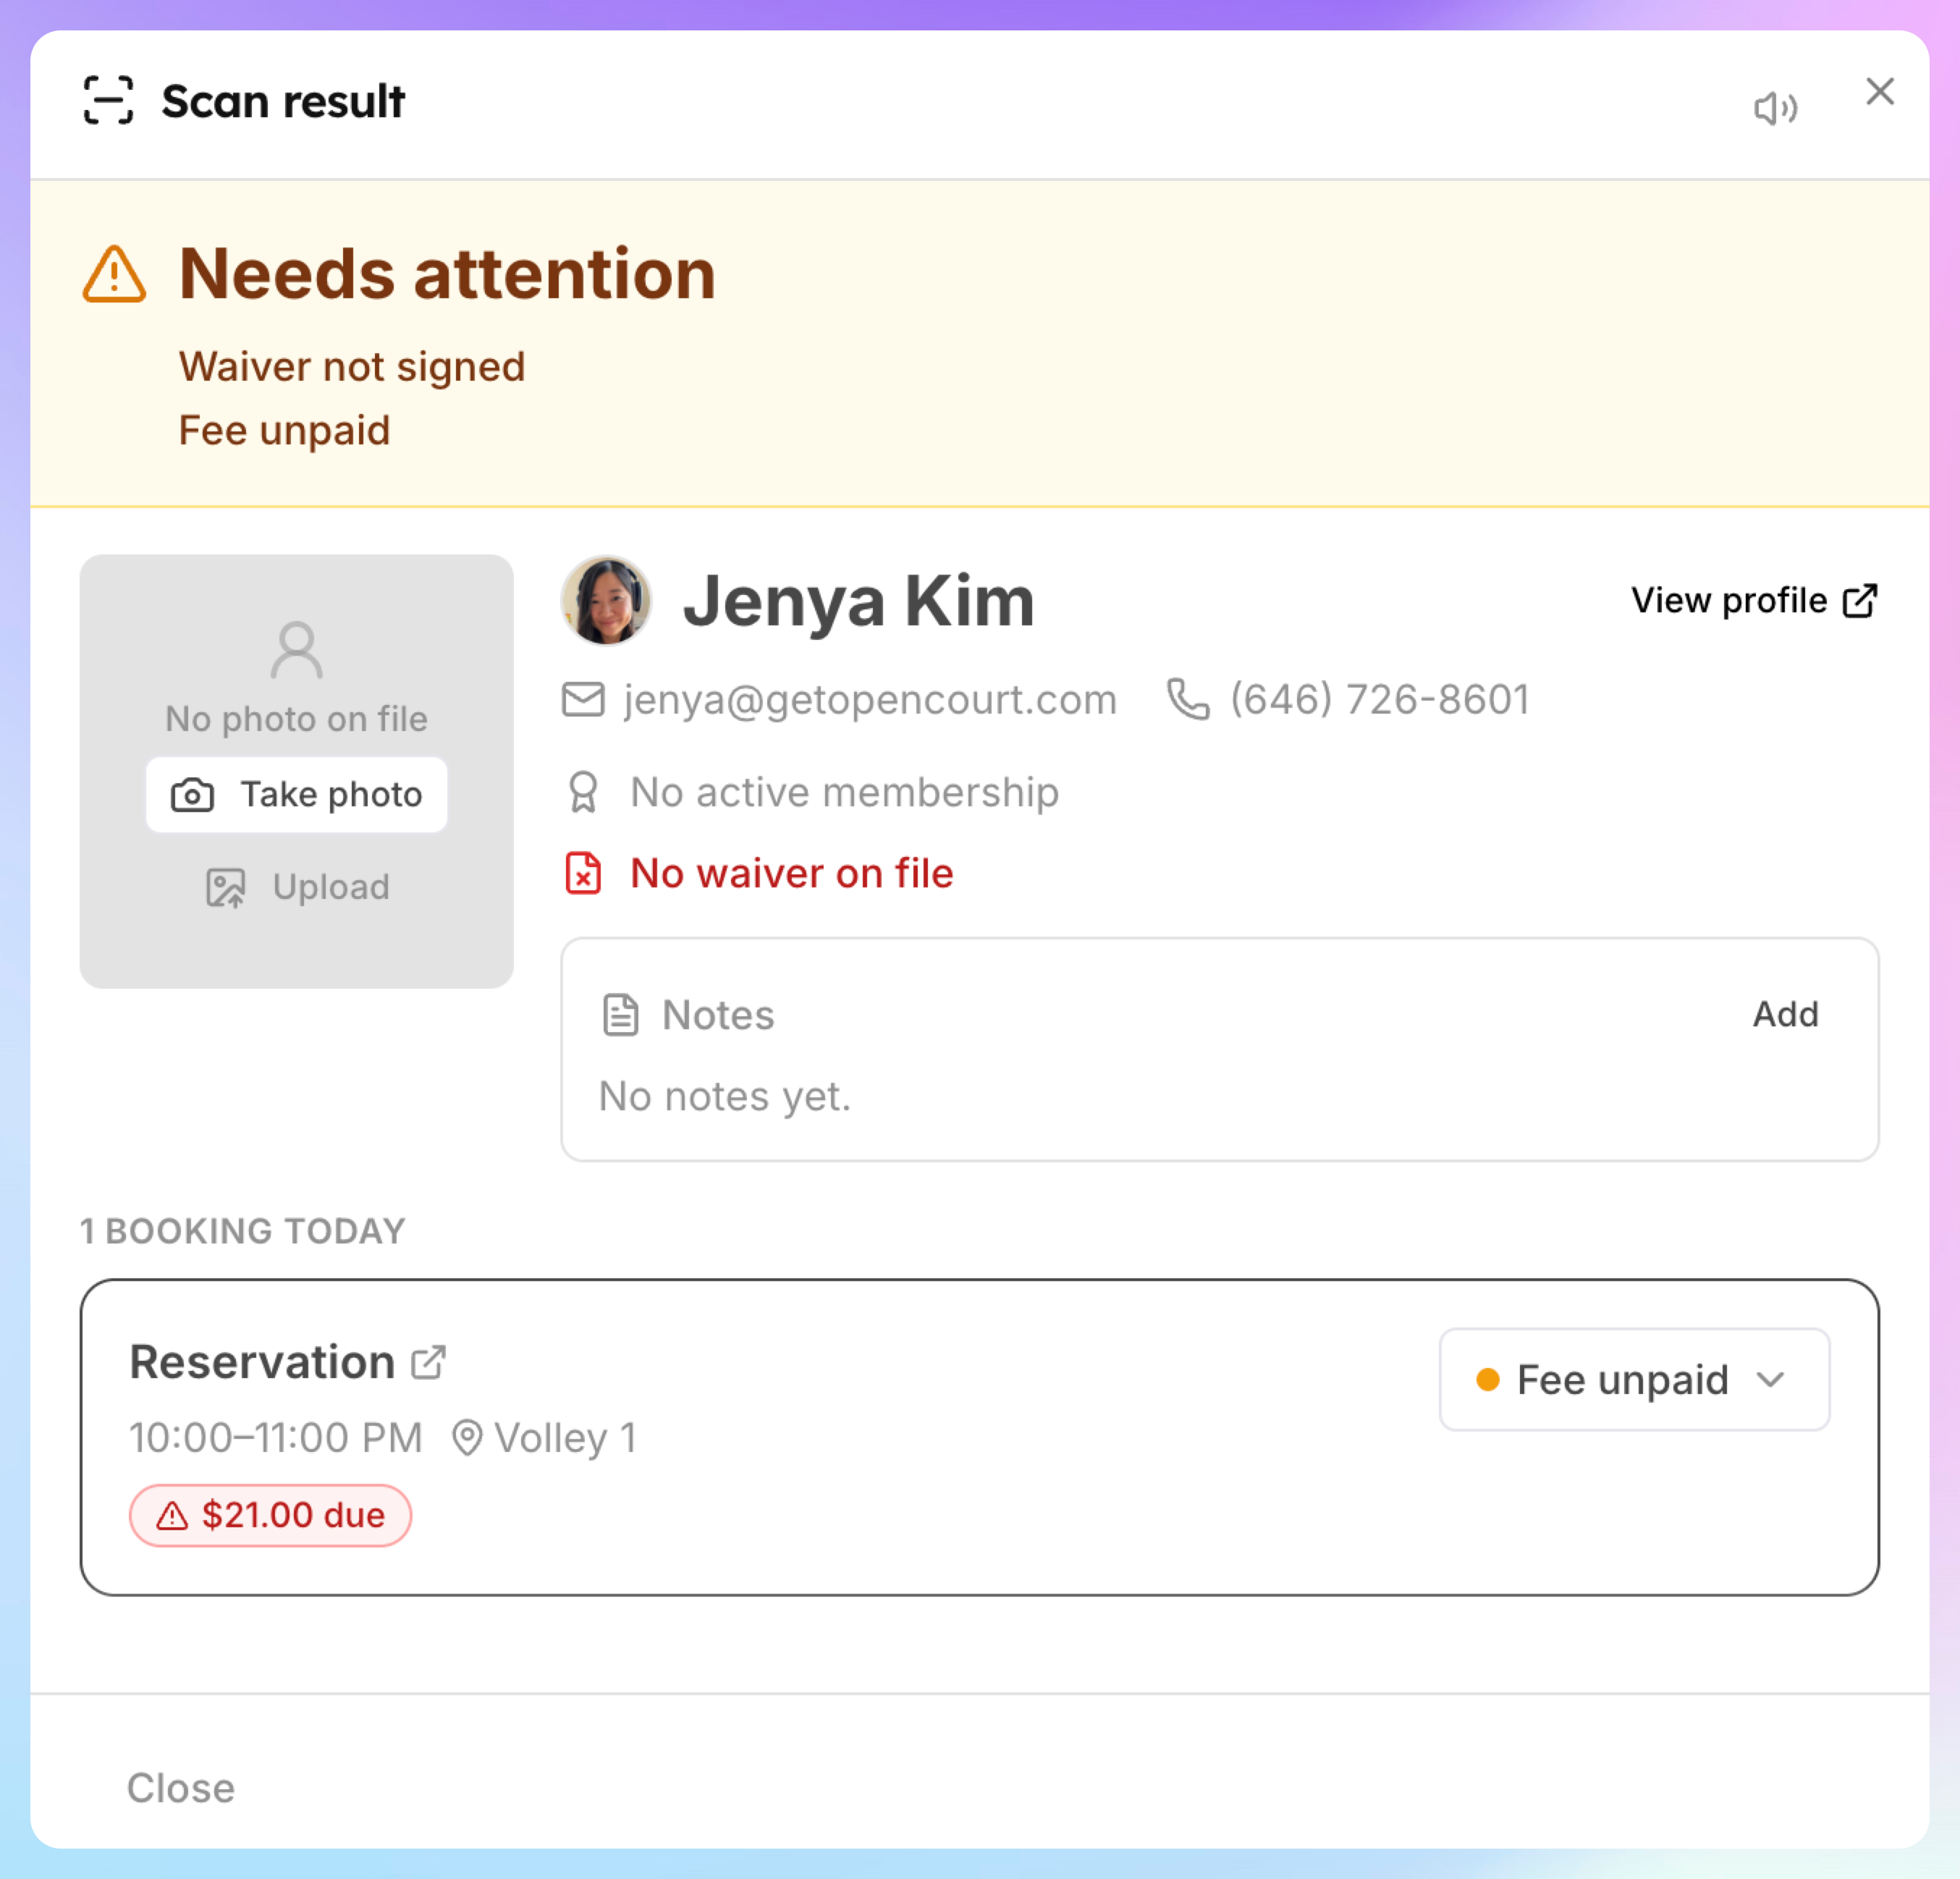
A Scan result window opens showing Needs attention if something needs a look (see below).
What happens next
Every check-in appears in the Check-in panel on your Today page, under Recently checked in, with a badge showing how it happened: QR scanner (you scanned them), Self check-in (they used a self-service QR), or Staff (set by hand). The header shows a running count of how many customers have checked in today.
Handle a customer who needs attention
When the Scan result window shows Needs attention, the reason is listed at the top — for example No booking today, Waiver not signed, or Payment required. The customer also drops into the Needs attention list in the Check-in panel, so they are not lost if the next person scans before you finish.
From the Scan result window you can:
Check in a booking with one click, or open the status dropdown to set Late arrival, No show, or Not checked in.
Check in each guest on the booking — every guest has their own Check in button and status dropdown, with their waiver and payment state shown next to their name. Convert turns a name-only guest into a customer account.
Take photo to capture a check-in photo (upload a file or use the computer's camera).
Add a note, or open the customer's full record with View profile.
For someone who is not a customer of this club yet, Add as customer — then their check-in continues.
To come back to someone later, open the Check-in panel on Today: click Resolve on their card to reopen their result, or dismiss the card once they are handled. Anyone who gets checked in — by you or by any other means — clears from Needs attention automatically.
Check someone in early
A scan only checks a customer in automatically once their check-in window opens (a set number of minutes before the booking starts — 180 by default, changed under Settings → Check-in). A booking whose window hasn't opened yet still appears in the Scan result with a Starts in [hours and minutes] countdown — and its Check in button works. If someone arrives early and you want them in, check them in; the window only limits the automatic behavior, never you.
The bookings list is headed [N] bookings today, so when a customer has more than fits on screen — a session now and a reservation tonight — the count tells you to scroll for the rest.
Check a customer in without a scanner
Click Find Customer at the top of the admin panel.
Search by name or email and pick the customer.
Their Scan result window opens — check in their booking or handle whatever needs attention, the same as a scan.
If something goes wrong
Nothing happens when I scan — make sure the scanner is plugged in and set to send an Enter at the end of each scan (the default on most models). Test it by scanning into any text box: the code should appear followed by a new line.
The scanner types strange characters — set the scanner (and the computer keyboard layout) to a US layout, or contact support; the Check-In QR uses characters that survive most layouts, but a mismatched scanner setting can still garble input.
"Not a customer" for someone who is a member — you may be on the wrong club, or they used a different account. Confirm the club in the top bar, then use Add as customer or Find Customer to locate the right record.
The customer can't find their QR — it is in the OpenCourt app under My Profile → Check-In QR Code. If they are not on the app, use Find Customer instead.