Creating a Free Pass for Events with a Specific Tag
Give your members free access to events tagged with a specific category — like a skill level, age group, or program name. Only events with the matching tag are covered.
Example: Members get 1 free "Youth Program" class per week.
Prerequisites
Before creating this pass, make sure you've created the event tag you want to use:
Go to Events → Tags
Create a tag (e.g., "Team Practice", "Beginner", "Youth Program")
Assign the tag to the relevant events
See Event Tags for details on creating and assigning tags.
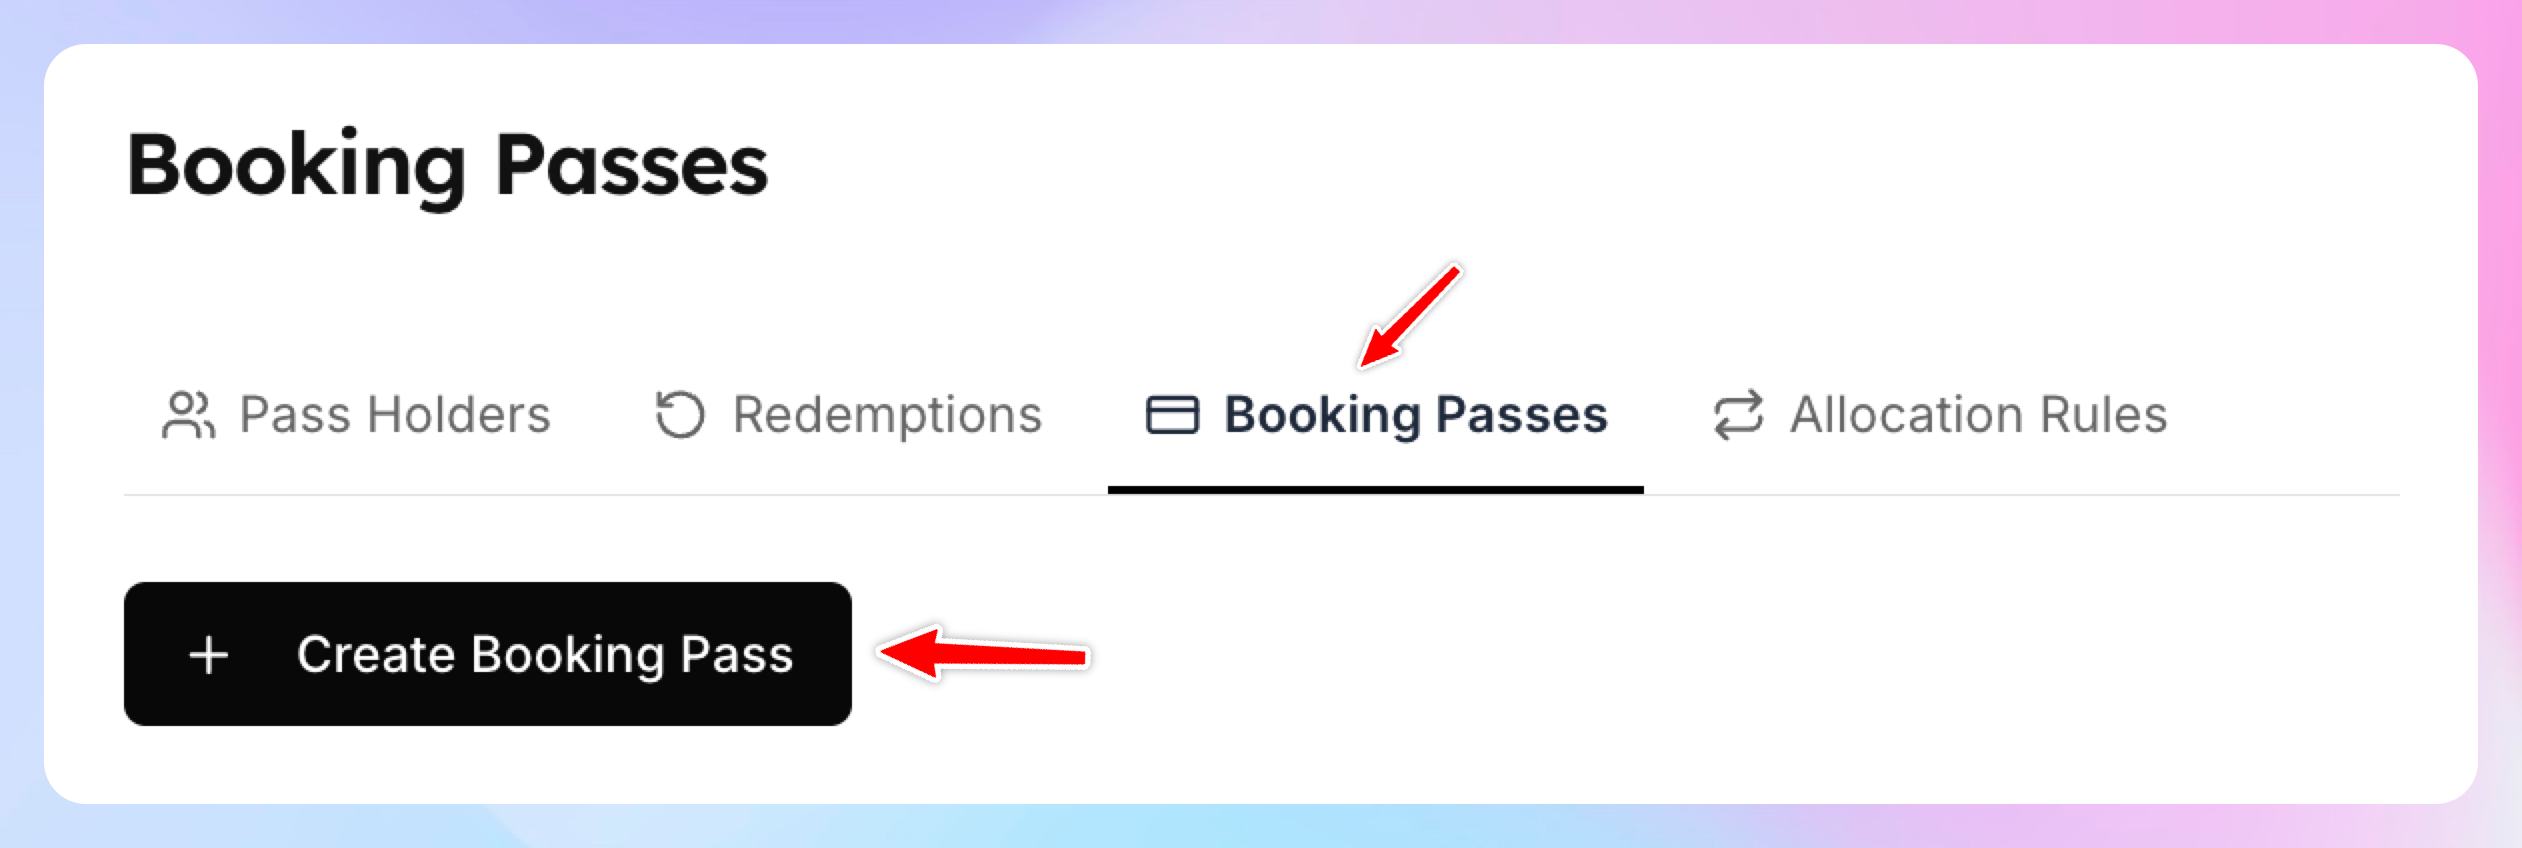
Step 1: Create the Pass Template
Go to Booking Passes page
Click Create Booking Pass
Enter the name and the description of the pass (optional)
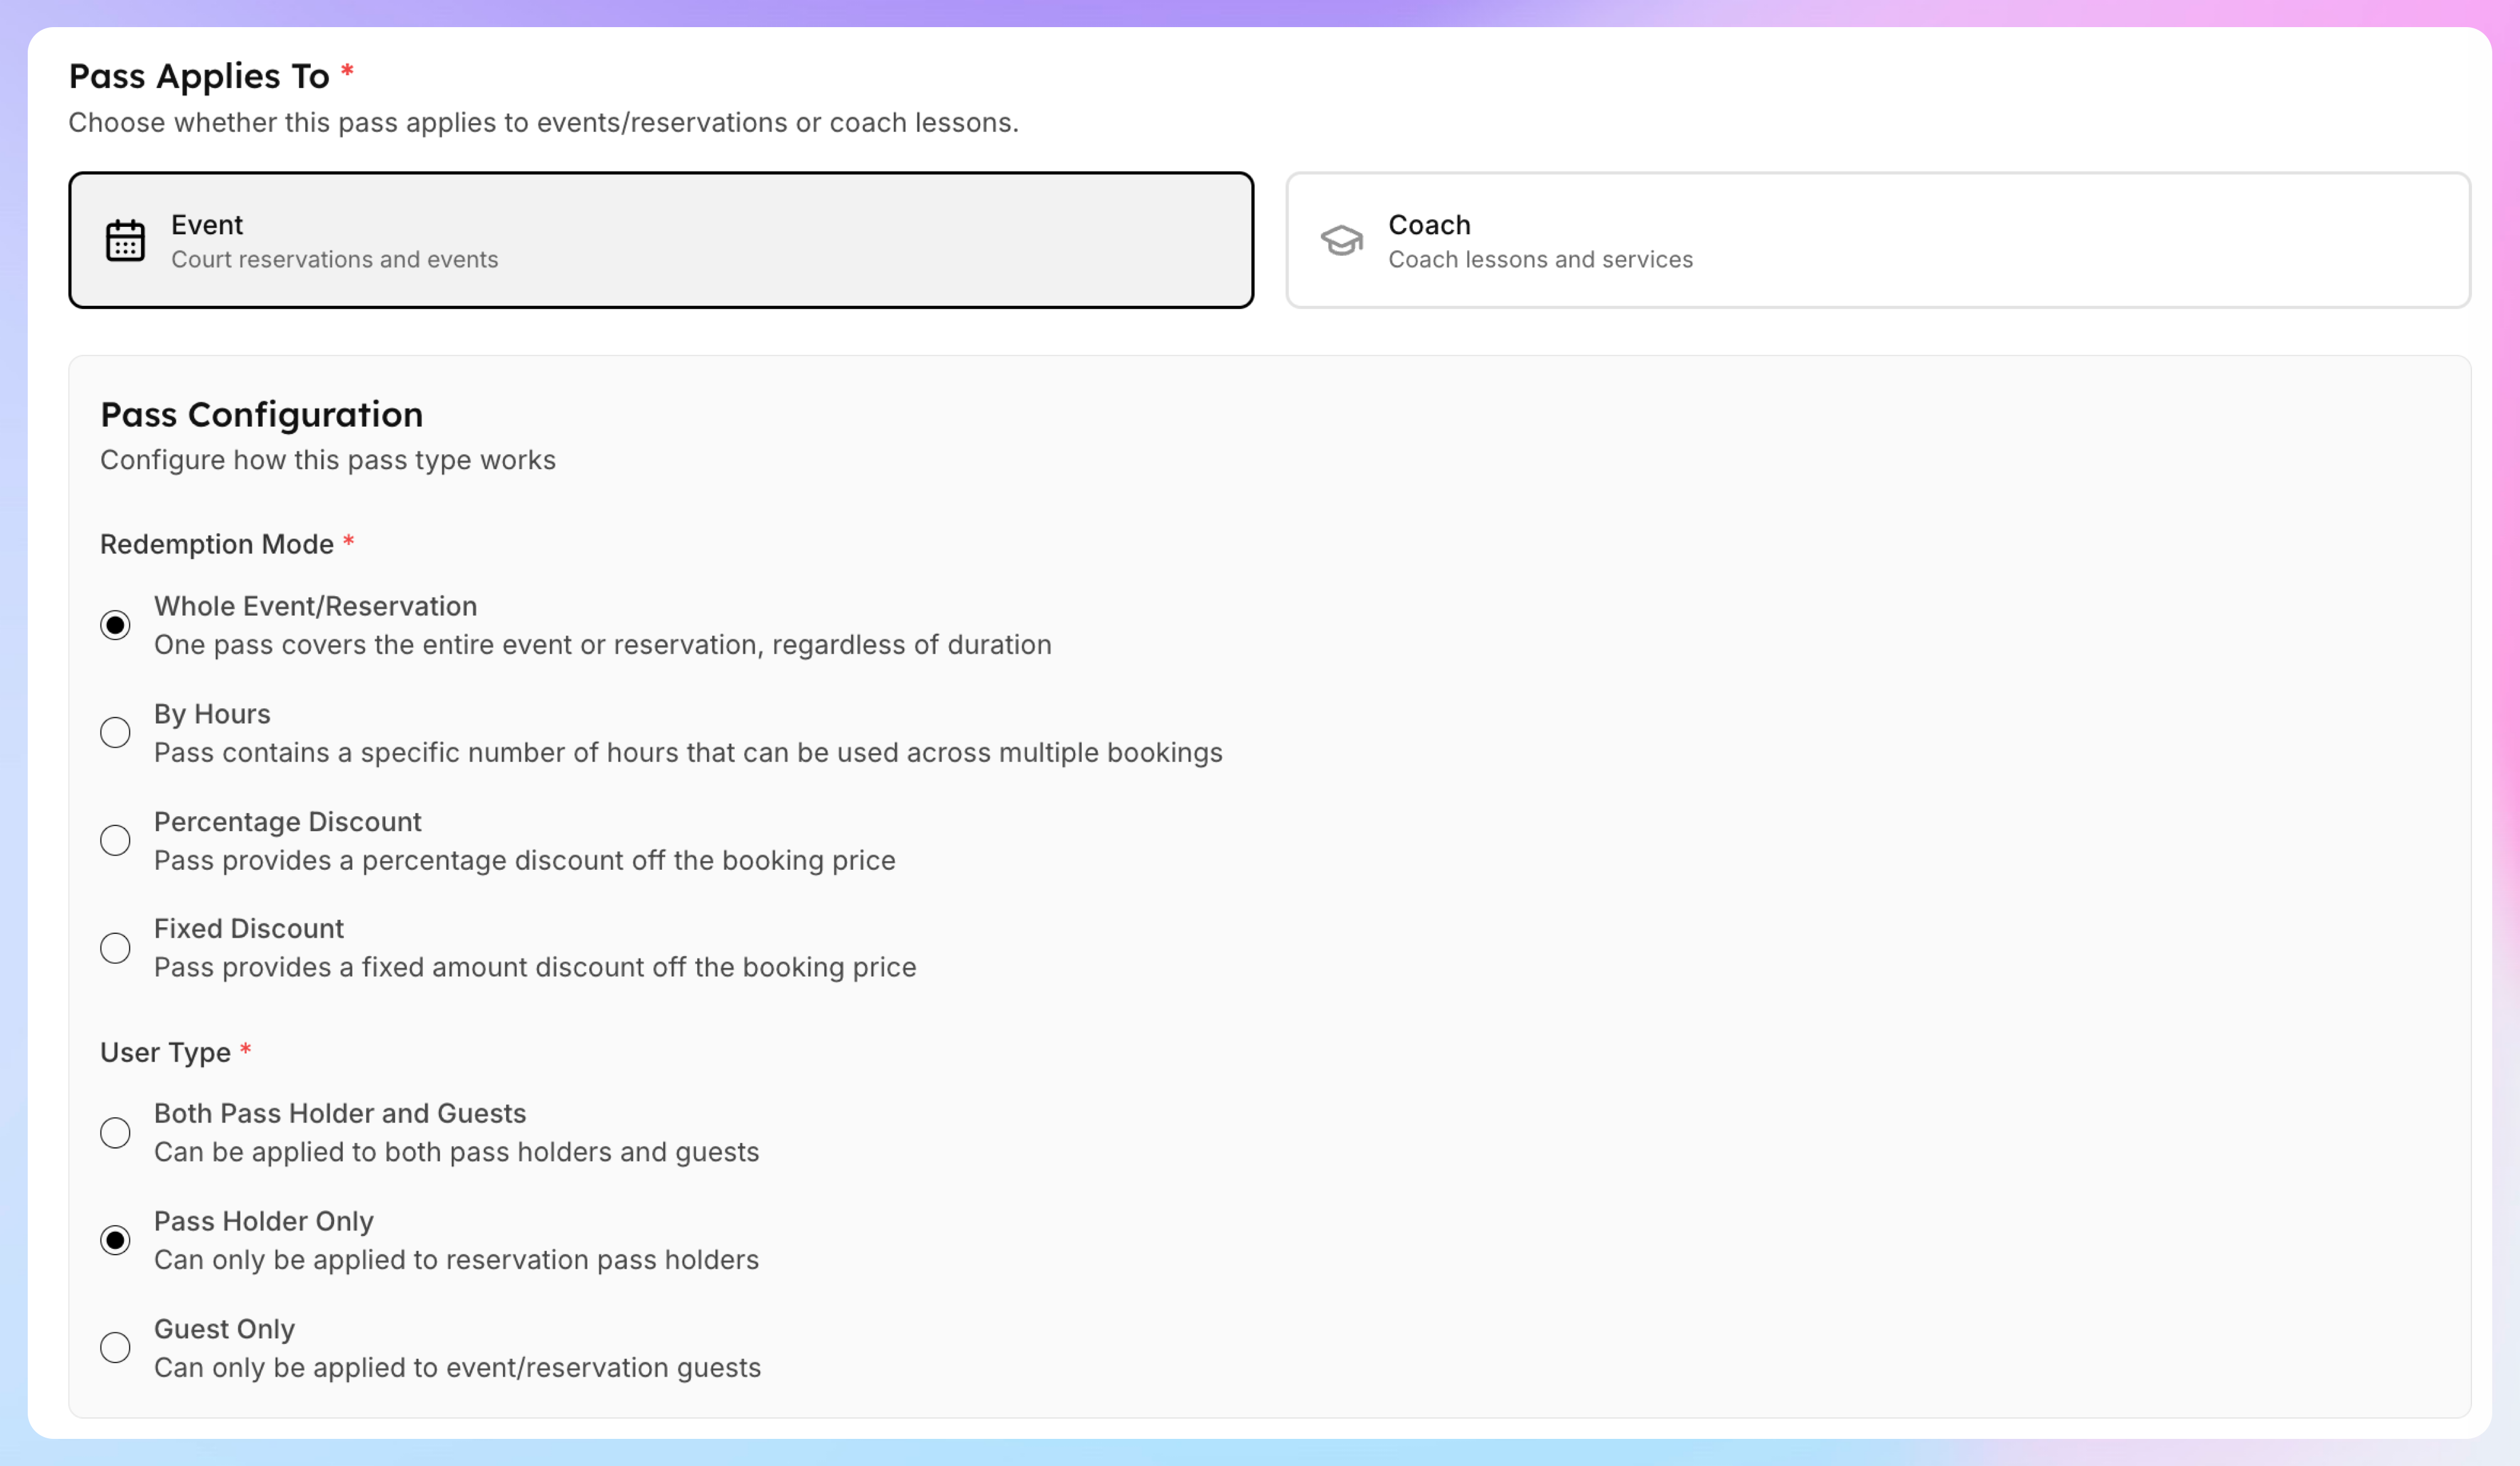
Pick Event that it applies to.
Choose Whole Event/Reservation
Choose Pass Holder Only as a user type that it can be applied to.
If you want your members to share it with their family members, toggle on this setting:

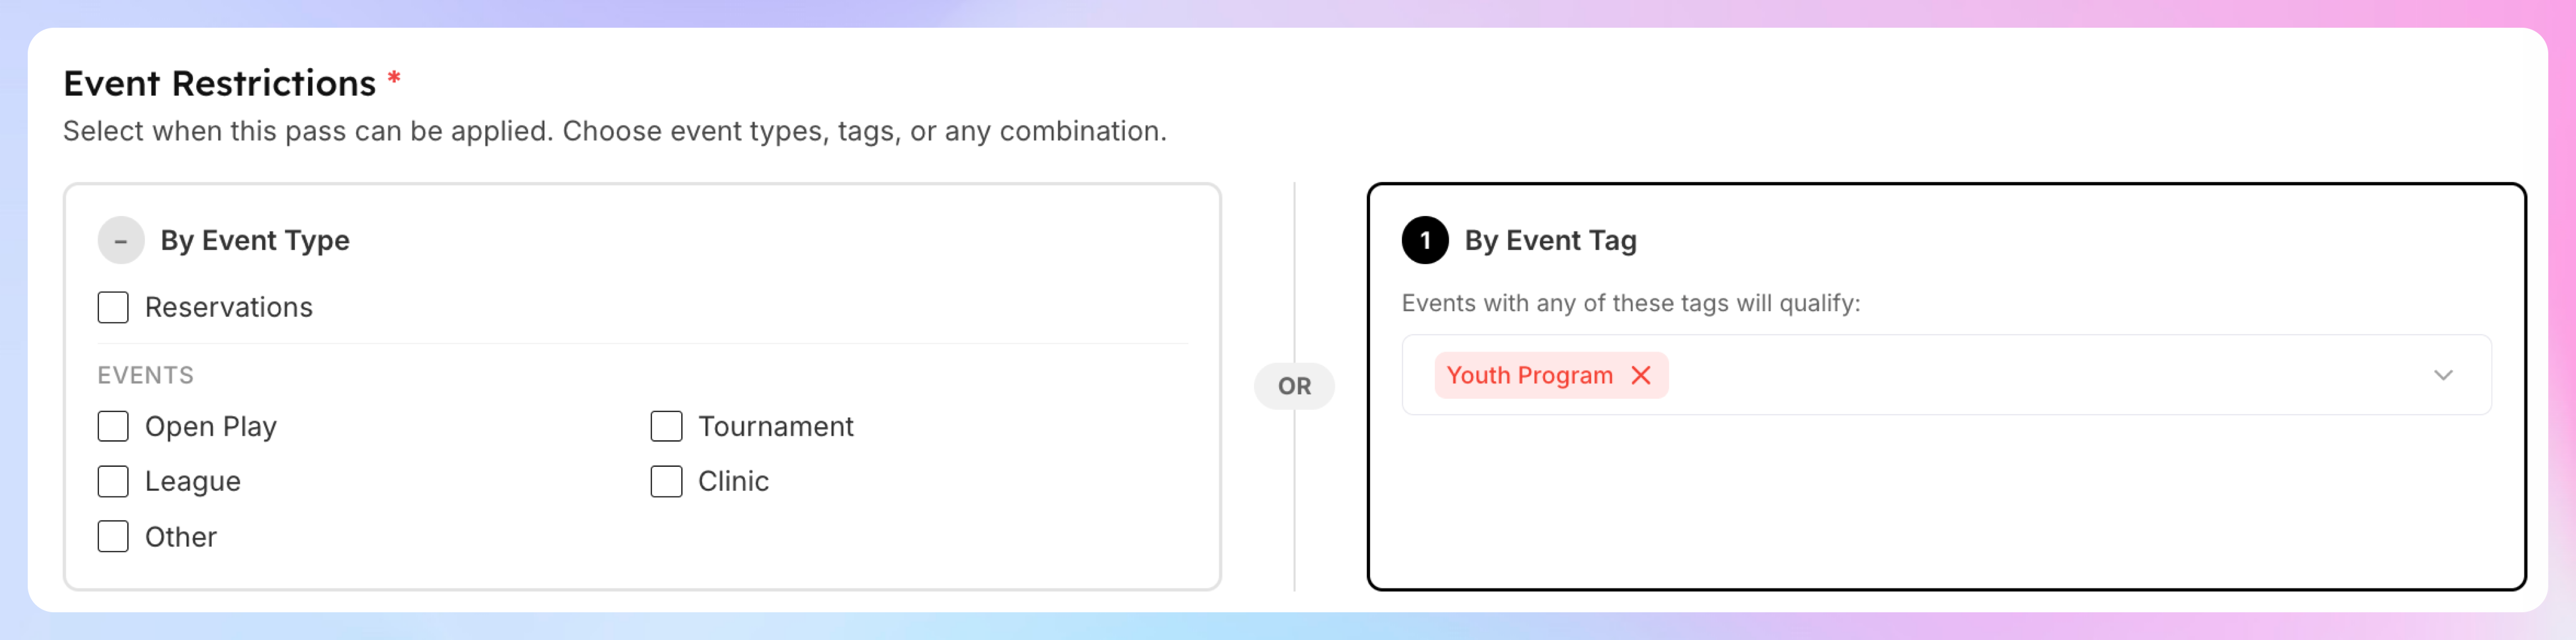
Under Event Restrictions, enter the tag you want the pass to be applied to. In this case the pass will be applied to all events with the tag “Youth Program”
Click Create Booking Pass.
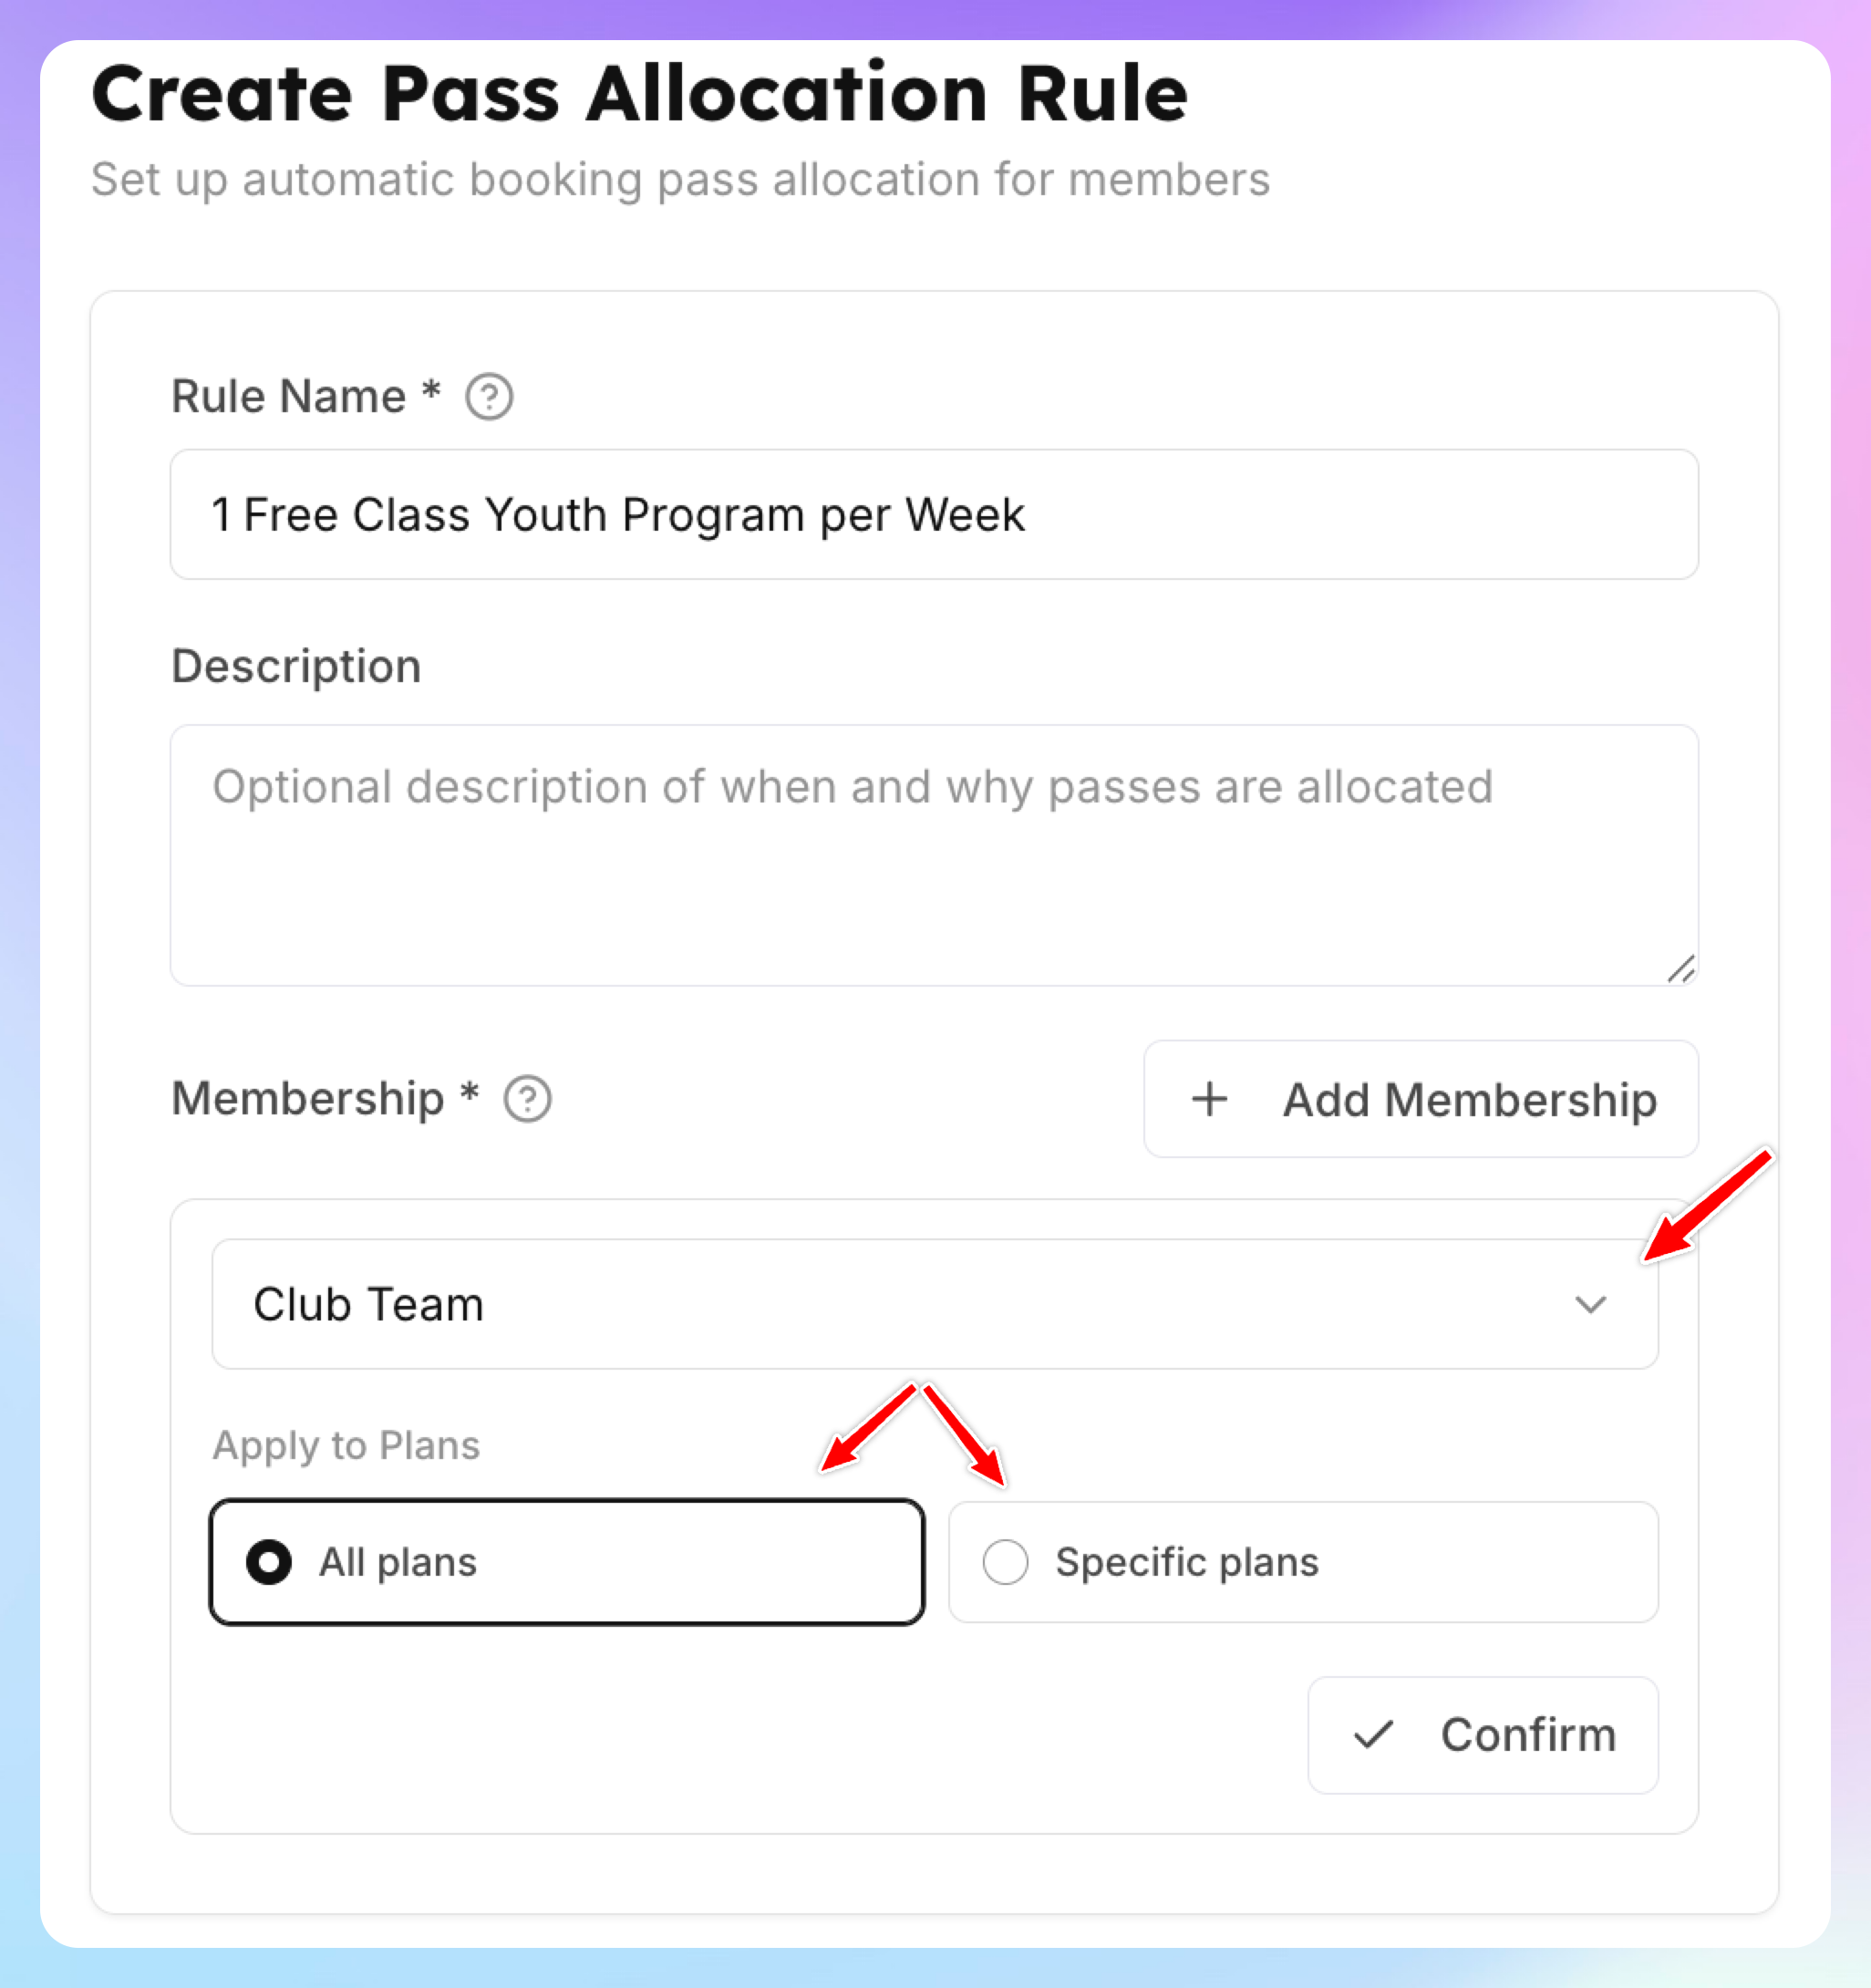
Step 2: Create the Allocation Rule
Now set up automatic allocation so members get passes when their membership activates.
Go to Booking Passes → Allocation Rules
Click Create Rule

Use this form to choose who will receive these passes, when they’ll be granted, and how often they’ll be issued.
1. Fill out the name and the description (optional)
2.Select the memberships and plans these passes should apply to.
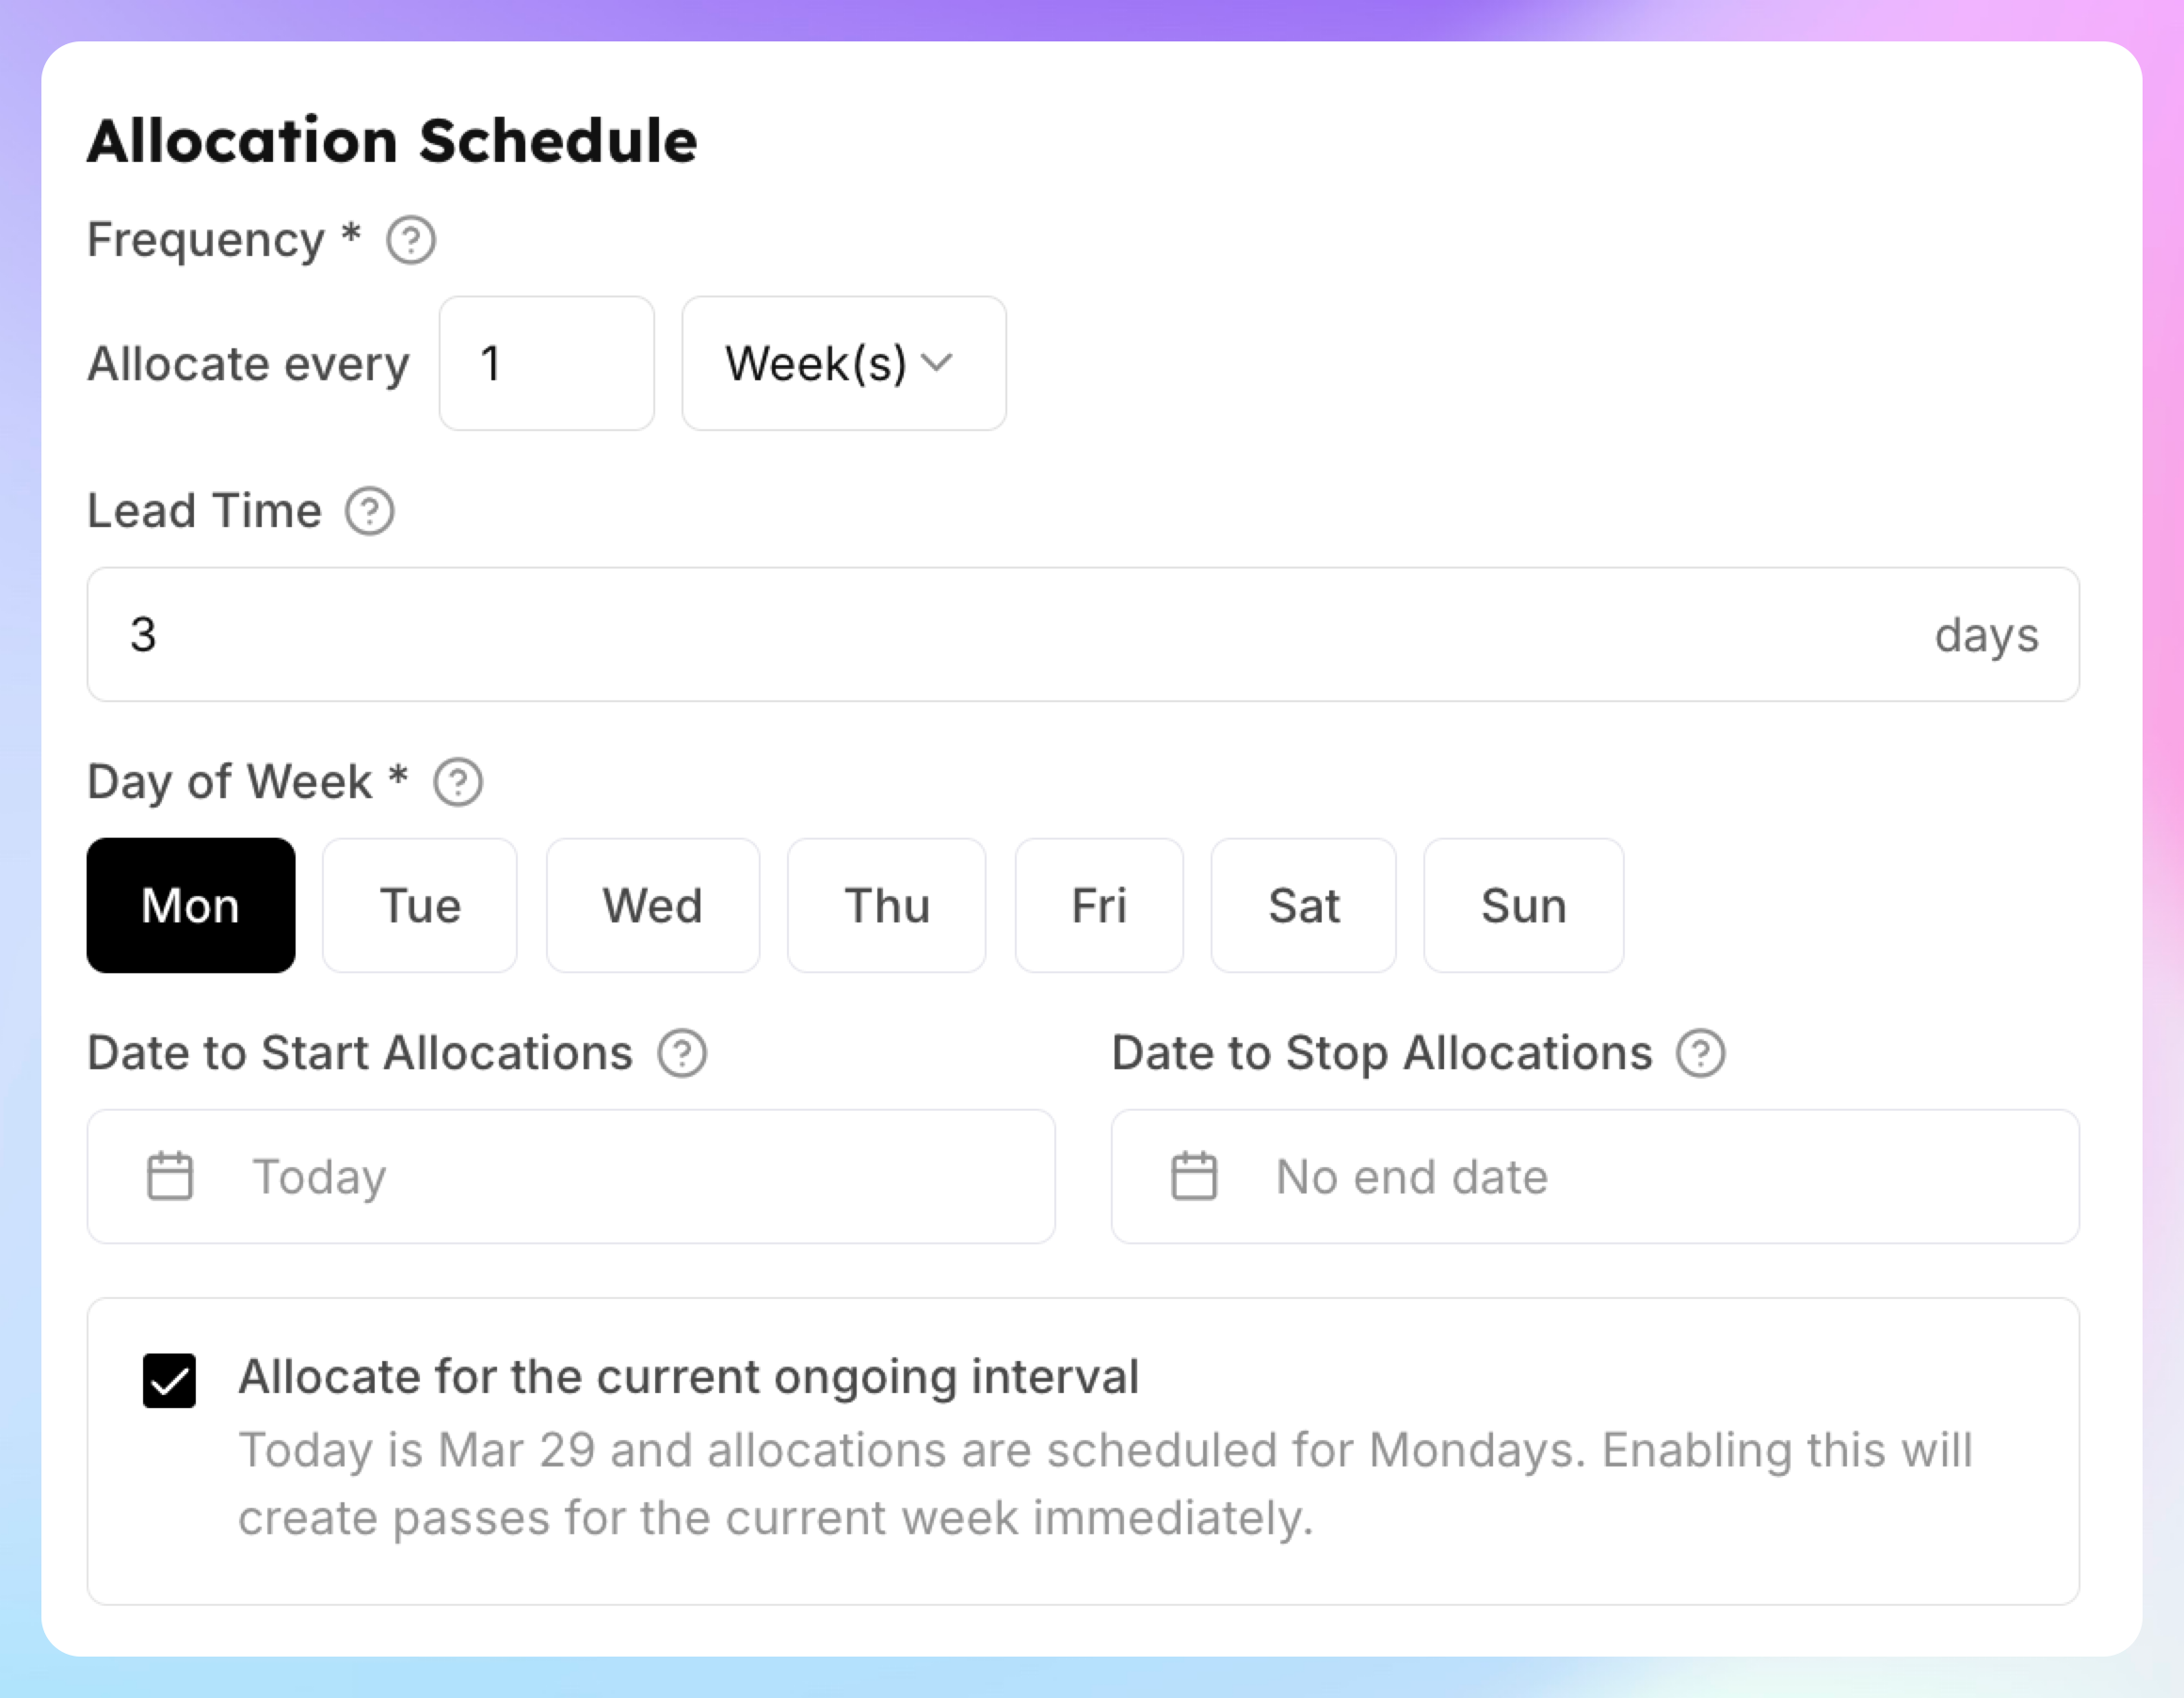
3. Define how often you will grant those passes - e.g. every month, or every week etc.
4. Choose how many days in advance the passes should be issued (Lead Time). For example, if members can book 3 days in advance, the passes should be issued 3 days before the start of the new week or month. If passes are issued weekly, also select the day of the week when they should be allocated.
5. If you check “Allocate for the current ongoing interval”, it’ll create the passes for he current period. Otherwise, it will start generating passes from the next month/week.
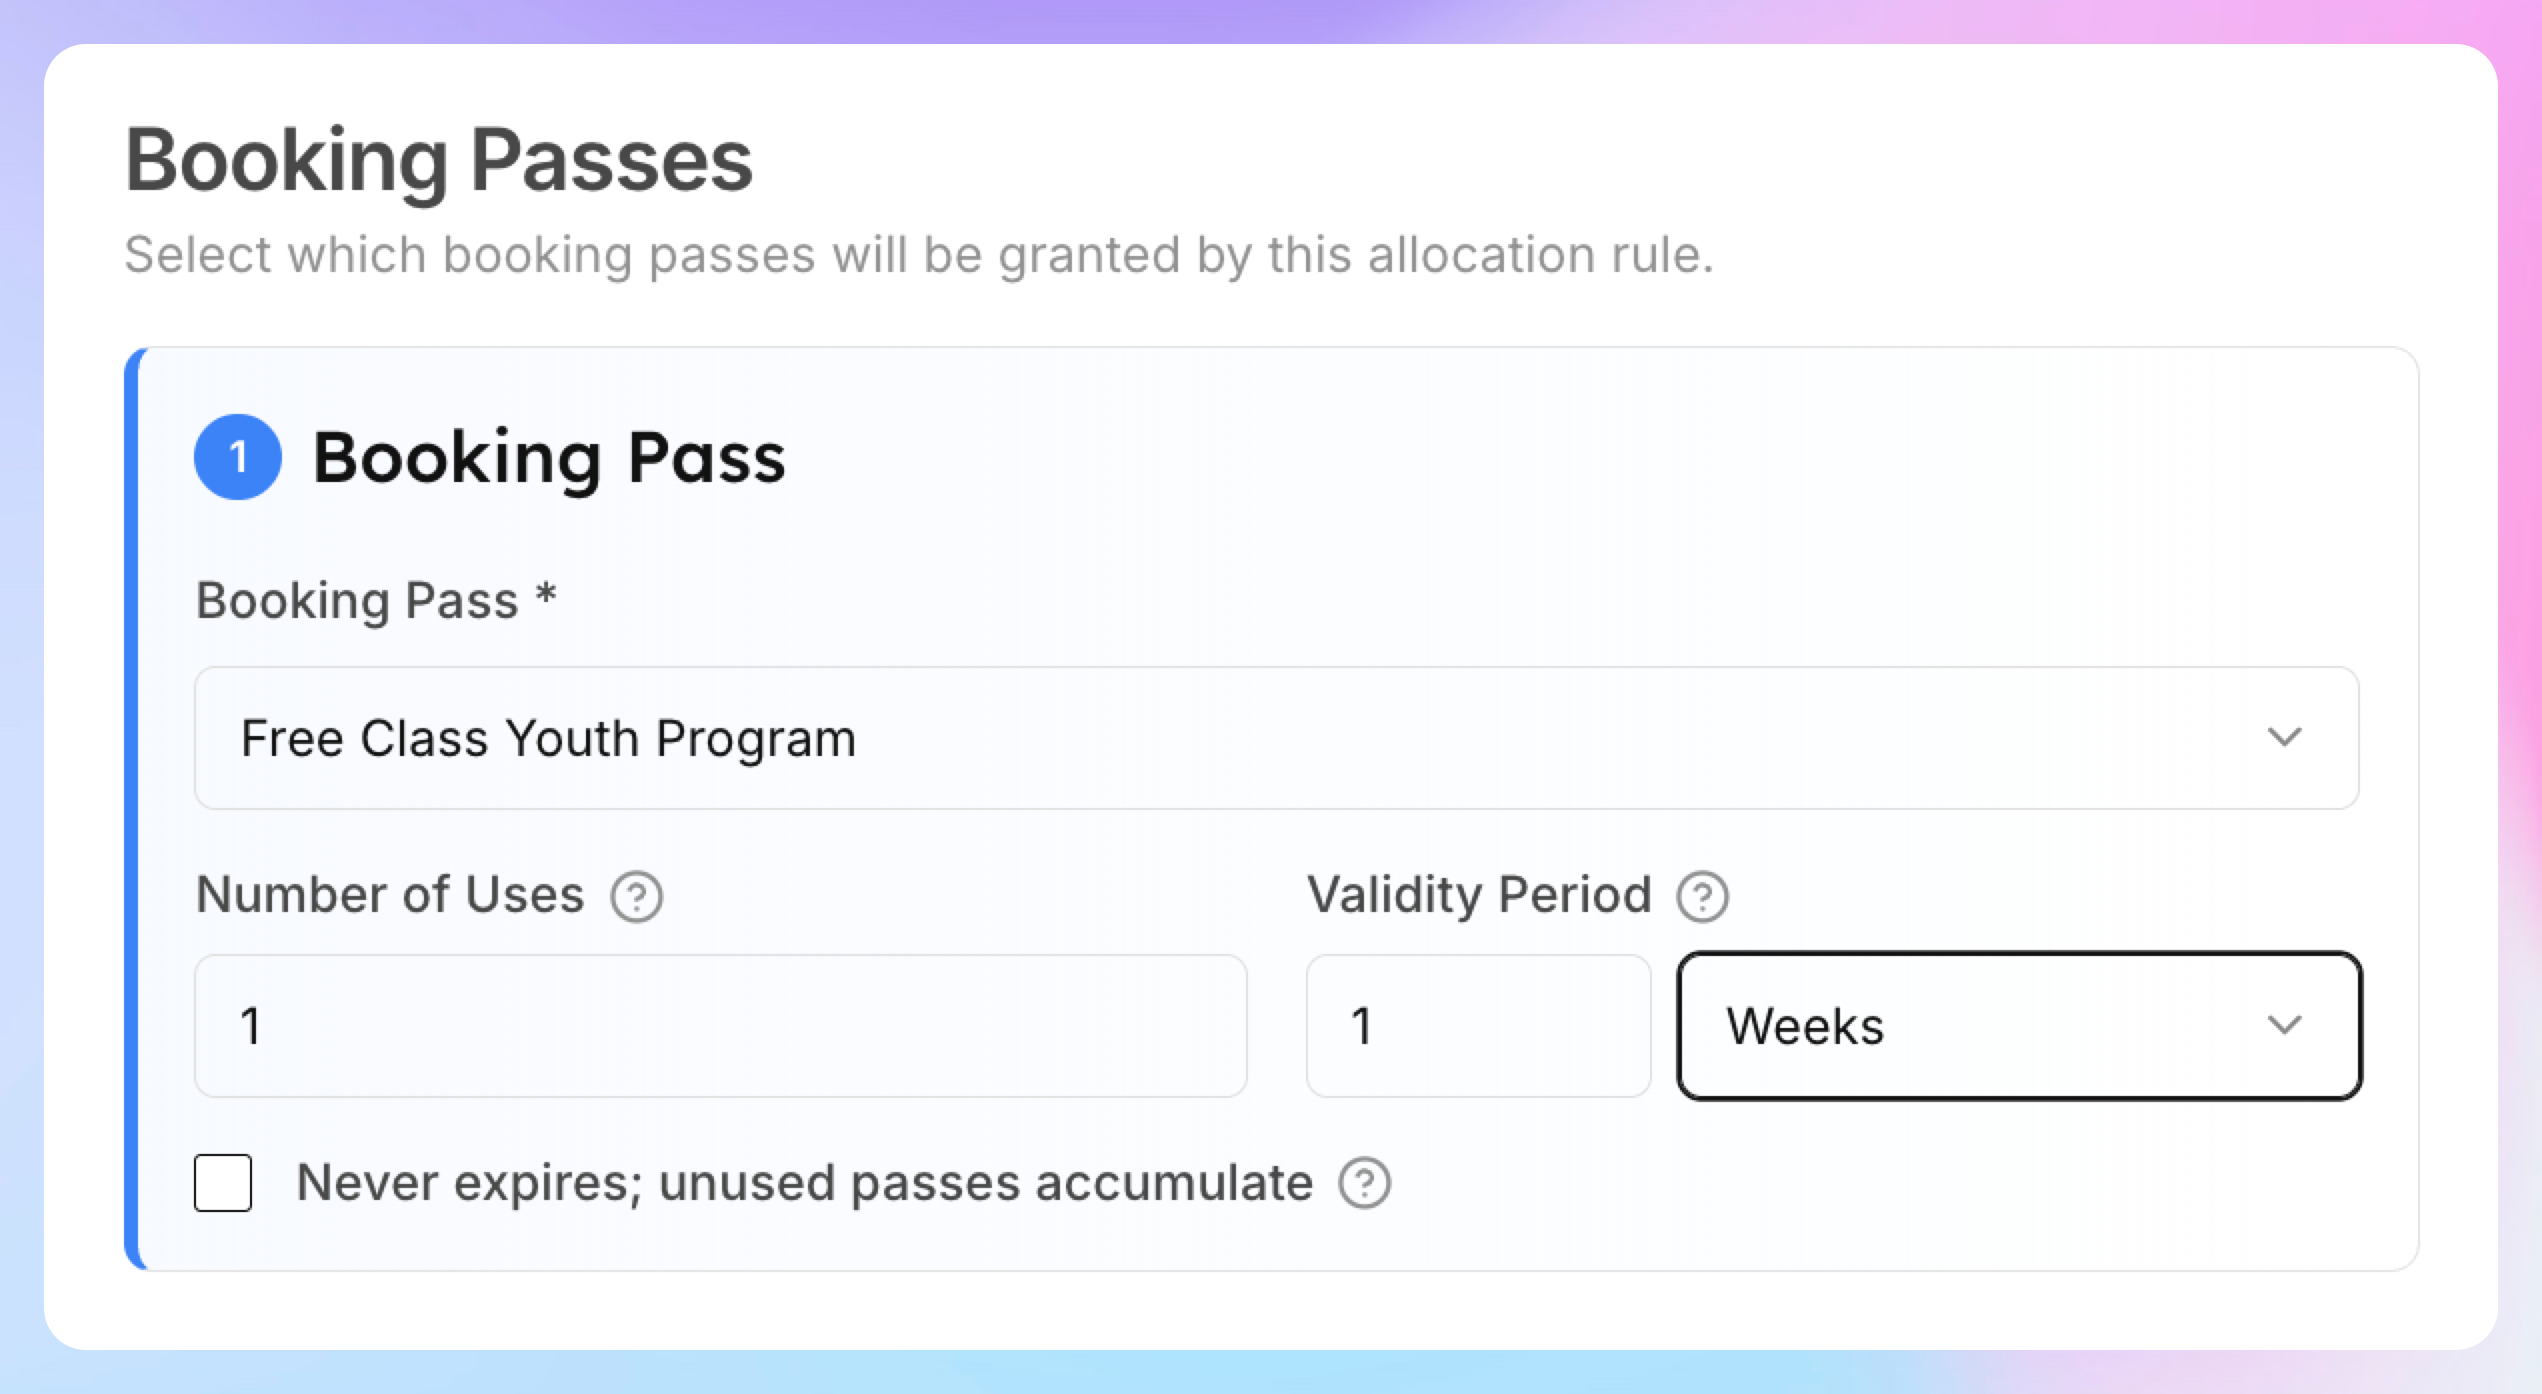
6. Under Booking Passes, click Add a booking pass and configure how many passes you want to give per certain period.
Click Save.
How It Works for Members
A member joins an event tagged "Group Fitness"
The system finds an available pass with that tag restriction and applies it
The event fee is waived — the pass is consumed
If the member joins another "Group Fitness" event that same week, they pay full price
If the member joins an event without the tag (e.g., a regular Open Play), the pass is not used
Next Monday, a new pass is allocated automatically
How Tag Matching Works
The pass applies to any event that has any of the selected tags
If you select multiple tags (e.g., "Youth Program" and "Yoga"), the pass applies to events with either tag
If you also check event types (e.g., Clinic), the pass applies to events matching the event type OR the tag — it's OR logic, not AND
Variations
Multiple tags: Select several tags to make the pass cover a broader set of events — e.g., "Beginner" and "Intermediate" to cover all non-advanced classes.
Tag + event type: Check both a tag and an event type for maximum flexibility. For example, check "Clinic" event type and "Beginner" tag — the pass covers all clinics OR any event tagged "Beginner."
Monthly instead of weekly: Change the frequency to "Month(s)" for a monthly allowance instead.
Key Points
Only events with the matching tag are covered — untagged events are not affected
Remember to tag your events consistently — if an event isn't tagged, the pass won't apply even if it's the right type of event
Tags use OR logic: selecting multiple tags means any one of them qualifies the event
Unused passes expire based on the validity period unless you check "Never expires"