Creating an event
Events are Open Plays, Socials, Clinics, Tournaments, Leagues, Opening Parties, etc: anything that your customers can join as a participant. How are Events different from Reservations?
OpenCourt lets you publish and manage any kinds of event in just a few clicks.
Go to the Schedule page and click on a time that the event is supposed to start, at the court (or one of the courts) where event will be taking place.
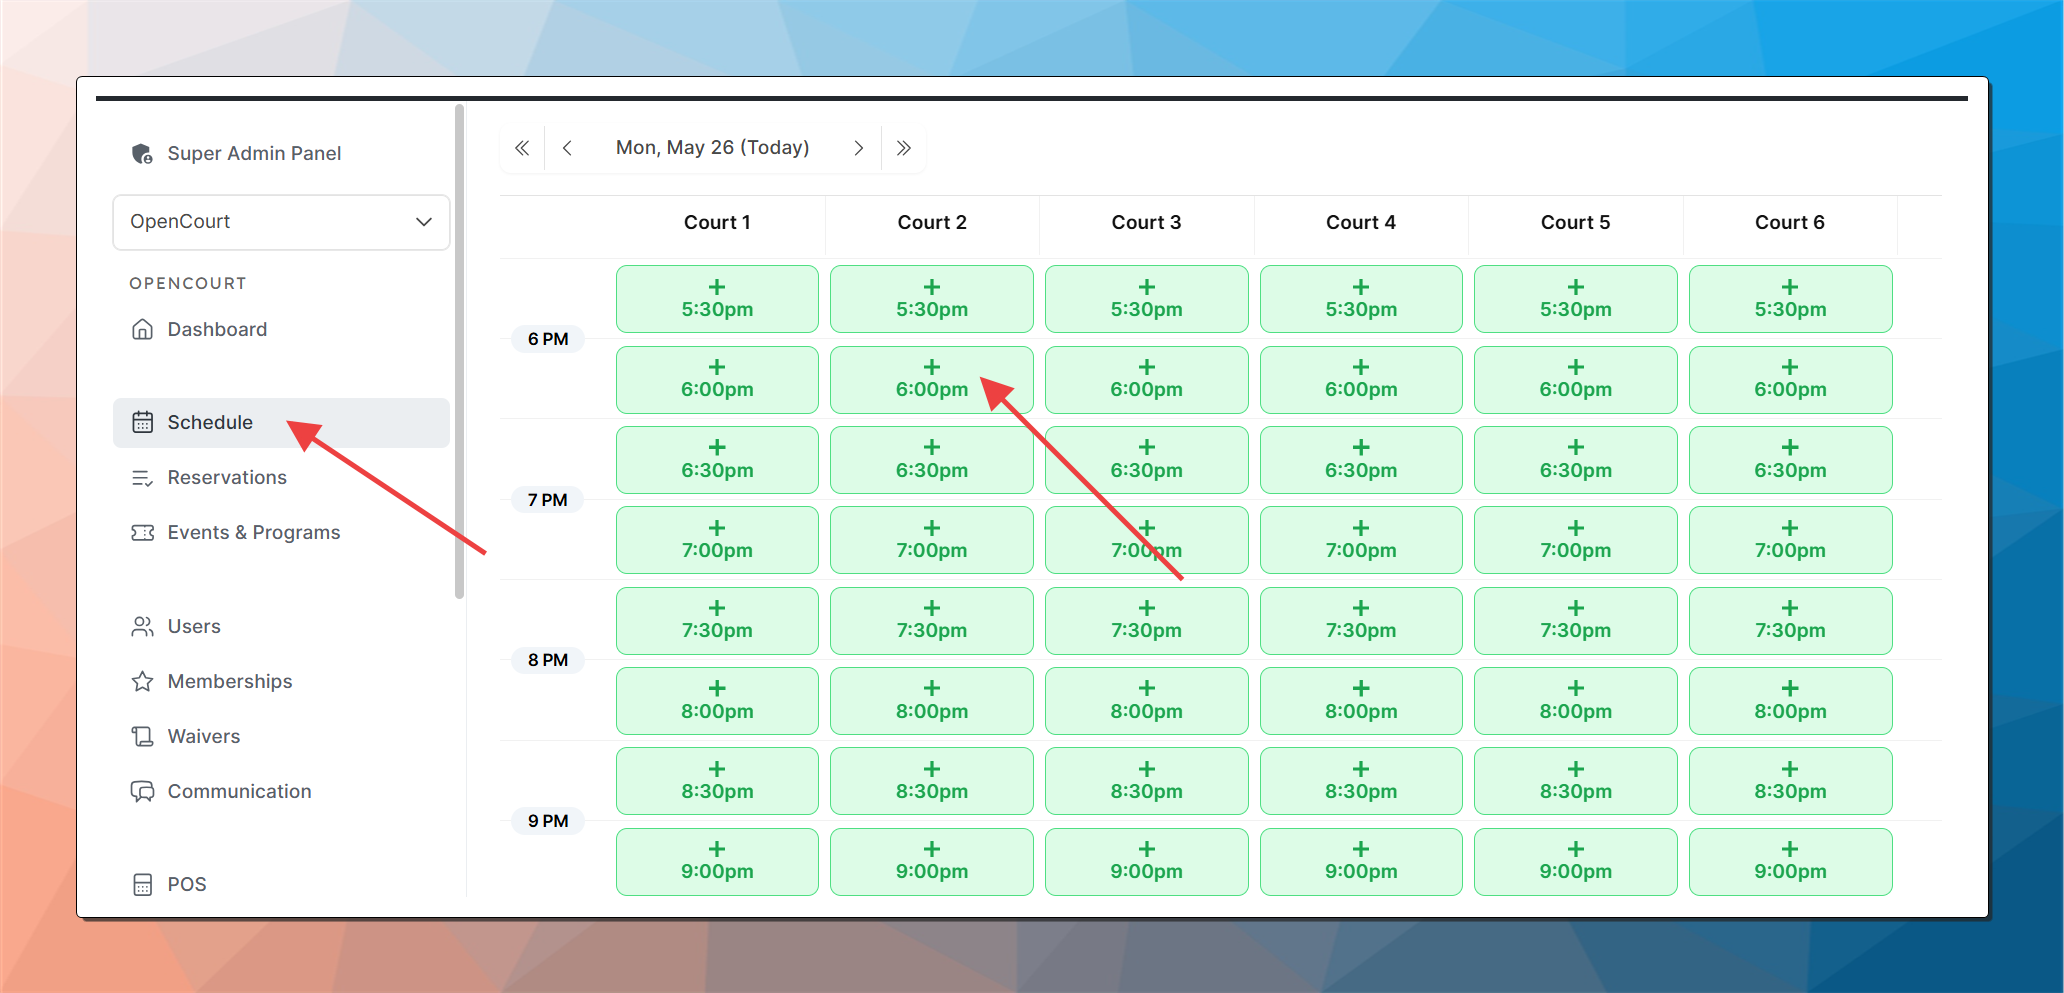
The New Booking window will appear.
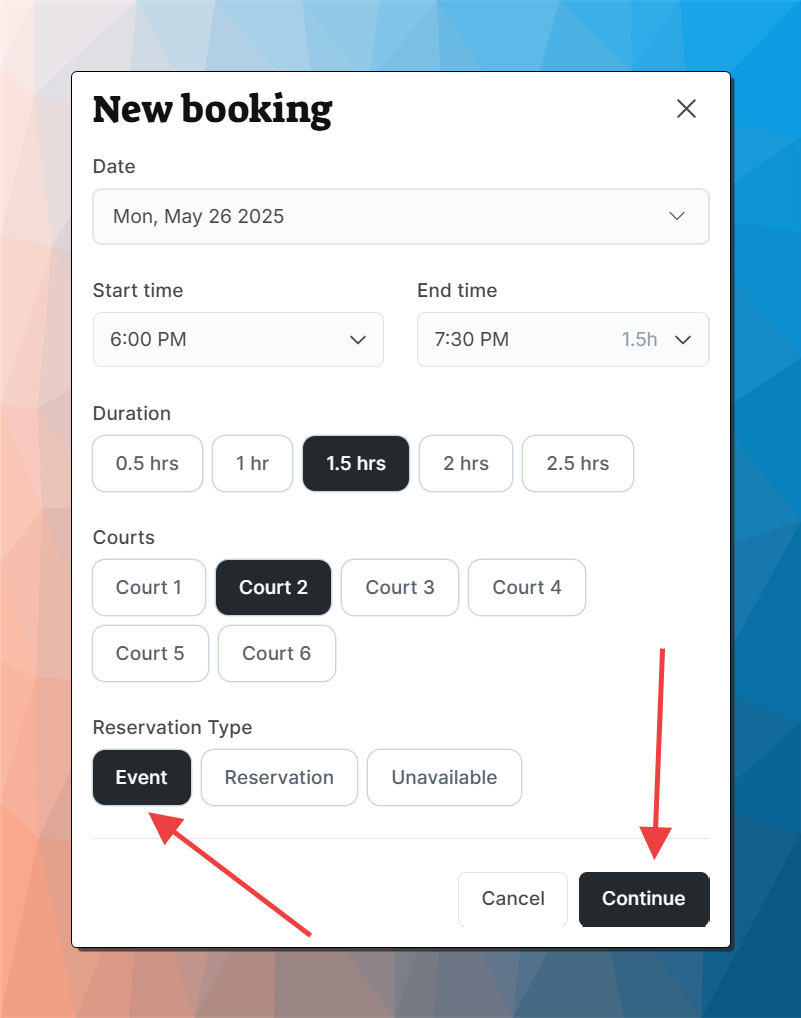
Date, Start time and court will already be pre-selected
Select the End Time or one of the Duration options
Select additional courts, if needed. If the event is taking place over multiple days (like a League or a multi-day Tournament), or it starts and ends on different courts at different times, you’ll be able to adjust the time slots later.
Select the Reservation Type as Event.
Press Continue.
The New Event page will appear.
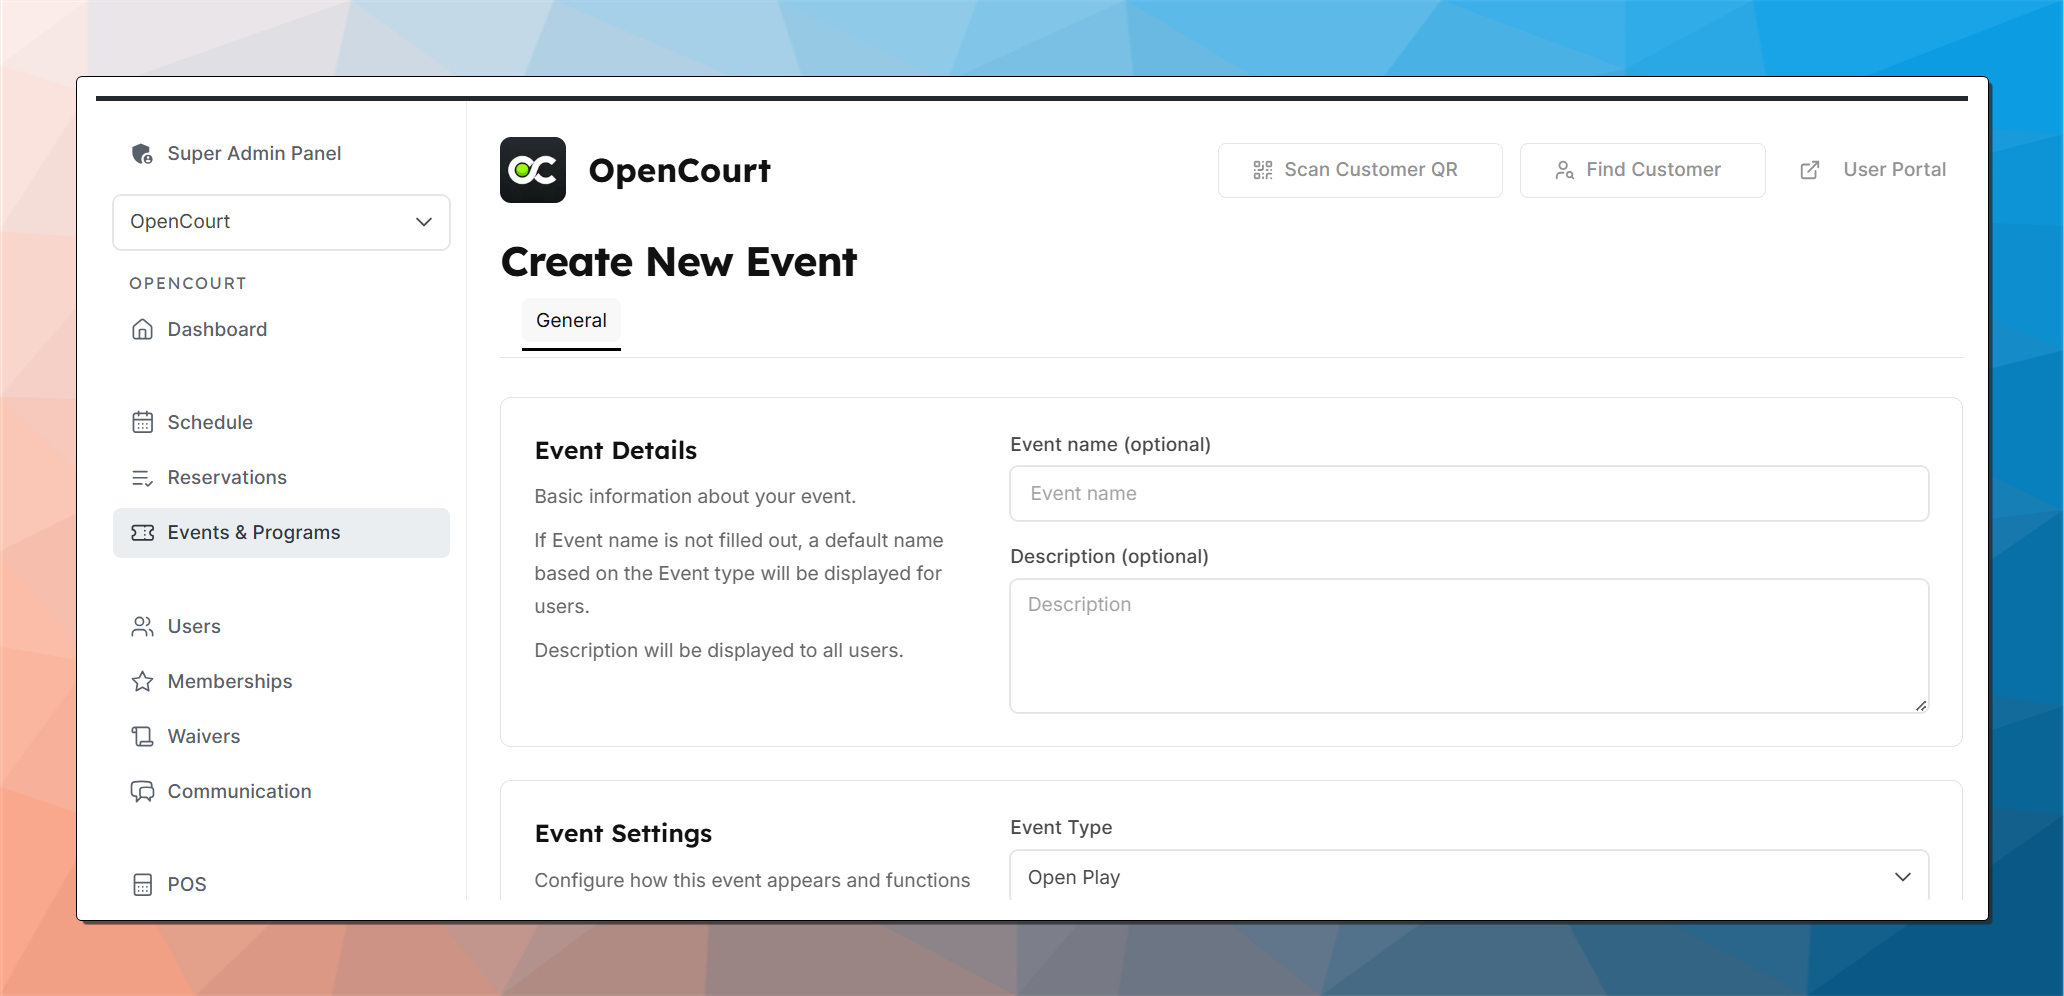
Event Name & Description: will be displayed to the user.
Event Type: will be displayed to the user; also you can later filter by the event in the various places in the admin panel; simplifies event filtering for your customers on their app’s Join tab.
Turn on Allow Public Registration to allow customers to join (in most cases you want it On).
Turn on Make Event Private if you’re looking to make event details hidden from anyone who sees it on the schedule; nobody would be able to see event details or join it unless you share the Private Invitation Link with them.
Max Capacity: event will stop accepting new signups once all spots are filled.
Pricing: events can be free or have a specific price. You can specify a price for each Membership Group. This is the price that a member of such Membership Group (or a non-member) would pay to join the event. Please note that pricing is set as a specific figure for the event as a whole; it’s not a per hour pricing.
Signup Questions: helpful for tournaments and leagues where you’re wanting to collect additional information, such as the partners name, team name, or a t-shirt size. You can make as many signup questions as you like for the event, and mark them as required or optional.
Skill Rating: you can set up recommended or enforced skill rating requirements for your event.
Choose time slots
Time slot will be prefilled if you started your process already selecting a time on the Schedule page. You can add, edit, remove time slots are you see fit.
Press Create Event.
Your event will now appear in both the Schedule and Events & Programs pages of the admin panel. It will also show up for the user on the Book and Join tabs of the web and mobile application.
You can also create your Event by pressing New Event button on the Events & Programs page. You’ll follow a very similar process as above, except you’ll specify the date, time, and courts as Time Slots on the page as opposed to pre-selecting them.
