Creating Events with Divisions
The Event Divisions feature lets you organize participants into groups within the same event—such as men’s and women’s brackets for a tournament, or different skill level brackets. This is especially useful when you want balanced participation or specific limits for each group.
Note: a user can sign up only for a single Division at a time in any individual event. If you’re looking to allow the user to sign up for multiple Divisions at the same time, we suggest creating multiple events.
How to Create an Event with Divisions
Start a New Event as usual
Go to Events & Programs and click Create Event.
Enter your event name and choose the event type.
Set capacity (total number of participants) and pricing as usual
Enable Divisions
Under the Pricing block, you’ll see a section for Event Divisions.
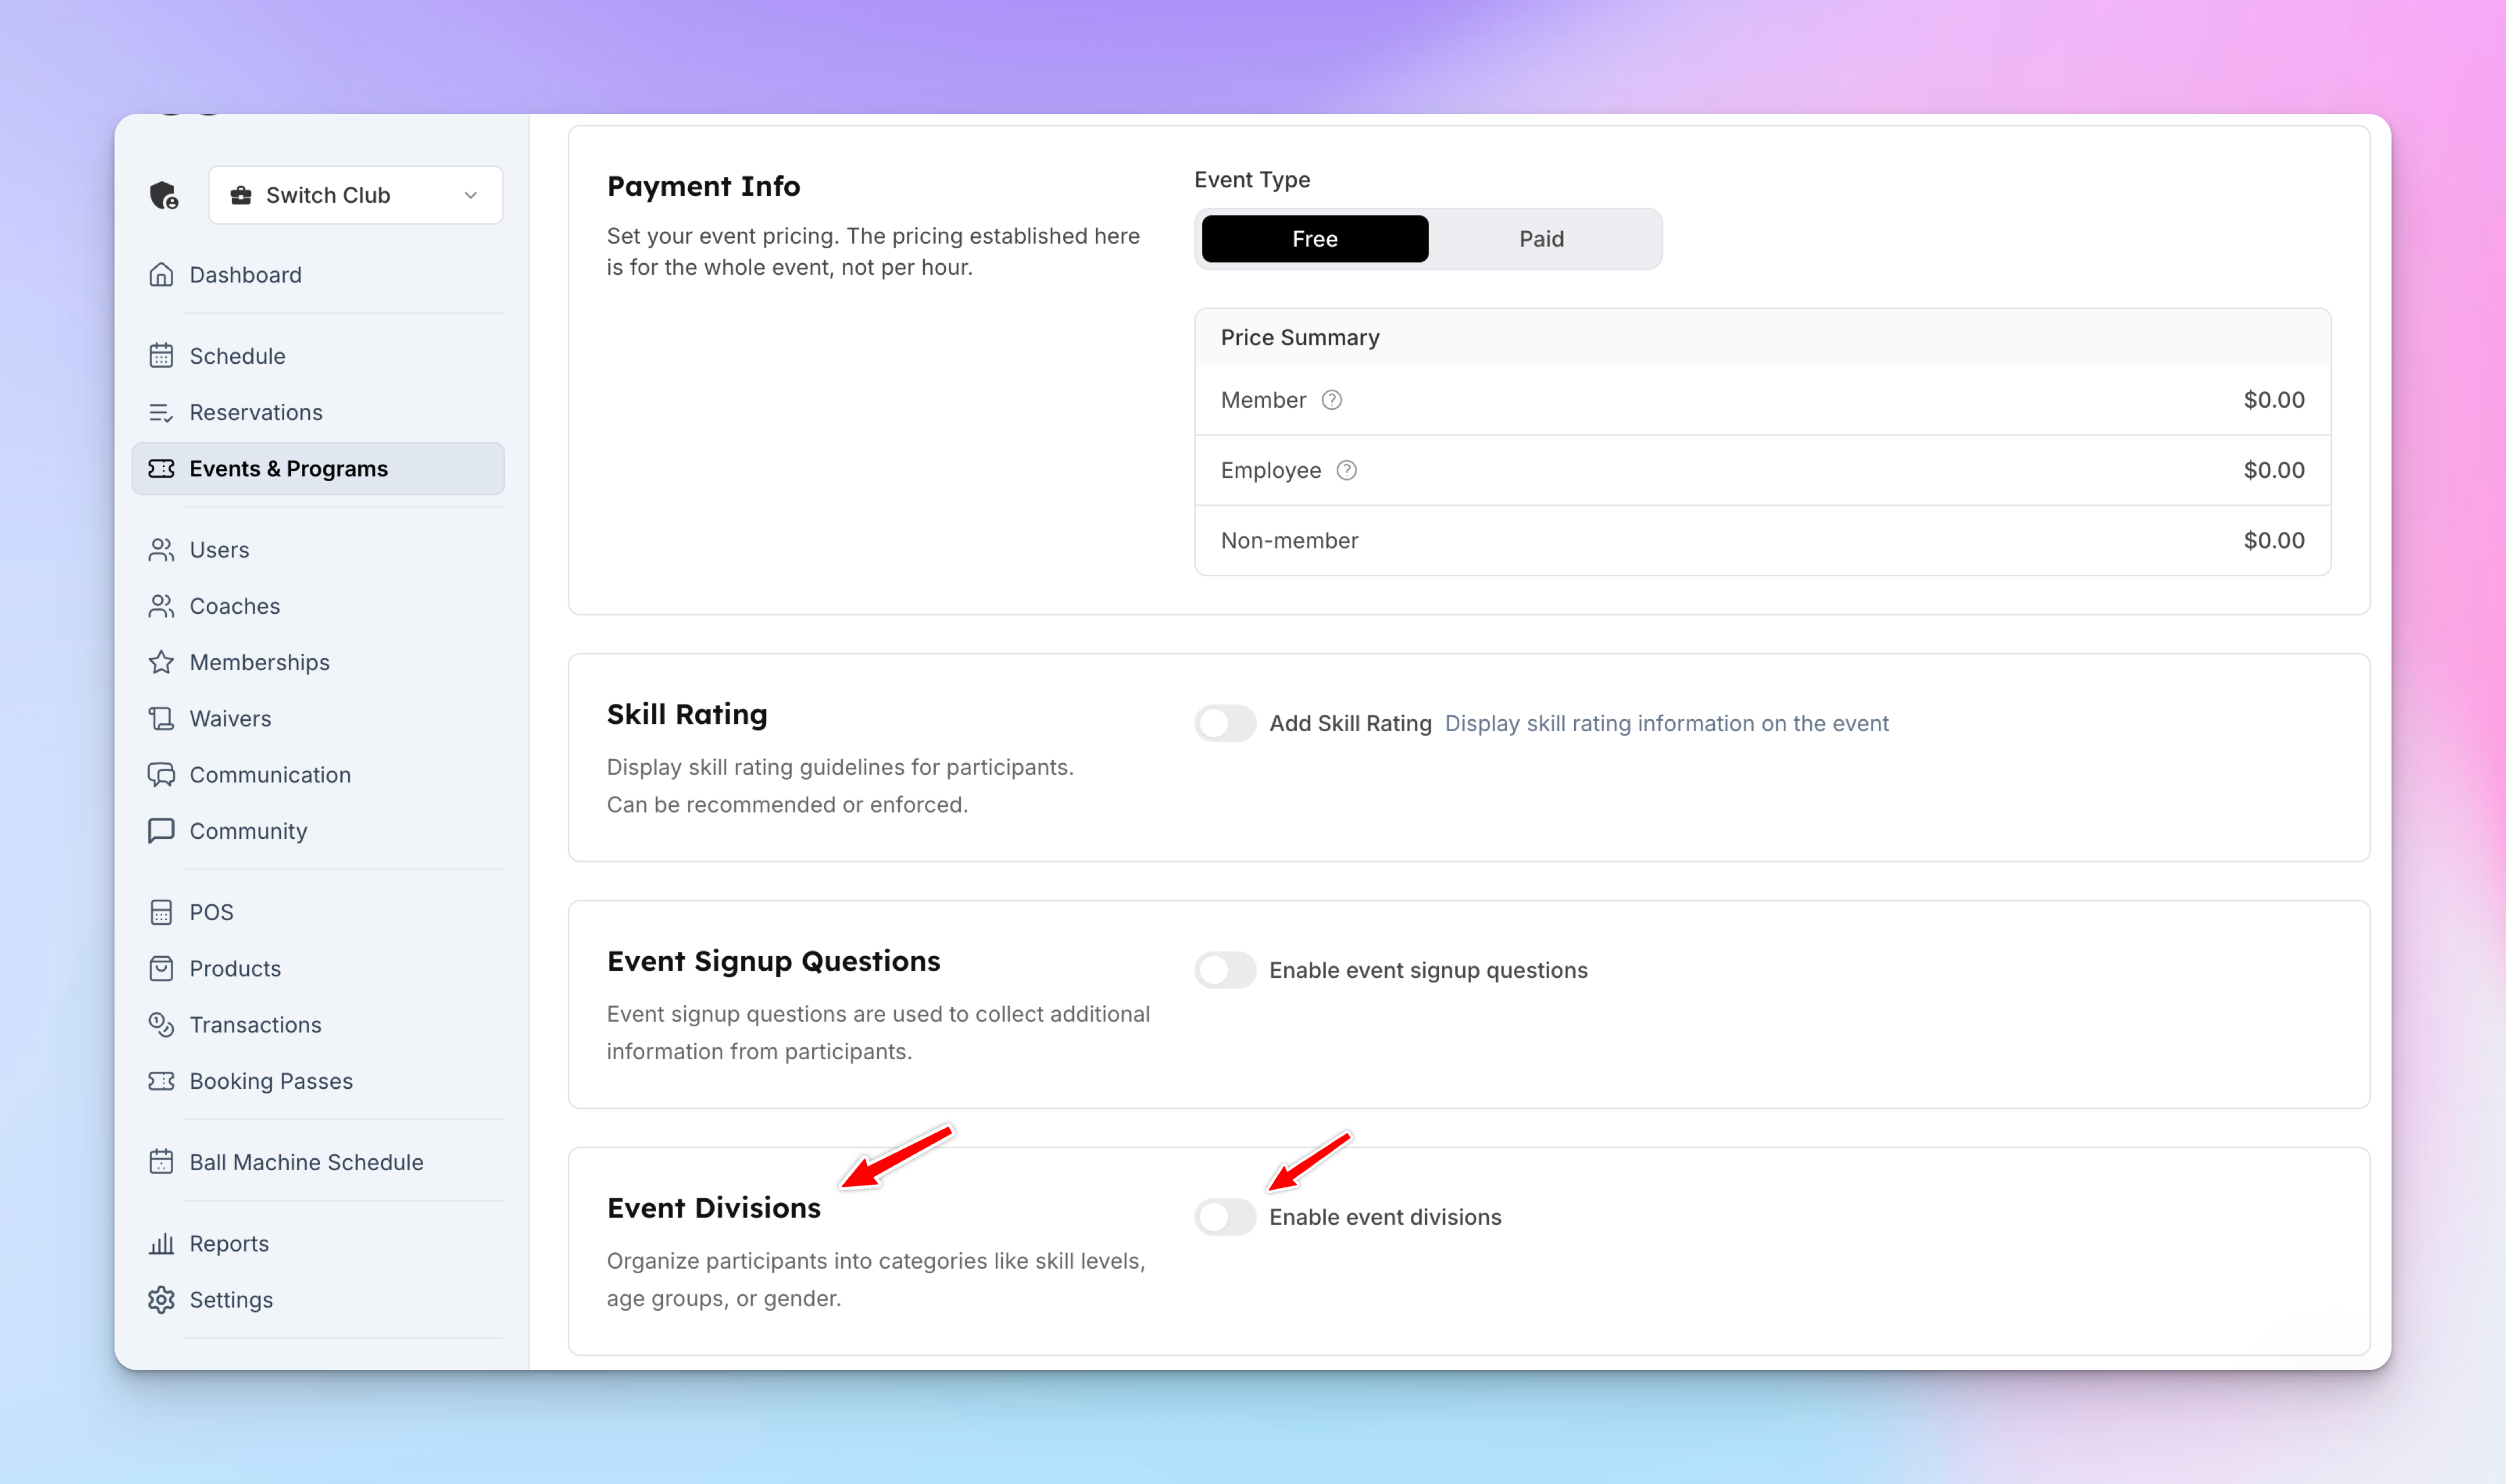
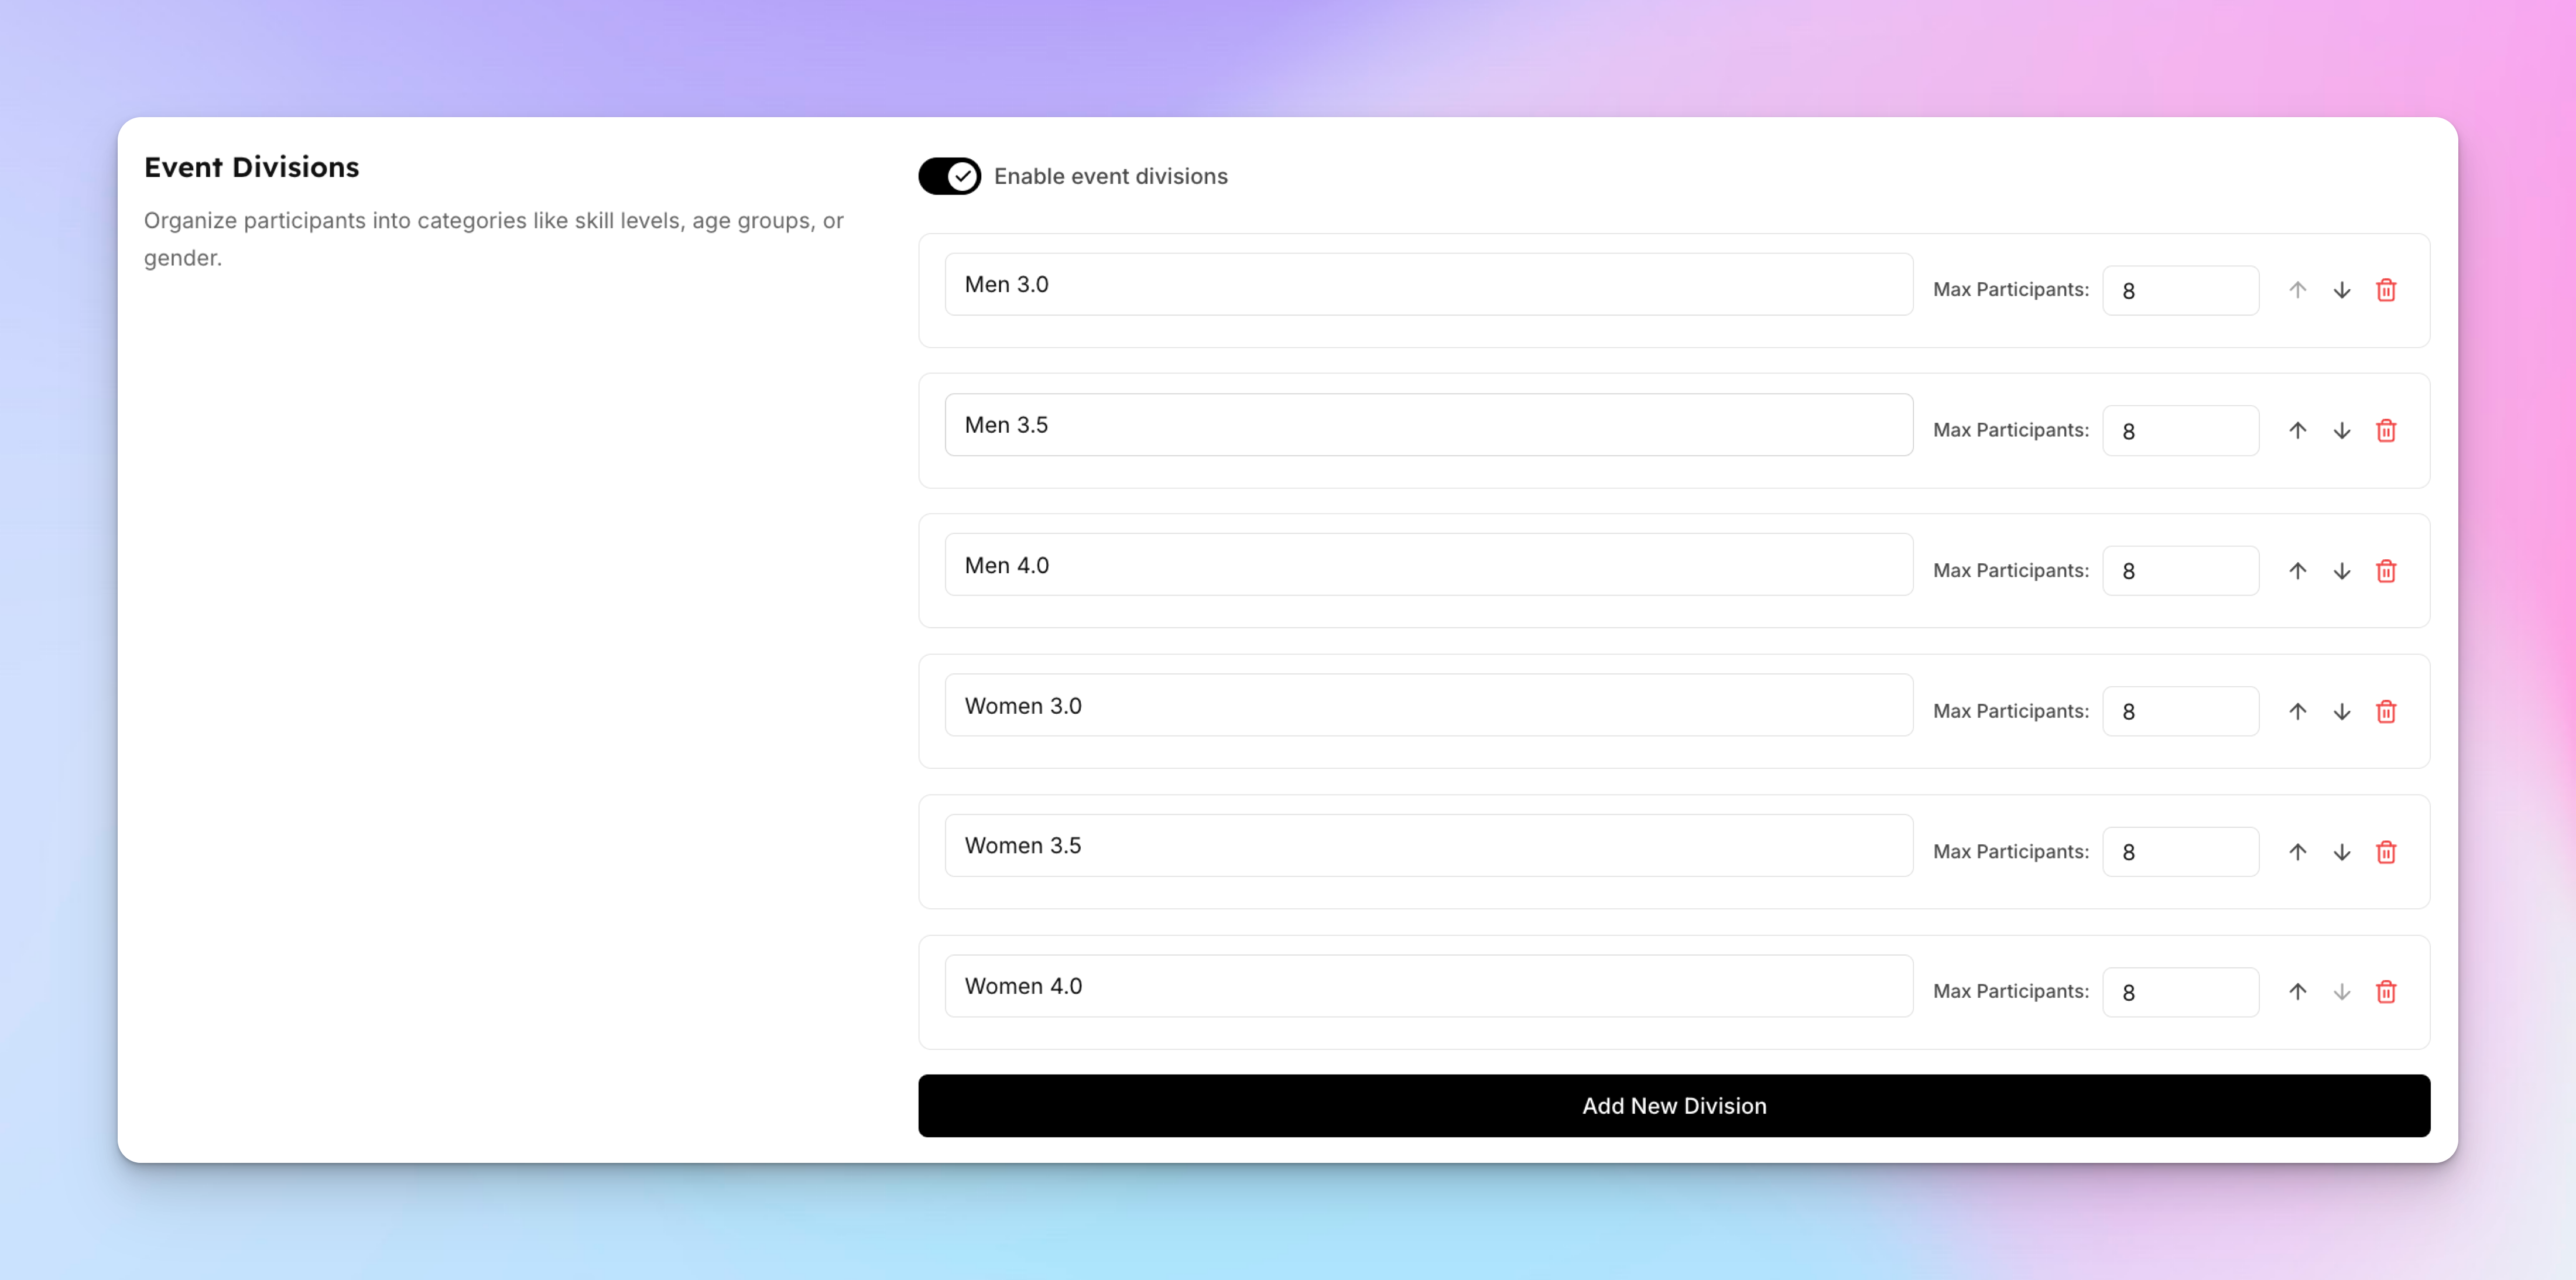
Toggle Event Divisions on and click Add New Division.
Create each division and set participant limits for each.
Add Time Slots
Choose the date and time for your event, then click Create Event.
Managing Participants as an Admin
When adding participants, you’ll now see a Division column with a dropdown menu.
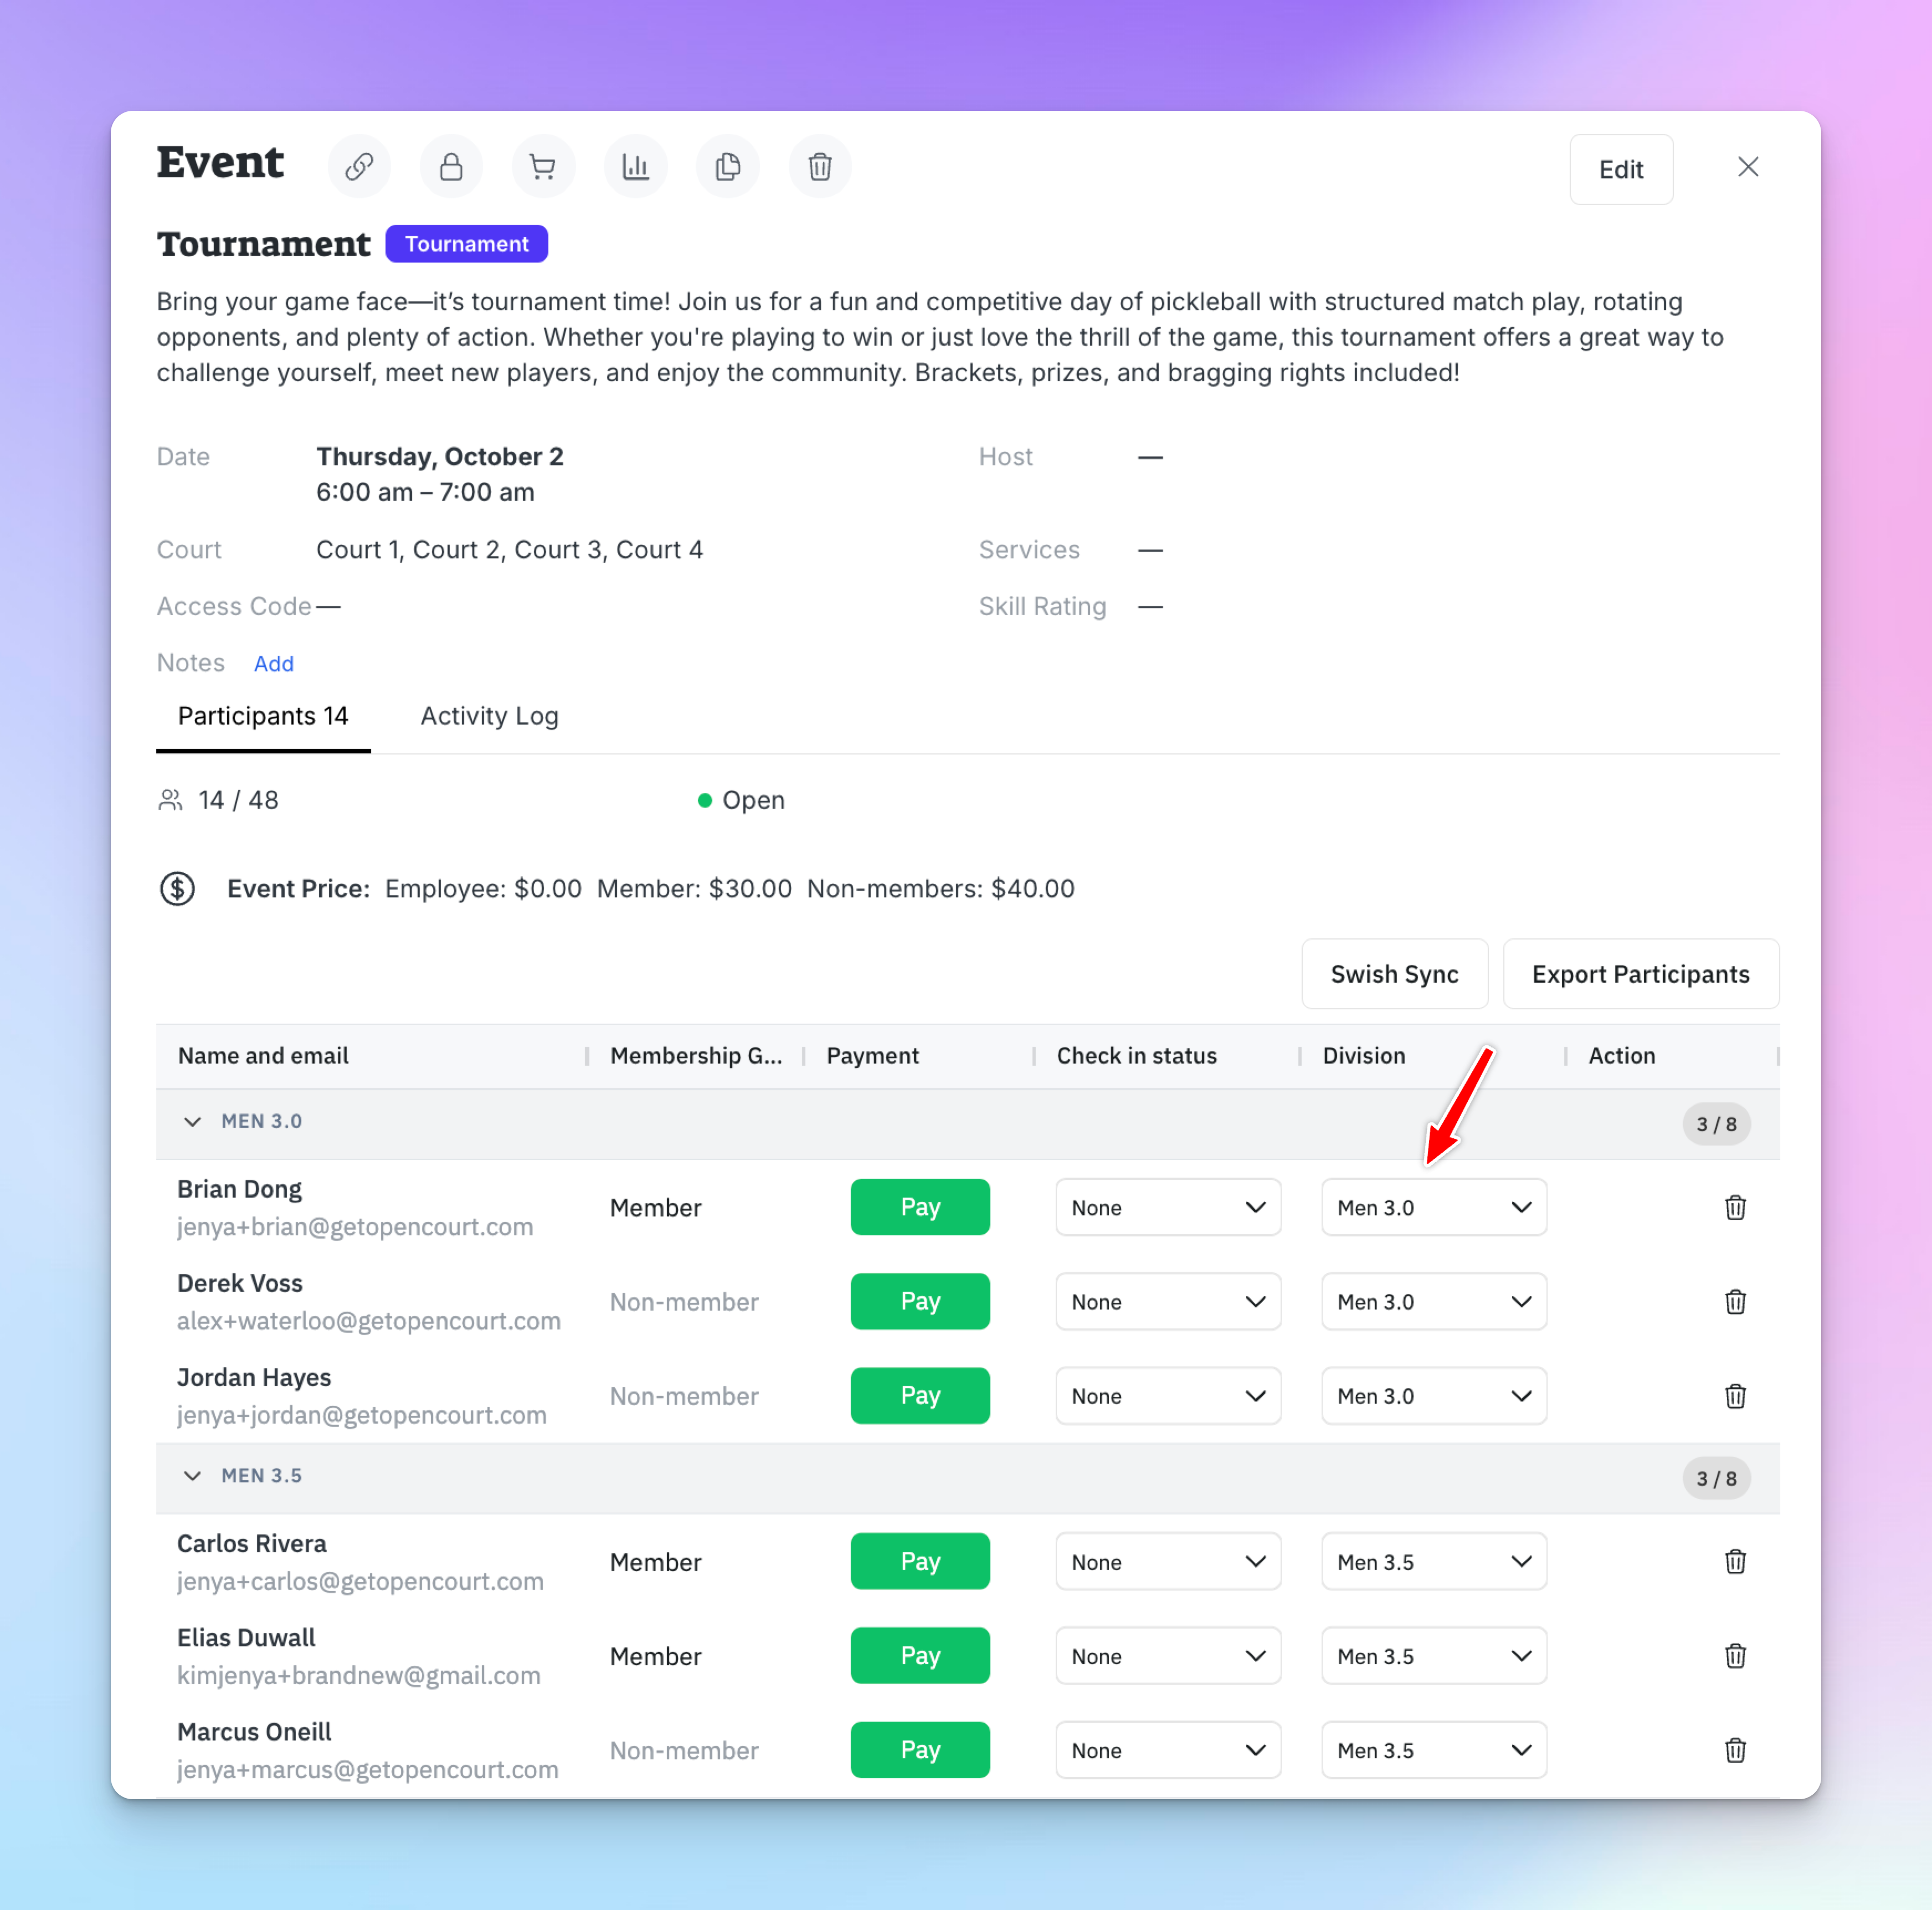
Select which division each participant belongs to.
User Experience
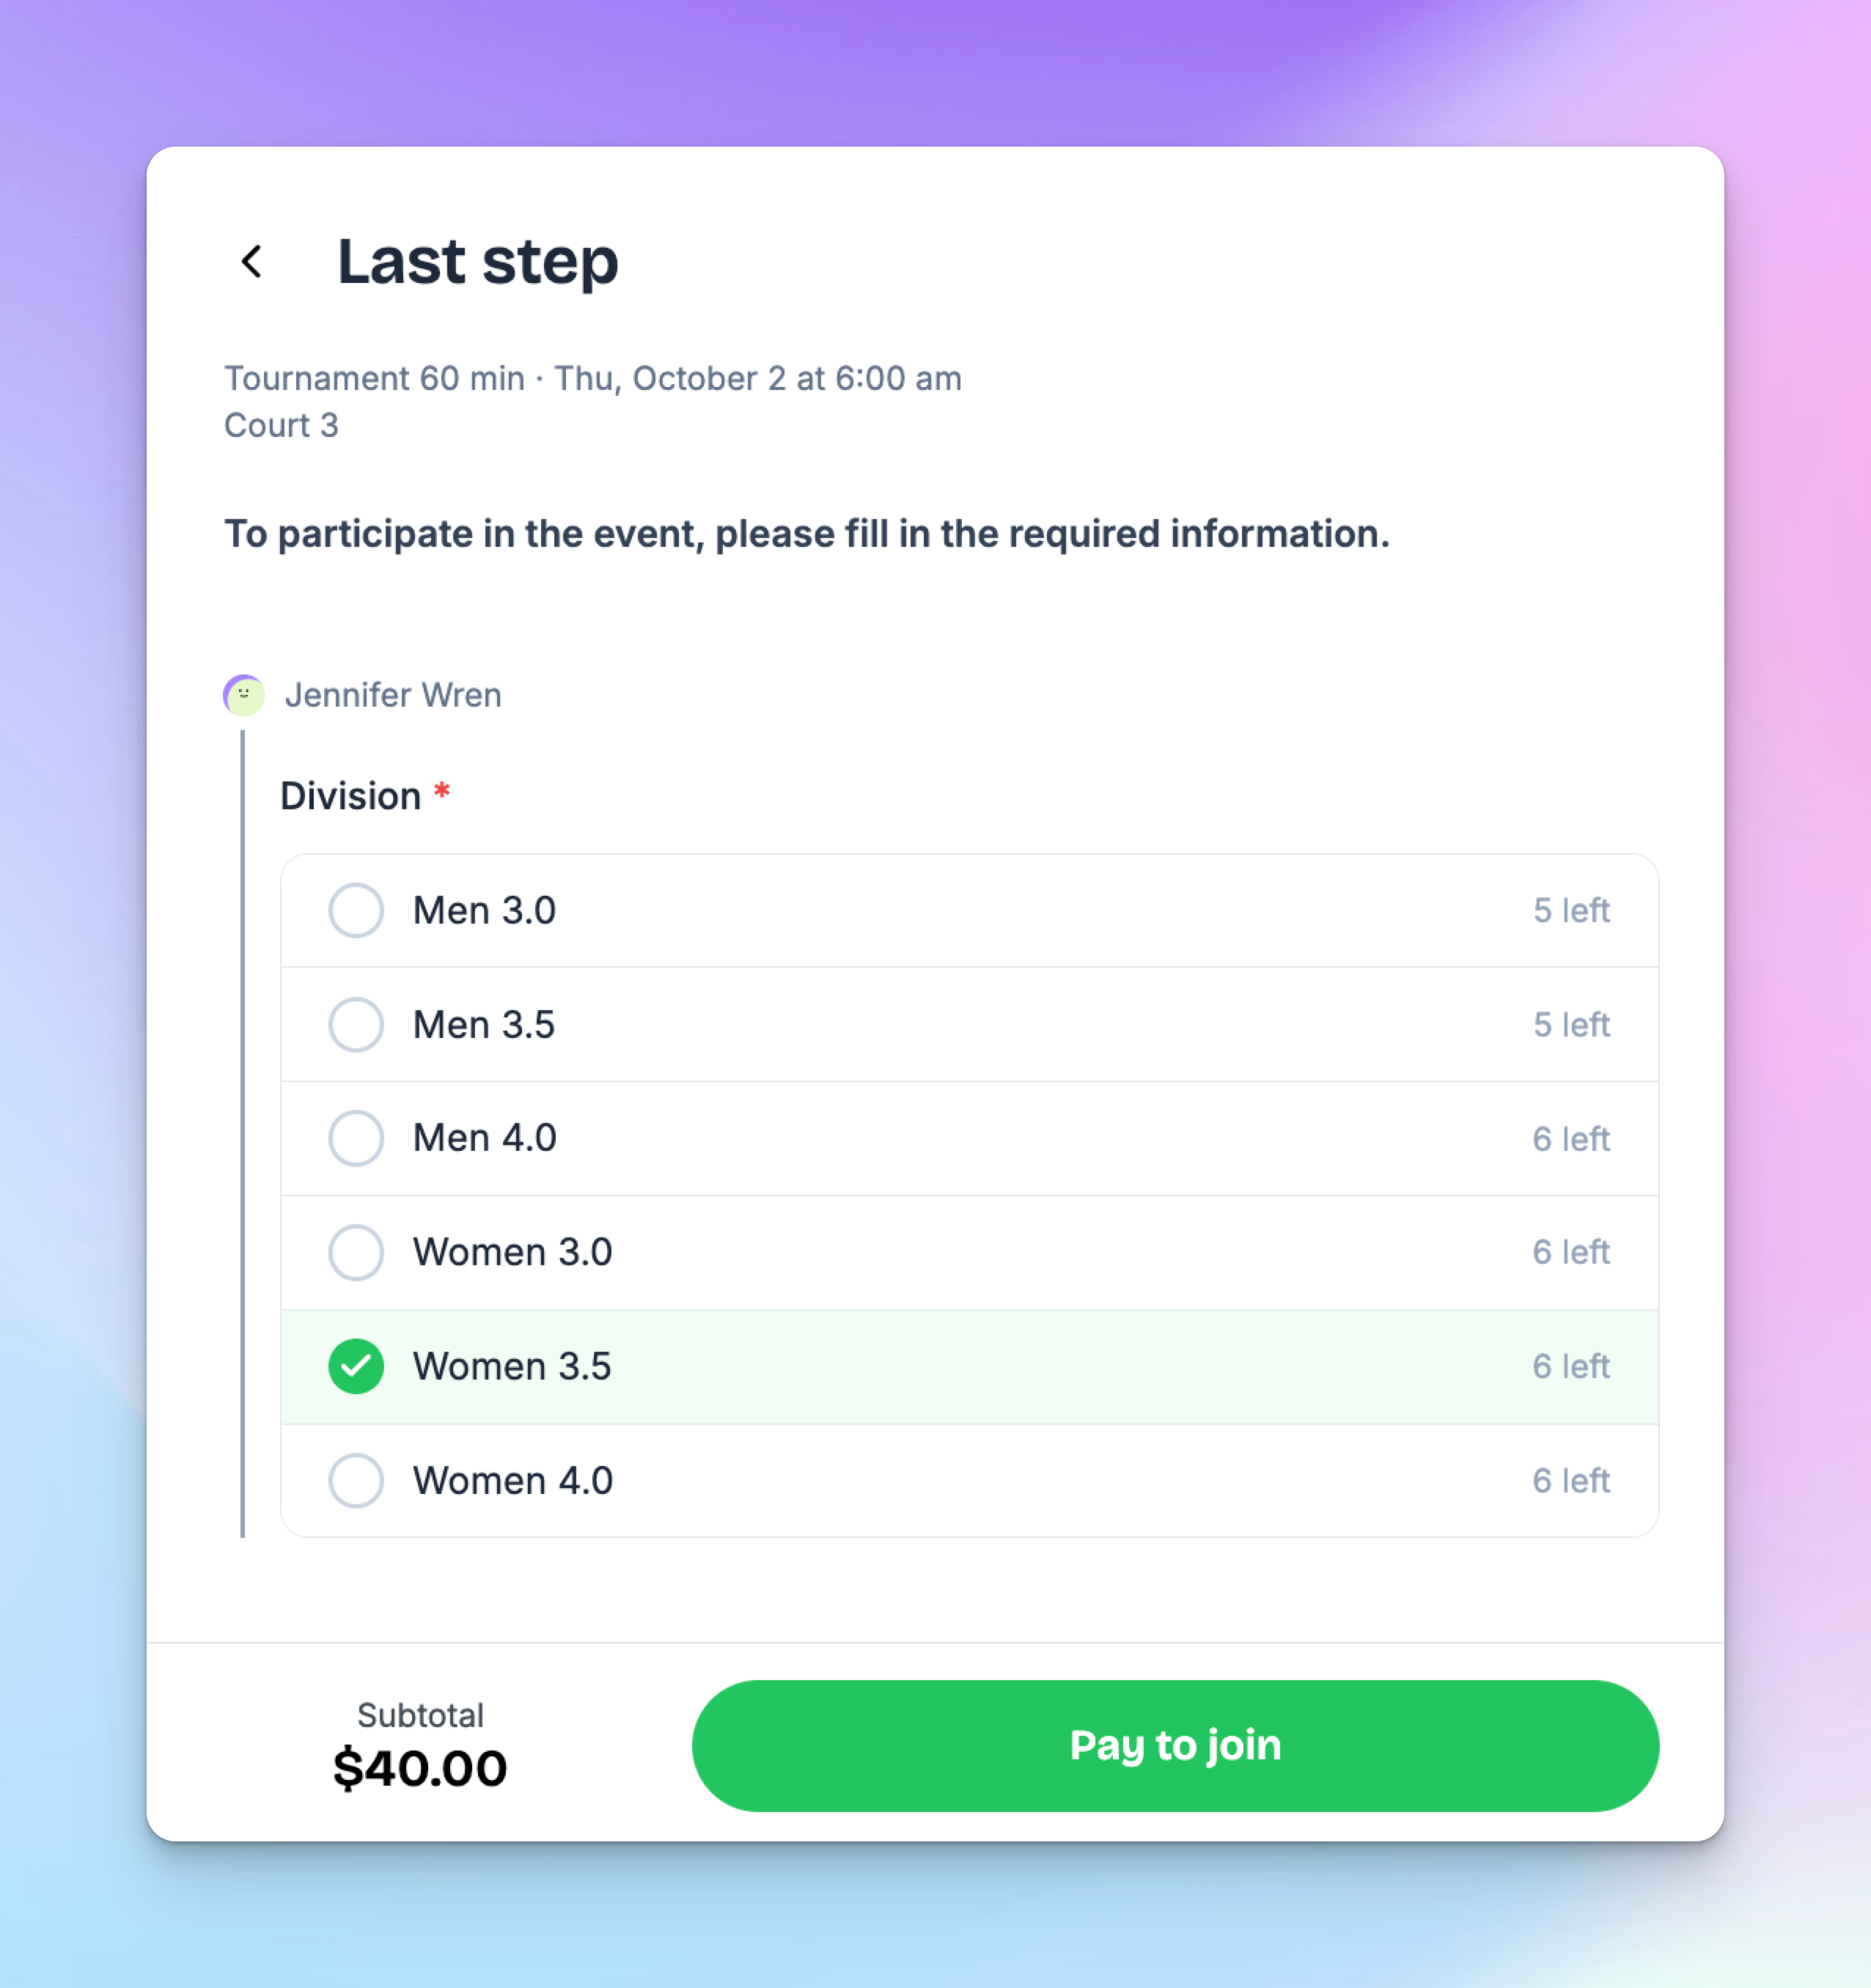
When signing up, participants will see the number of spots left in each division.
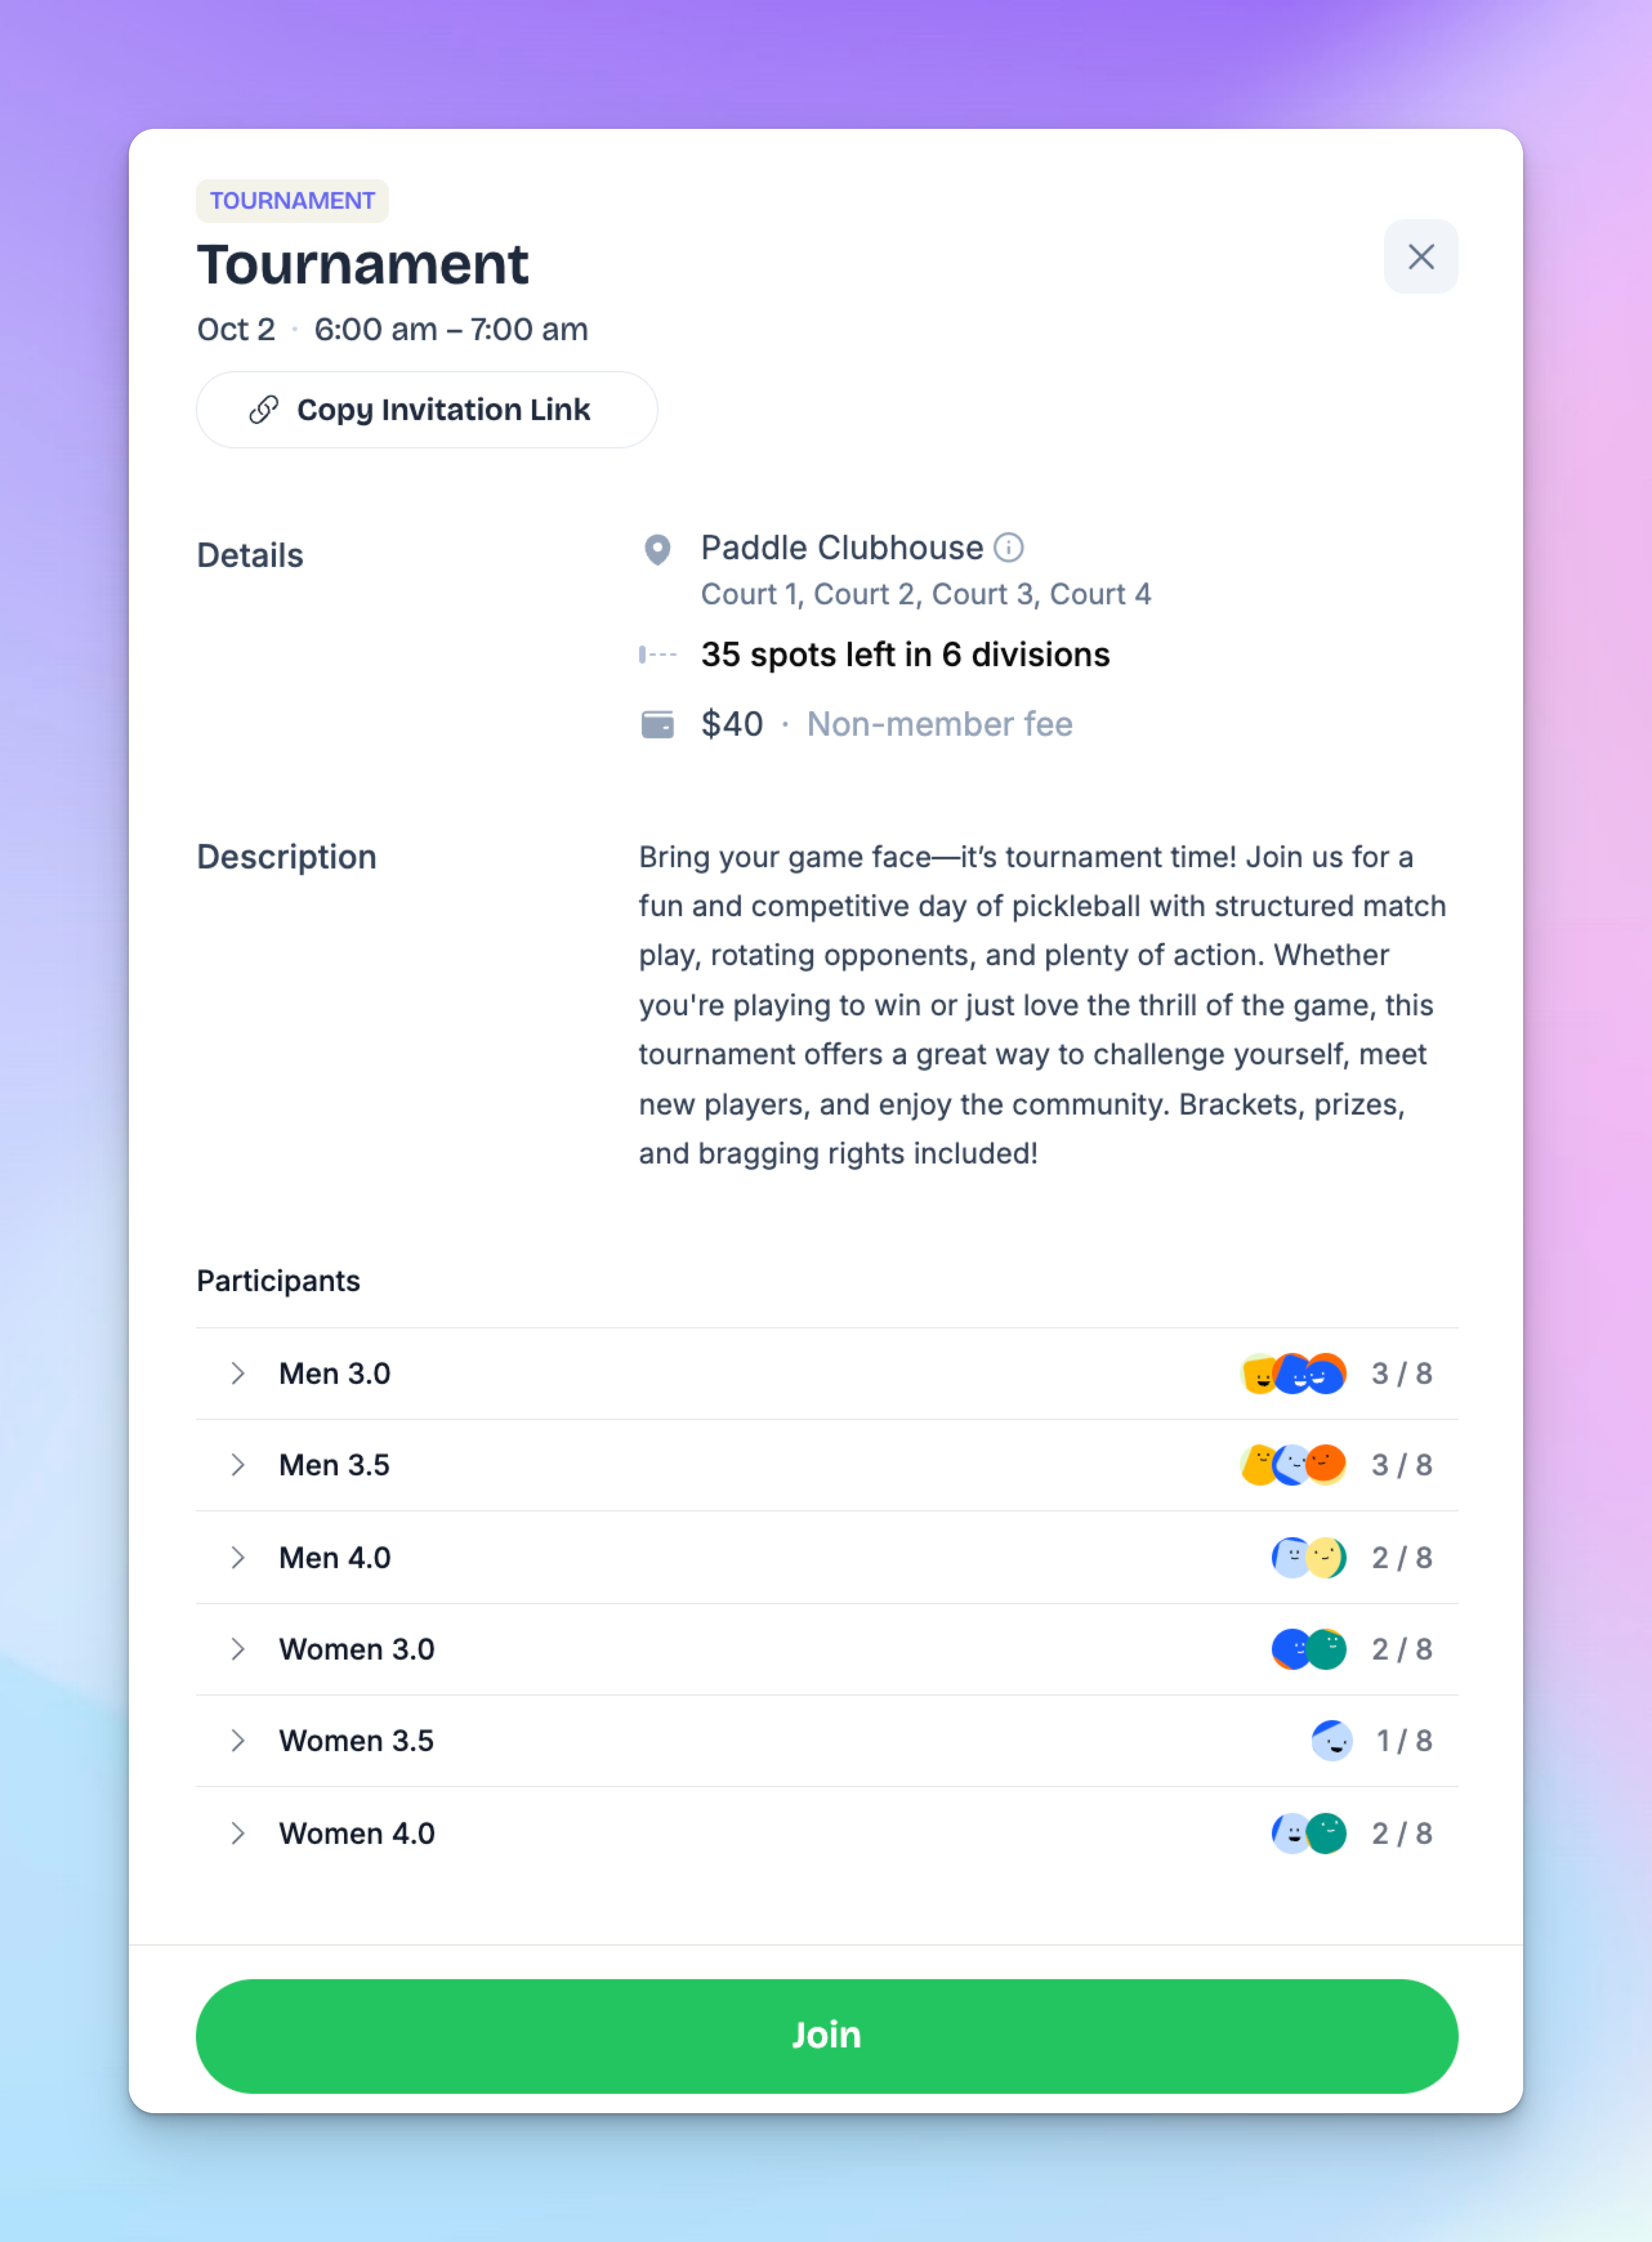
During registration, they must select a division before completing payment.
Each participant will be listed under their chosen division once registered.
✅ That’s it! Your event is now organized with clear divisions, making it easier for players to join the right group and for admins to manage balanced events.